基于Nginx搭建RTMP/HLS视频直播流媒体服务器
1,Nginx环境搭建(基于lnmp环境)
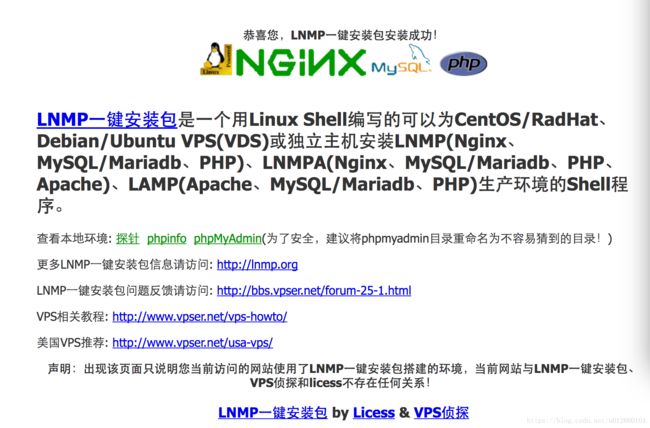
lnmp环境一键安装脚本
按照教程安装!
下载并安装lnmp环境,可以根据该网站的安装步骤进行
wget -c http://soft.vpser.net/lnmp/lnmp1.5.tar.gz && tar zxf lnmp1.5.tar.gz && cd lnmp1.5 && ./install.sh lnmp安装时生成的解压文件夹lnmp1.3先别删除!
2,安装Nginx的扩展rtmp模块
github下载 nginx-rtmp-module
下载的时候注意要在Linux的服务器上安装好GIT中后下载不要先下载到窗户后在上传到的Linux服务器会报错:
nginx: [emerg] unknown directive “rtmp” in xxxxx这问题由两个方面造成,先确保安装rtmp模块的时候没有报错,其次是配置文件的编码最好是ASCII文本,可以使用文件nginx.conf指令查看一下。我的问题是第一个,安装的时候有报错:
报了大量的 $'\r': command not found回忆了一下犯了个错误,我是在窗户下的git拉下来考到服务器上的,中间文件换编码了。。 。。切记切记。。。要直接从Linux的混帐克隆下来再安装。
[root@localhost ~]# nginx -V //查看nginx的配置参数复制配置参数:后的所有参数!例如:
复制configure arguments:后的所有参数!
例如:--user=www --group=www --prefix=/usr/local/nginx --with-http_stub_status_module --with-http_ssl_module --with-http_v2_module --with-http_gzip_static_module --with-ipv6 --with-http_sub_module
关闭nginx,php-fpm服务
//关闭nginx
service nginx stop
//关闭php-fpm
service php-fpm stop
进入安装时生成的文件夹:./lnmp1.3/src目录
//解压nginx源码包
tar -xzvf nginx-1.10.0.tar.gz
//进入nginx源码目录
cd nginx-1.10.0
//安装rtmp扩展模块
./configure  刚才复制的nginx configure参数  --add-module=rtmp扩展包目录
如:
./configure --user=www --group=www --prefix=/usr/local/nginx --with-http_stub_status_module --with-http_ssl_module --with-http_v2_module --with-http_gzip_static_module --with-ipv6 --with-http_sub_module --add-module=/usr/local/nginx/extend_module/nginx-rtmp-module
//编译
make
//安装
make install
//重启nginx
service nginx start
service php-fpm start
//查看安装状态
nginx -V
!上图如果出现nginx-rtmp-module说明安装成功!
3、配置rtmp
进入cd /usr/local/nginx/conf 目录
//编辑配置
vim nginx.conf
加入 rtmp
rtmp{} 和 http{} 是同一级
rtmp {
    server {
        listen 1935;
        chunk_size 4000;
        application hls {
            live on;
            hls on;
            hls_path /home/wwwroot/default/hls;
            hls_fragment 5s;
        }
    }
}

#参数说明:

#rtmp              是协议名称
#server            说明内部中是服务器相关配置
#listen            监听的端口号, rtmp协议的默认端口号是1935
#application       访问的应用路径是 hls
#live on;          开启实时
#hls on;           开启hls
#hls_path;         rtmp推流请求路径,文件存放路径
#hls_fragment 5s;  每个TS文件包含5秒的视频内容
#record off;       不记录数据
开始推流
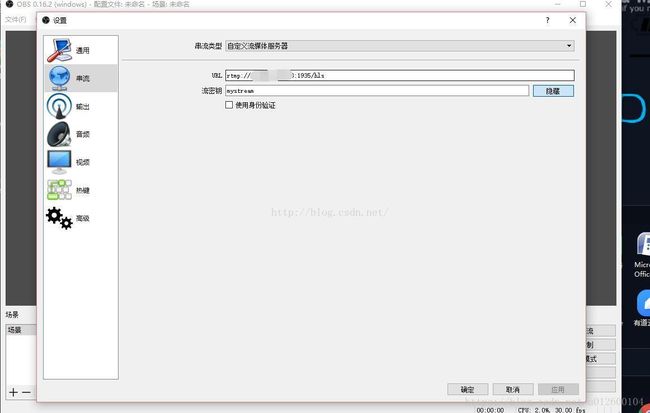
做好以上的配置后,就可以开始推流了,我们可以使用obs来推流。
可以百度一下 “obs直播软件” 下载

在设置->串流 中填写信息:URL为 rtmp://xxx:1935/hls,xxx为你的服务器的IP地址,hls是用来存放流媒体的。
秘钥可以随便填写一个,用来播放的时候识别播放哪个流媒体的,例如填写mystream。
填写完毕后,点击开始串流,就说明我们的流媒体服务器搭建成功了。
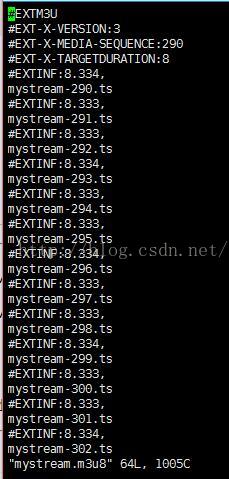
打开/usr/share/nginx/html/hls,里面出现mystream.m3u8说明推流正常了
观看直播(拉流)
观看直播就比较简单了,可以简单的使用H5的录象标签就可以观看了。可以访问HTTP:// XXX:81 / HLS / mystream.m3u8来观看直播,其中XXX为你的服务器IP地址,因为pc不支持m3u8,所以使用video.js地址https://github.com/videojs/video.js新建一个test.html文件,代码如下:
<link href="//vjs.zencdn.net/7.0/video-js.min.css" rel="stylesheet">
<script src="//vjs.zencdn.net/7.0/video.min.js">script>
<script src="https://unpkg.com/videojs-contrib-hls/dist/videojs-contrib-hls.js">script>
<video
    id="my-player"
    class="video-js"
    controls
    preload="auto"
    poster="//vjs.zencdn.net/v/oceans.png"
    data-setup='{}'>
     <source
     src="http://x.x.x.x:81/hls/123.m3u8"
     type="application/x-mpegURL">
  <p class="vjs-no-js">
    To view this video please enable JavaScript, and consider upgrading to a
    web browser that
    <a href="http://videojs.com/html5-video-support/" target="_blank">
      supports HTML5 video
    a>
  p>
video>
<script>
var player = videojs('my-player');
var options = {};

var player = videojs('my-player', options, function onPlayerReady() {
  videojs.log('Your player is ready!');

  // In this context, `this` is the player that was created by Video.js.
  this.play();

  // How about an event listener?
  this.on('ended', function() {
    videojs.log('Awww...over so soon?!');
  });
});
script>
然后使用手机访问这个网站就能够观看直播了。延迟大概在20S左右。

(m3u8文件内容)
如果降低延迟也不是没有方法,可以设置切片生成的大小以及访问的速度,但是这样大大增加了服务器的压力。
当然,我们也可以用rtmp拉流工具(VLC等)来看该直播,延迟大概在2-5S左右,拉流地址与推流地址一致。


