前言
为了使用C++ 编写python的扩展程序, 需要使用pybind11, pybind11使用比较简单,文档也比较详细。下面本人分别在Ubuntu和Windows系统上测试使用pybind11
开发/测试环境
Ubuntu系统
- Ubuntu 18.04
- pybind11
- Anaconda3, with python 3.6
- cmake
Windows系统
- win10 64bit
- Microsoft Visual Studio 2017
- Anaconda3, with python 3.7
pybind11
https://github.com/pybind/pybind11
安装配置
下载pybind11
git clone https://github.com/pybind/pybind11.git
安装pytest
pip install pytest
编译安装
mkdir build
cd build
cmake ..
cmake --build . --config Release --target check
编译好的动态库
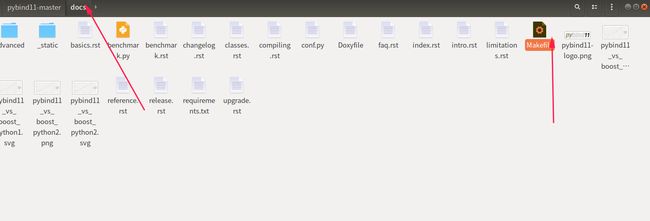
编译pybind11文档
在doc目录下
make html
Ctrl + H 显示隐藏文件
Windows系统
Requires
- Microsoft Visaul Studio 2017 x64
- Anaconda3 , with python 3.7
Pybind11配置安装
首先直接下载pybind11
https://github.com/pybind/pybind11
pybind11是 header-only的,因此不需要编译动态链接库,直接使用即可。
使用VS2017测试
使用C++编写python扩展(python调用C++)
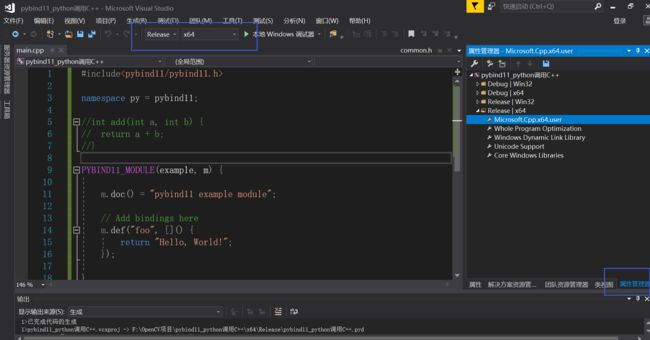
新建一个vs c++工程
工程配置:
- 设置编译输出类型
- 添加include包含
- 添加lib路径
- 链接器添加lib
1. 编译输出类型
2. include包含路径
- python/include
-
pybind11/include
3. lib路径
4. 链接器配置
C++代码
很简单的一个代码,编写一个python扩展模块,模块中包含一个函数foo() 这是一个lamda函数。
#include

namespace py = pybind11;

PYBIND11_MODULE(example, m) {

    m.doc() = "pybind11 example module";

    // Add bindings here
    m.def("foo", []() {
        return "Hello, World!";
    });

}
编译生成pyd, lib
(改名为example)
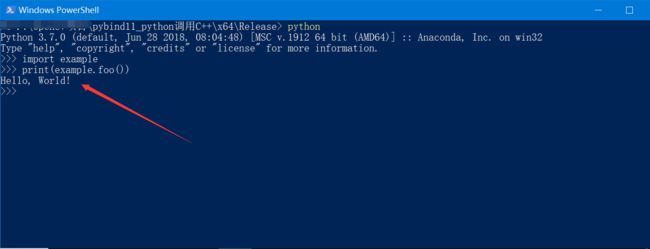
测试pyd扩展
首先,打开至x64/Release目录, 打开power shell窗口:
然后,输入python打开python解释器:
输入python代码:
import example
print(example.foo())
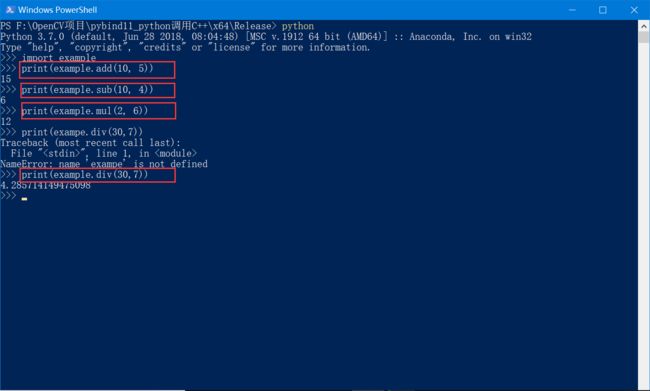
继续写一个复杂的例子
计算加,减,乘,除
#include

namespace py = pybind11;


PYBIND11_MODULE(example, m) {

    m.doc() = "pybind11 example module";

    // Add bindings here
    m.def("foo", []() {
        return "Hello, World!";
    });

    m.def("foo2", []() {
        return "This is foo2!\n";
    });

    m.def("add", [](int a, int b) {
        return a + b;
    });

    m.def("sub", [](int a, int b) {
        return a - b;
    });

    m.def("mul", [](int a, int b) {
        return a * b;
    });

    m.def("div", [](int a, int b) {
        return static_cast(a) / b;
    });

}
示例2:
代码
#include
#include

namespace py = pybind11;


/*
file:///D:/pybind11-master/docs/.build/html/basics.html
*/

# if 1

int add(int a, int b) {
    return a + b;
}

int add2(int a, int b) {
    return a + b;
}

int add3(int a, int b) {
    return a + b;
}


PYBIND11_MODULE(demo2, m) {

    m.doc() = "example module";
    //函数名称, 函数指针, 描述
    m.def("add", &add, "A function which adds two numbers");

    // keyword arguments
    //py::arg("a")
    m.def("add2", &add2, "A function which adds two numbers", py::arg("a"), py::arg("b"));

    //default arguments
    m.def("add3", &add3, "A function which adds two numbers", py::arg("a") = 10, py::arg("b") = 5);

    //Exporting variables
    m.attr("num1") = 100;
    py::object world = py::cast("World");
    m.attr("what") = world;

}

#endif

