Netty 入门示例详解
目录
开发包获取
二进制 jar 包
Maven 依赖
Hello World
服务端
客户端
测试运行
自学建议
在已经了解完《Netty 理论详解》之后,想必已经开始跃跃欲试了,毕竟这么好的东西呀!本文将详细讲解 Netty 入门案例。
Netty 官网地址:http://netty.io/
GitHub 托管地址:https://github.com/netty/netty
用户指南官网地址:https://netty.io/wiki/user-guide.html
Netty 4.0 官网开发文档地址:https://netty.io/4.0/api/index.html
Netty 4.1 官网开发文档地址:https://netty.io/4.1/api/index.html
开发包获取
二进制 jar 包
1、Netty 本身就是人家写好的一个 Java 的 Jar 包(库),所以开发的第一步便是要下载它,Maven 方式后面讲解。
2、如下所示,进入 Netty 官网,然后鼠标悬停在 "Downloads" 上,点击下载对应的版本,本文以最新的 4.1.30.Final 为例。
3、下载后压缩包大小为 20.1M,可以使用 "WinRar" 等压缩工具进行解压。
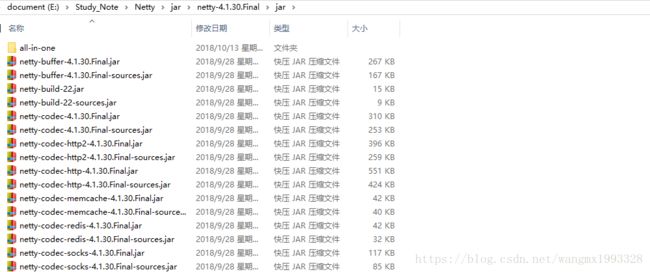
4、jar 开发包目录中提供了各个模块单独的开发包,同时也提供了对应的源码,其中有一个 netty-example-4.1.30.Final.jar 、netty-example-4.1.30.Final-sources.jar 提供了大量的示例,非常适合学习。
5、以导入二进制类库的方式开发 Netty 时,则只需要导入如下所示的整合包即可,3.7M 包含了所有的模块,同时也提供了源码。
Maven 依赖
1、如果使用 Maven 进行项目开发管理,则 Netty 也提供了 Maven 依赖。
2、Maven 依赖可以从 Netty 官网下载页中获取:https://netty.io/downloads.html,如下所示:
...
io.netty
netty
X.Y.Z.Q
compile
...
netty :如果 Netty 是 4.0 以下版本,则 artifactId值写 netty,如果 Netty 是 4.0 及以上版本,则 写 netty-all。
X.Y.Z.Q :netty 版本号自己填写具体版本即可。
3、也可以直接从 Maven 官方仓库获取:https://mvnrepository.com/artifact/io.netty/netty-all
4、这里同样可以选择上面最新版的 4.1.30.Final ,点击进入即可获取依赖:
    io.netty
    netty-all
    4.1.30.Final
Hello World
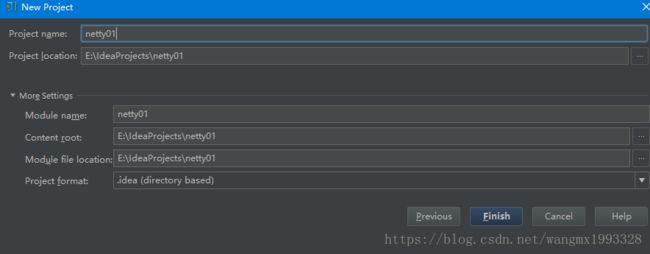
1、出于入门阶段学习的目的,本文将新建 Java SE 项目,采用导入二进制开发包的方式,暂时不使用 Maven 管理。
2、环境:IDEA 14 + JDK 8 + Netty4.1.30。
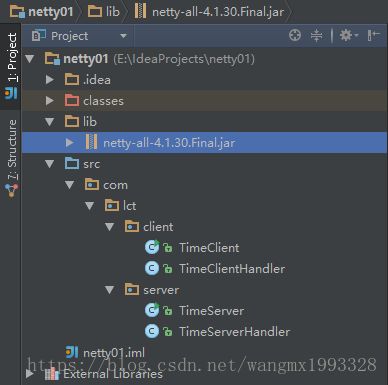
3、项目建好之后,新建 lib 目录用于存放第三方开发包,注意要添加到类路径中,同时新建 classes 目录作为项目统一的编译输出目录。
4、以一个简单的例子来对 Netty 网络编程有一个初步的了解,其中的细节可以以后慢慢消化:先开启服务器等待客户端连接,然后开启客户端,同时给服务器发送一条消息,服务器接收到消息后,回发一条消息。
服务端
·TimeServer·
import io.netty.bootstrap.ServerBootstrap;
import io.netty.channel.*;
import io.netty.channel.nio.NioEventLoopGroup;
import io.netty.channel.socket.SocketChannel;
import io.netty.channel.socket.nio.NioServerSocketChannel;
import java.beans.beancontext.BeanContextChildComponentProxy;
/**
 * Created by Administrator on 2017/5/16.
 */
public class TimeServer {
    public static void main(String[] args) {
        int port = 9898;
        new TimeServer().bind(port);
    }
    public void bind(int port) {
        /**
         * interface EventLoopGroup extends EventExecutorGroup extends ScheduledExecutorService extends ExecutorService
         * 配置服务端的 NIO 线程池,用于网络事件处理,实质上他们就是 Reactor 线程组
         * bossGroup 用于服务端接受客户端连接,workerGroup 用于进行 SocketChannel 网络读写*/
        EventLoopGroup bossGroup = new NioEventLoopGroup();
        EventLoopGroup workerGroup = new NioEventLoopGroup();
        try {
            /** ServerBootstrap 是 Netty 用于启动 NIO 服务端的辅助启动类,用于降低开发难度
             * */
            ServerBootstrap b = new ServerBootstrap();
            b.group(bossGroup, workerGroup)
                    .channel(NioServerSocketChannel.class)
                    .option(ChannelOption.SO_BACKLOG, 1024)
                    .childHandler(new ChildChannelHandler());

            /**服务器启动辅助类配置完成后,调用 bind 方法绑定监听端口,调用 sync 方法同步等待绑定操作完成*/
            ChannelFuture f = b.bind(port).sync();

            System.out.println(Thread.currentThread().getName() + ",服务器开始监听端口,等待客户端连接.........");
            /**下面会进行阻塞,等待服务器连接关闭之后 main 方法退出,程序结束
             *
             * */
            f.channel().closeFuture().sync();
        } catch (InterruptedException e) {
            e.printStackTrace();
        } finally {
            /**优雅退出,释放线程池资源*/
            bossGroup.shutdownGracefully();
            workerGroup.shutdownGracefully();
        }
    }

    private class ChildChannelHandler extends ChannelInitializer {
        @Override
        protected void initChannel(SocketChannel arg0) throws Exception {
            arg0.pipeline().addLast(new TimeServerHandler());
        }
    }
}
·TimeServerHandler·
import io.netty.buffer.ByteBuf;
import io.netty.buffer.Unpooled;
import io.netty.channel.ChannelHandler;
import io.netty.channel.ChannelHandlerAdapter;
import io.netty.channel.ChannelHandlerContext;
import io.netty.channel.ChannelInboundHandlerAdapter;
import java.util.Date;
/**
 * Created by Administrator on 2017/5/16.
 * ChannelInboundHandlerAdapter extends ChannelHandlerAdapter 用于对网络事件进行读写操作
 */
public class TimeServerHandler extends ChannelInboundHandlerAdapter {
    /**
     * 收到客户端消息,自动触发
     *
     * @param ctx
     * @param msg
     * @throws Exception
     */
    @Override
    public void channelRead(ChannelHandlerContext ctx, Object msg) throws Exception {
        /**
         * 将 msg 转为 Netty 的 ByteBuf 对象,类似 JDK 中的 java.nio.ByteBuffer,不过 ButeBuf 功能更强,更灵活
         */
        ByteBuf buf = (ByteBuf) msg;
        /**readableBytes:获取缓冲区可读字节数,然后创建字节数组
         * 从而避免了像 java.nio.ByteBuffer 时,只能盲目的创建特定大小的字节数组,比如 1024
         * */
        byte[] reg = new byte[buf.readableBytes()];
        /**readBytes:将缓冲区字节数组复制到新建的 byte 数组中
         * 然后将字节数组转为字符串
         * */
        buf.readBytes(reg);
        String body = new String(reg, "UTF-8");
        System.out.println(Thread.currentThread().getName() + ",The server receive  order : " + body);

        /**回复消息
         * copiedBuffer:创建一个新的缓冲区,内容为里面的参数
         * 通过 ChannelHandlerContext 的 write 方法将消息异步发送给客户端
         * */
        String respMsg = "I am Server,消息接收 success!";
        ByteBuf respByteBuf = Unpooled.copiedBuffer(respMsg.getBytes());
        ctx.write(respByteBuf);
    }

    @Override
    public void channelReadComplete(ChannelHandlerContext ctx) throws Exception {
        /**flush:将消息发送队列中的消息写入到 SocketChannel 中发送给对方,为了频繁的唤醒 Selector 进行消息发送
         * Netty 的 write 方法并不直接将消息写如 SocketChannel 中,调用 write 只是把待发送的消息放到发送缓存数组中,再通过调用 flush
         * 方法,将发送缓冲区的消息全部写入到 SocketChannel 中
         * */
        ctx.flush();
    }

    @Override
    public void exceptionCaught(ChannelHandlerContext ctx, Throwable cause) throws Exception {
        /**当发生异常时,关闭 ChannelHandlerContext,释放和它相关联的句柄等资源 */
        ctx.close();
    }
}
客户端
·TimeClient·
import io.netty.bootstrap.Bootstrap;
import io.netty.bootstrap.ServerBootstrap;
import io.netty.channel.ChannelFuture;
import io.netty.channel.ChannelInitializer;
import io.netty.channel.ChannelOption;
import io.netty.channel.EventLoopGroup;
import io.netty.channel.nio.NioEventLoopGroup;
import io.netty.channel.socket.SocketChannel;
import io.netty.channel.socket.nio.NioServerSocketChannel;
import io.netty.channel.socket.nio.NioSocketChannel;
/**
 * Created by Administrator on 2017/5/16.
 */
public class TimeClient {
    /**
     * 使用 3 个线程模拟三个客户端
     *
     * @param args
     */
    public static void main(String[] args) {
        for (int i = 0; i < 3; i++) {
            new Thread(new MyThread()).start();
        }
    }

    static class MyThread implements Runnable {

        @Override
        public void run() {
            connect("192.168.1.20", 9898); //本机 ip 使用 127.0.0.1 即可
        }

        public void connect(String host, int port) {
            /**配置客户端 NIO 线程组/池*/
            EventLoopGroup group = new NioEventLoopGroup();
            try {
                /**Bootstrap 与 ServerBootstrap 都继承(extends)于 AbstractBootstrap
                 * 创建客户端辅助启动类,并对其配置,与服务器稍微不同,这里的 Channel 设置为 NioSocketChannel
                 * 然后为其添加 Handler,这里直接使用匿名内部类,实现 initChannel 方法
                 * 作用是当创建 NioSocketChannel 成功后,在进行初始化时,将它的ChannelHandler设置到ChannelPipeline中,用于处理网络I/O事件*/
                Bootstrap b = new Bootstrap();
                b.group(group).channel(NioSocketChannel.class)
                        .option(ChannelOption.TCP_NODELAY, true)
                        .handler(new ChannelInitializer() {
                            @Override
                            public void initChannel(SocketChannel ch) throws Exception {
                                ch.pipeline().addLast(new TimeClientHandler());
                            }
                        });

                /**connect:发起异步连接操作,调用同步方法 sync 等待连接成功*/
                ChannelFuture channelFuture = b.connect(host, port).sync();
                System.out.println(Thread.currentThread().getName() + ",客户端发起异步连接..........");

                /**等待客户端链路关闭*/
                channelFuture.channel().closeFuture().sync();
            } catch (InterruptedException e) {
                e.printStackTrace();
            } finally {
                /**优雅退出,释放NIO线程组*/
                group.shutdownGracefully();
            }
        }
    }
}
·TimeClientHandler·
import io.netty.buffer.ByteBuf;
import io.netty.buffer.Unpooled;
import io.netty.channel.ChannelHandlerContext;
import io.netty.channel.ChannelInboundHandlerAdapter;
import java.util.logging.Logger;
/**
 * Created by Administrator on 2017/5/17.
 * 用于对网络事件进行读写操作
 */
public class TimeClientHandler extends ChannelInboundHandlerAdapter {
    private static final Logger logger = Logger.getLogger(TimeClientHandler.class.getName());
    /**
     * 当客户端和服务端 TCP 链路建立成功之后,Netty 的 NIO 线程会调用 channelActive 方法
     */
    @Override
    public void channelActive(ChannelHandlerContext ctx) throws Exception {
        String reqMsg = "我是客户端 " + Thread.currentThread().getName();
        byte[] reqMsgByte = reqMsg.getBytes("UTF-8");
        ByteBuf reqByteBuf = Unpooled.buffer(reqMsgByte.length);
        /**
         * writeBytes:将指定的源数组的数据传输到缓冲区
         * 调用 ChannelHandlerContext 的 writeAndFlush 方法将消息发送给服务器
         */
        reqByteBuf.writeBytes(reqMsgByte);
        ctx.writeAndFlush(reqByteBuf);
    }

    /**
     * 当服务端返回应答消息时,channelRead 方法被调用,从 Netty 的 ByteBuf 中读取并打印应答消息
     */
    @Override
    public void channelRead(ChannelHandlerContext ctx, Object msg) throws Exception {
        ByteBuf buf = (ByteBuf) msg;
        byte[] req = new byte[buf.readableBytes()];
        buf.readBytes(req);
        String body = new String(req, "UTF-8");
        System.out.println(Thread.currentThread().getName() + ",Server return Message:" + body);
        ctx.close();
    }

    /**
     * 当发生异常时,打印异常 日志,释放客户端资源
     */
    @Override
    public void exceptionCaught(ChannelHandlerContext ctx, Throwable cause) throws Exception {
        /**释放资源*/
        logger.warning("Unexpected exception from downstream : " + cause.getMessage());
        ctx.close();
    }
}
测试运行
1、先运行服务端,再运行客户端:
基于 Netty 的应用开发不但 API 使用简单,开发模式固定,而且扩展性和定制性非常好。需要注意的是,本示例没有考虑读半包的处理,对于简单的功能,或者不苛责的环境下是没有的问题的,但是如果进行性能测试或者压力测试,就不敢保证正常运行了,所以后面会介绍半包处理情况。
自学建议
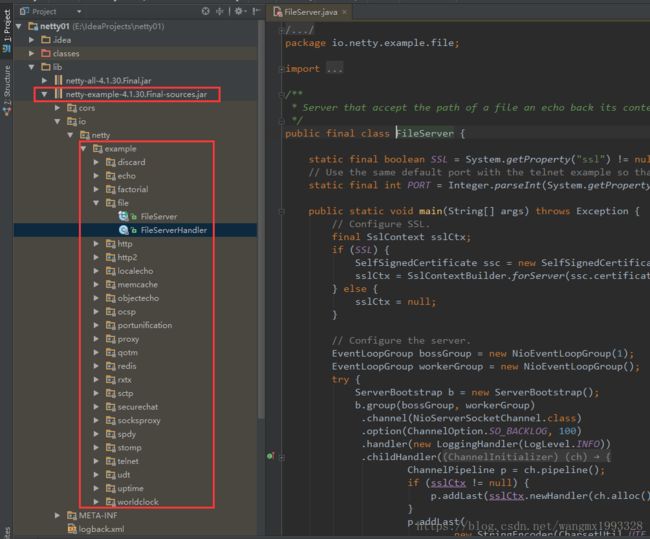
1、对于和我一样自学的兄弟姐妹来说,除了百度以外,还可以参考下载包中更多官方示例,如下所示:
2、也可以参考官网的用户手册:https://netty.io/wiki/user-guide-for-4.x.html
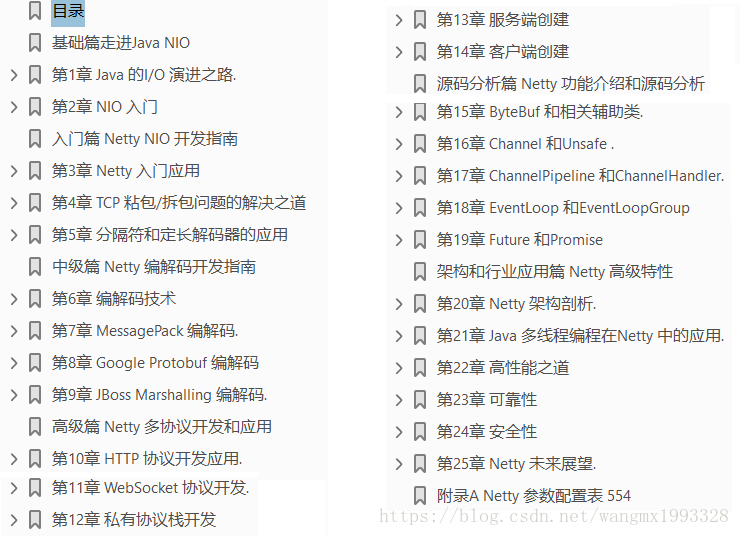
3、也可以购买书籍,或者网上的 PDF 文档,如下所示的《Netty 权威指南》可以下载:
链接:https://pan.baidu.com/s/1lstWa4r7V3vX2pyuAWwK2A
提取码:tjwf
············下一篇《 TCP 粘包/拆包说明 及 异常案例》


