centos7下安装mysql,并通过navicat远程连接mysql数据库
安装步骤:
一般网上的按照步骤都是:
#yum install mysql
#yum install mysql-server
#yum install mysql-devel
安装mysql和mysql-devel都会成功,但是mysql-server安装会根据centos7的版本而不同。
我分别用centos7 linux release 7.4和7.6安装。7.4安装不成功,7.6版本就通过了。7.4按照提示以下结果:
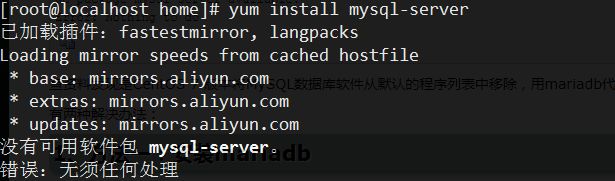
CentOS 7 有些版本将MySQL数据库软件从默认的程序列表中移除,用mariadb代替了。
方法1:
网上说可以直接安装mariadb。MariaDB数据库管理系统是MySQL的一个分支,主要由开源社区在维护,采用GPL授权许可。开发这个分支的原因之一是:甲骨文公司收购了MySQL后,有将MySQL闭源的潜在风险,因此社区采用分支的方式来避开这个风险。MariaDB的目的是完全兼容MySQL,包括API和命令行,使之能轻松成为MySQL的代替品。
#yum install mariadb-server mariadb 然后启动mariadb:
#systemctl start mariadb.service然后正常使用mysql:
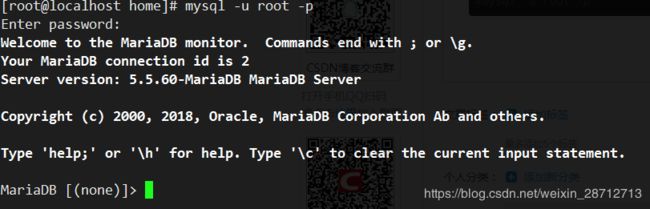
上面显示的是MariaDB,可能看起来不习惯,但是和mysql一样的操作。
方法2:
官网下载mysql:
# wget http://dev.mysql.com/get/mysql-community-release-el7-5.noarch.rpm
# rpm -ivh mysql-community-release-el7-5.noarch.rpm
# yum install mysql-community-server
安装成功后,就启动mysql服务:
# systemctl start mysql.service第一次安装的mysql,root账户没有密码的,需要设置密码:
[root@localhost home]# mysql -u root
Welcome to the MySQL monitor.  Commands end with ; or \g.
Your MySQL connection id is 2
Server version: 5.6.44 MySQL Community Server (GPL)

Copyright (c) 2000, 2019, Oracle and/or its affiliates. All rights reserved.

Oracle is a registered trademark of Oracle Corporation and/or its
affiliates. Other names may be trademarks of their respective
owners.

Type 'help;' or '\h' for help. Type '\c' to clear the current input statement.

mysql>
网上说可以使用如下命令设置密码:
mysql> set password for 'root'@'localhost' =password('123456');
ERROR 1558 (HY000): Column count of mysql.user is wrong. Expected 43, found 42. Created with MySQL 50560, now running 50644. Please use mysql_upgrade to fix this error.
mysql>
但是我的报错,是因为我升级了库,我先安装了mariaDB,然后又安装mysql替换掉了,所以执行以下命令升级,但是又引发出一个错误:
[root@localhost home]# mysql_upgrade -u root -p 13456
Enter password:
Looking for 'mysql' as: mysql
Looking for 'mysqlcheck' as: mysqlcheck
Error: Failed while fetching Server version! Could be due to unauthorized access.
FATAL ERROR: Upgrade failed
看网上帖子说修改my.cnf:
在[mysqld]后面任意一行添加“skip-grant-tables”用来跳过密码验证的过程,如下图所示:
[mysqld]
  5 #
  6 # Remove leading # and set to the amount of RAM for the most important data
  7 # cache in MySQL. Start at 70% of total RAM for dedicated server, else 10%.
  8 # innodb_buffer_pool_size = 128M
  9 #
 10 # Remove leading # to turn on a very important data integrity option: logging
 11 # changes to the binary log between backups.
 12 # log_bin
 13 #
 14 # Remove leading # to set options mainly useful for reporting servers.
 15 # The server defaults are faster for transactions and fast SELECTs.
 16 # Adjust sizes as needed, experiment to find the optimal values.
 17 # join_buffer_size = 128M
 18 # sort_buffer_size = 2M
 19 # read_rnd_buffer_size = 2M
 20 datadir=/var/lib/mysql
 21 socket=/var/lib/mysql/mysql.sock
 22 skip-grant-tables
然后重启mysql:
[root@localhost home]# systemctl restart mysql.service 就可以更新mysql数据库了:
[root@localhost home]# mysql_upgrade -uroot -p123456
Warning: Using a password on the command line interface can be insecure.
Looking for 'mysql' as: mysql
Looking for 'mysqlcheck' as: mysqlcheck
Running 'mysqlcheck with default connection arguments
Warning: Using a password on the command line interface can be insecure.
Running 'mysqlcheck with default connection arguments
Warning: Using a password on the command line interface can be insecure.
mysql.columns_priv                                 OK
mysql.db                                           OK
mysql.event                                        OK
mysql.func                                         OK
mysql.general_log                                  OK
mysql.help_category                                OK
mysql.help_keyword                                 OK
mysql.help_relation                                OK
mysql.help_topic                                   OK
mysql.host                                         OK
mysql.ndb_binlog_index                             OK
mysql.plugin                                       OK
mysql.proc                                         OK
mysql.procs_priv                                   OK
mysql.proxies_priv                                 OK
mysql.servers                                      OK
mysql.slow_log                                     OK
mysql.tables_priv                                  OK
mysql.time_zone                                    OK
mysql.time_zone_leap_second                        OK
mysql.time_zone_name                               OK
mysql.time_zone_transition                         OK
mysql.time_zone_transition_type                    OK
mysql.user                                         OK
Running 'mysql_fix_privilege_tables'...
Warning: Using a password on the command line interface can be insecure.
Running 'mysqlcheck with default connection arguments
Warning: Using a password on the command line interface can be insecure.
mysqlcheck: Got error: 1045: Access denied for user 'root'@'localhost' (using password: YES) when trying to connect
FATAL ERROR: Error during call to mysql_check for fixing the db/tables names on all db(s) except mysql
您在 /var/spool/mail/root 中有邮件
绕了一大圈回来,再重置mysql账号密码,下面的root就是你的用户名,123456就是密码:
mysql> set password for 'root'@'localhost' =password('123456');
Query OK, 0 rows affected (0.00 sec)
远程连接设置:
把在所有数据库的所有表的所有权限赋值给位于所有IP地址的root用户。
mysql> grant all privileges on *.* to root@'%'identified by '123456';
Query OK, 0 rows affected (0.00 sec)
如果是新用户而不是root,则要先新建用户。
mysql>create user 'username'@'%' identified by 'password';网上可以有下载navicat破解版:https://pan.baidu.com/s/1OfFPvqrTqbUAC_Eqq2i0KA 提取密码:jgep
安装包的内容有,1.先点击navicat_trial...exe安装。

2.然后点击PatchNavicat.exe,然后选择刚刚安装的Navicat安装路径下找到navicat.exe文件,点击选择即可激活 成功。
然后打开navicat,设置连接属性:

点击链接测试,连接成功就行了。还有点就是主要centos7的防火墙,你可以通过添加3306端口到防火墙内,让其不屏蔽3306端口,或者直接关掉防火墙就行。
参考文档:https://www.cnblogs.com/starof/p/4680083.html