最近因为突然对android发生兴趣了,所以就安装了eclipse来进行android开发学习。在安装过程中,突然想顺便把php的扩展也安装好,以方便以后使用,百度了很多下,很失败,网络上的文章要不是千篇一律的错误,要不就是很老的文章。最后还是求助谷歌大神,找到了了eclipse的wiki地址,上面介绍了正确的安装方法,因此,我记录下来,以弥补自己的健忘。
首先,下载eclipse,一般是下载classic经典版本(谷歌的android SDK教程里也推荐这个版本),目前的版本是3.7 Indigo
在安装eclipse还必须要做的一个就是安装jdk,下载地址http://www.oracle.com/technetwork/java/javase/downloads/jdk-7u2-download-1377129.html,我是在windows下安装,就选windows版本,直接按提示下一步下一步点就行了,我觉得可以不用配置环境变量的
安装好就安装eclipse
然后就是安装扩展
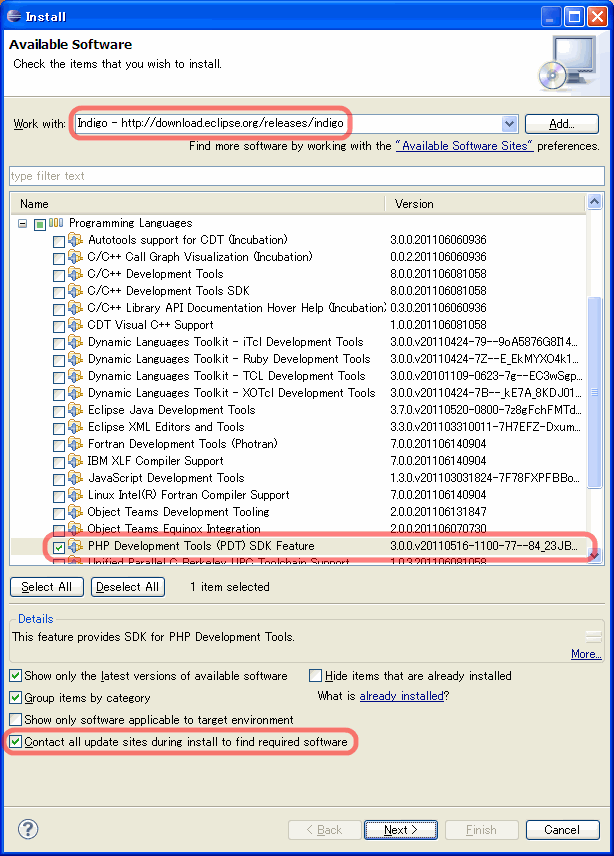
1.首先我安装php的扩展,因为php是我的主业,现在php都采用zend 的pdt插件,网上有很多文章提供的pdt地址都不行,其实在软件的源里面是自带了的,根本用不着那么费劲去找,打开eclipse -> Help -> Install New Software.然后在work with的下拉表里选择Indigo地址如下图
图中的PHP Development Tools(PDT) SDK Feature就是我要安装的pdt插件,他的位置在列表中的Programming Languages,展开列表就可以看见,里面是一些常见语言的插件,例如C/C++语言,这里安装相当方便只管next就行了
参考地址:http://wiki.eclipse.org/PDT/Installation#Eclipse_3.7_.2F_Indigo_.2F_PDT_3.0
2.安装aptana插件
其实aptana有已经集成好的aptana studio编辑器,也是eclipse的核心,听说他在javascript程序方面有独到之处,因此我就打算直接在eclipse里安装aptana的插件,以方便我学习js,安装完后使用时才发现,原来这插件是有BUG的,哭死
安装完这个插件,因为插件的解释器和eclipse的解释器会发生冲突,我打开php文件时,始终提示我不能解析php后缀的文件,我在eclipse里查了半天,也不知道为什么,最后卸载了这个插件,一切都正常了。因此,大家安装的时候一定要三思而后行
官方的安装方法
1.From the Help menu, select Install New Software... to open the Install New Software dialog.
2.Paste the URL for the update site into the Work With text box, and hit the Enter (or Return) key.
3.In the populated table below, check the box next to the name of the plug-in, and then click the Next button.
4.Click the Next button to go to the license page.
5.Choose the option to accept the terms of the license agreement, and click the Finish button.
6.You may need to restart Eclipse to continue.
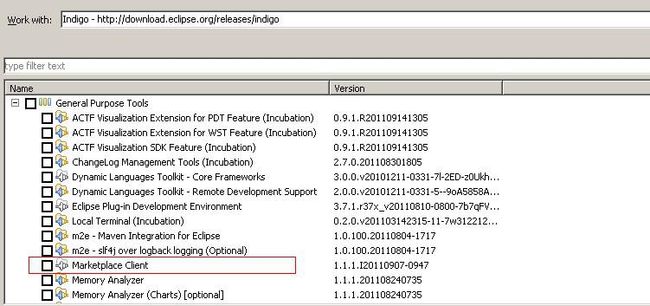
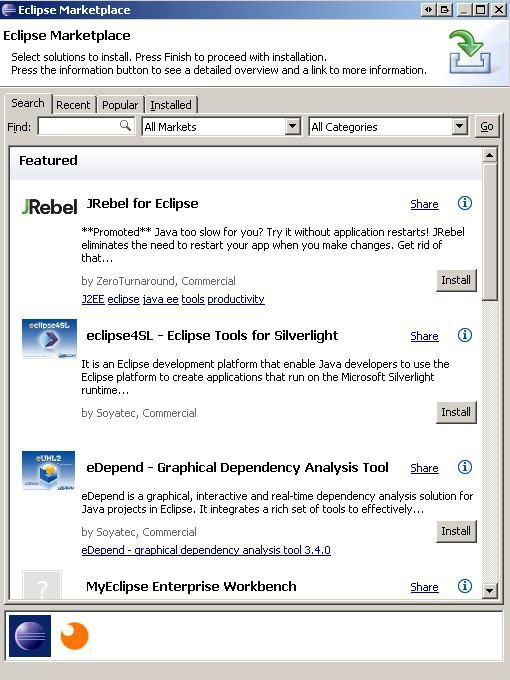
因为我已经安装了,所以前面是已安装的标记,安装好后,重启了eclipse,就会在help菜单下看见Eclipse Marketplace...选项,marketplace界面截图
然后就可以选择自己喜欢的插件了。
4.安装android扩展
谷歌的android SDK介绍里有很详细的安装步骤
首先是安装android SDK 地址:http://developer.android.com/sdk/installing.html
然后是安装eclipse adt插件 地址:http://developer.android.com/sdk/eclipse-adt.html#installing
我觉得基本上大家都能看懂里面的安装步骤吧
实在有问题可以看看这个页面
http://www.cnblogs.com/skynet/archive/2010/04/12/1709892.html
是一个教学系列。写的太详细了,我就是看这个学的
到这里eclipse的配置也就差不多了,如果需要安装什么插件,直接进marketplace找就行了,不过安了这几个插件,我就发现内存占用比较大了,我还没打开工程,就占了200多M,开了工程有时候会占到500多M,哎,插件大家还是悠着点安吧,没用的就别安了。


