1、页面准备:
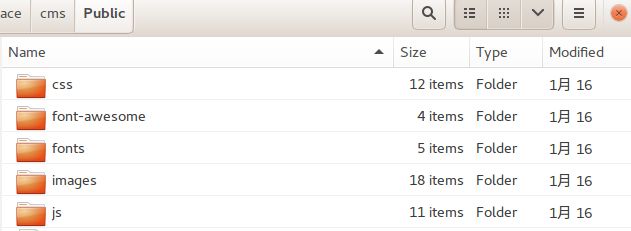
(1)前端资源的导入:将准备好的页面添加到项目中,放到Public目录下(公共的页面样式、js、图片等资源)
(2)添加登录的视图模板
将登录页面的视图放到Amin>View>Login>index.html中
DOCTYPE html>
<html lang="zh-CN">
<head>
    <meta charset="utf-8">
    <meta http-equiv="X-UA-Compatible" content="IE=edge">
    <meta name="viewport" content="">

    <meta name="description" content="">
    <meta name="author" content="">
    <link rel="icon" href="">

    <title>新闻cms内容管理平台title>


    <link href="/Public/css/bootstrap.min.css" rel="stylesheet">

    <link href="signin.css" rel="stylesheet">


head>

<body>
<style>
    .s_center {
        margin-left: auto;
        margin-right: auto;
    }
style>
<div class="s_center container col-lg-6 ">

    <form class="form-signin" enctype="multipart/form-data"  method="post">
        <h2 class="form-signin-heading">请登录h2>
        <label class="sr-only">用户名label>
        <input type="text"  class="form-control" name="username" placeholder="请填写用户名" required autofocus>
        <br />
        <label  class="sr-only">密码label>
        <input type="password" name="password" id="inputPassword" class="form-control" placeholder="密码" required>
        <br />
        <button class="btn btn-lg btn-primary btn-block" type="button" onclick="login.check()">登录button>
    form>

div>
<script src="/Public/js/jquery.js">script>

body>
html>
(3)添加登录的控制器和方法
完成代码实现:(文件位置:Admin>Controller>LoginController.class.php)
php
namespace Admin\Controller;
use Think\Controller;
class LoginController extends Controller {
    public function index(){
       $this->display();  //默认加载View>Login>index.html
    }
}
(3)浏览器访问
http://172.17.0.2/index.php?m=admin&c=login&a=index
(4)页面显示
2、数据库准备
(1)数据库恢复: >mysql : source /var/www/html/cms.sql
(2)数据库配置:(位置:Common>Conf>config.php和db.php)
1)config.php配置

//允许加载其他配置文件,其文件名为(多个文件的文件名用逗号隔开)
'LOAD_EXT_CONFIG' => 'db'
2)db.php数据库配置

php
return array(

    'DB_TYPE' => 'mysql',
    'DB_HOST' => '127.0.0.1',  //数据库服务器主机ip地址
    'DB_USER' => 'root',  //数据库用户名
    'DB_PWD' => '',   //数据库用户密码
    'DB_PORT' => 3306,   //数据库端口号
    'DB_NAME' => 'cms',   //数据库名
    'DB_CHARSET' => 'utf8', //数据库编码
    'DB_PREFIX' => 'cms_'   //数据库前缀名

);
2、layer插件
(1)layer插件准备:
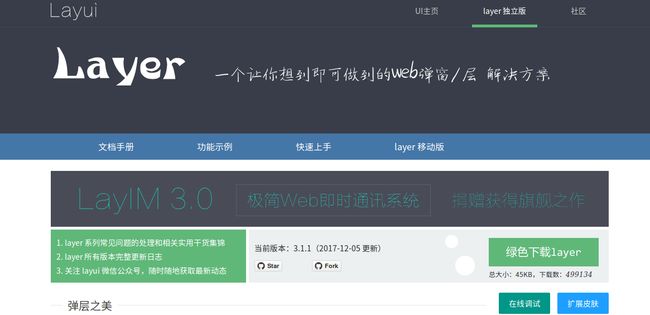
官方下载地址: http://layer.layui.com
官方教程: www.layui.com/doc/modules/layer.html
layer插件包括extend目录、skin目录和layer.js文件
完整文件放到项目下的dialog目录(位置: Public>js>dialog)
(2)插件二次封装:
为便于在此项目中使用,再对项目需要的弹出层进行二次封装,命名为dialog.js(位置:Public>js>dailog.js)
(3)常用弹出层:
1)错误弹出层
// 错误弹出层
error: function(message) {
    layer.open({
        content:message,
        icon:2,
        title : '错误提示',
    });
},
2)成功弹出层
// 成功弹出层
success : function(message,url) {
    layer.open({
        content : message,
        icon : 1,
        yes : function(){
            location.href=url;
        },
    });
},
3)确认弹出层
// 确认弹出层
confirm : function(message, url) {
    layer.open({
        content : message,
        icon:3,
        btn : ['是','否'],
        yes : function(){
            location.href=url;
        },
    });
}
4)无须跳转弹出层
//无需跳转到指定页面的确认弹出层
toconfirm : function(message) {
    layer.open({
        content : message,
        icon:3,
        btn : ['确定'],
    });
}
(4)弹出层的调用:
1)引入本系统的类库dialog.js文件 (在Amin>View>Login>index.html中引入)
<script src="/Public/js/dialog.js">script>
2)引入第三方插件layer.js文件(在Amin>View>Login>index.html中引入)
<script src="/Public/js/dialog/layer.js">script>
3)调用(js文件)
dialog.error("这是弹出的消息内容");
3、数据校验
(1)数据提交的两种方式:
1)同步提交数据:页面跳转(体验不好)
2)异步提交数据:通过js的ajax请求,页面不跳转,异步请求地址
(2)异步请求的实现:
1)jquery框架的ajax实现手册 http://jquery.cuishifeng.cn/
2)$.ajax()、 $.get()、 $.post()三种方式的理解
(3)前端登录的业务处理:
1)js校验:(位置: Public>js>admin>login.js)
/**
 * 前端登录业务类
 */
var login = {
    check : function() {
        // 获取登录页面中的用户名 和 密码
var username = $('input[name="username"]').val();
        var password = $('input[name="password"]').val();

        if(!username) {
            dialog.error('用户名不能为空');
        }
        if(!password) {
            dialog.error('密码不能为空');
        }

        var url = "/index.php?m=admin&c=login&a=check";
        var data = {'username':username,'password':password};
        // 执行异步请求  $.post
        $.post(url,data,function(result){
            if(result.status == 0) {
                return dialog.error(result.message);
            }
            if(result.status == 1) {
                return dialog.success(result.message, '/index.php?m=admin&c=index');
            }

        },'JSON');

    }
}
2)html表单触发(Amin>View>Login>index.html文件)
<button class="btn btn-lg btn-primary btn-block" type="button" onclick="login.check()">登录button>
3)login.js文件引入(在Amin>View>Login>index.html中引入)
<script src="/Public/js/admin/login.js">script>
3)浏览器运行效果
(4)后端php业务处理:
1)check方法的数据校验:
$username = $_POST['username'];
$password = $_POST['password'];
if(!trim($username)) {
    return show(0,'用户名不能为空');
}
if(!trim($password)) {
    return show(0,'密码不能为空');
}
前端的数据校验是js实现的,其在浏览器中是可视的,用户是可看到的,为避免用户对修改js文件规避数据校验,所以必须在服务器端再次校验
show()公共方法的封装:(多处地方要用到,所以作为公共函数封装到Common/Common/function.php文件)
/**展示数据
 * @param $status  状态码
 * @param $message  展示的消息内容
 * @param array $data
 */
function  show($status, $message,$data=array()) {
    $result = array(
        'status' => $status,
        'message' => $message,
        'data' => $data,
    );

    exit(json_encode($result));
}
2)数据校验通过的数据处理一-------用户不存在(登录失败)(check方法)
$ret = D('Admin')->getAdminByUsername($username); //查询admin表中是否存在该用户
if(!$ret || $ret['status'] !=1) {
    return show(0,'该用户不存在');
}

if($ret['password'] != getMd5Password($password)) {
    return show(0,'密码错误');
}
判断用户是否存在----操作数据库查询数据(Application/Common/Model/adminModel.class.php)
php
namespace Common\Model;
use Think\Model;

class AdminModel extends Model {

    private $_db = '';
    public function __construct() {
        $this->_db = M('admin'); //实例化admin表
    }

    public function getAdminUsername($username) {
        $ret = $this->_db->where('username="'.$username.'"')->find();
        return $ret;
    }
}
对用户输入的密码进行md5加密(Application/Common/Common/function.php)
function getMd5Password($password) {
    return md5($password . C('MD5_PRE'));   // C('MD5_PRE')访问配置文件中'MD5_PRE'配置项的设置值
}
注:直接md5加密也不是太安全,所以配置一个自定义的前缀,然后再进行md5加密,相对更安全
MD5_PRE配置(Application/Common/Conf/config.php)
'MD5_PRE' => 'my_cms',
3)数据校验通过的数据处理二-------用户存在(登录成功)(check方法)
//将用户信息保存到session中
session('adminUser', $ret);
return show(1,'登录成功');
(5)浏览器运行效果
4、退出登录(利用session失效)
(1)设置访问后台页面时的session判断
public function index() {
    if(session('adminUser')) {
        $this->redirect('/iindex.php?m=admin&c=index');
    }
   $this->display();  //默认加载View>Login>index.html
}
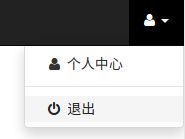
(2)后台首页面退出登录的请求
<li>
  <a href="/index.php?m=admin&c=login&a=logout"><i class="fa fa-fw fa-power-off">i> 退出a>
li>
(3)添加logout控制器方法处理退出登录
public function logout() {
    session('adminUser', null);
    $this->redirect('/index.php?m=admin&c=login&a=index');
}
退出成功后自动跳转到后台登录页面。
后台登录功能完成!


