eureka注册中心+zuul网关
本文为博主转载文章,遵循 CC 4.0 by-sa 版权协议。
本文链接:https://blog.csdn.net/qq_36845328/article/details/89060067
构建第一个项目,File -> New -> Project


不用选择额外的依赖,这里我们创建一个父模块
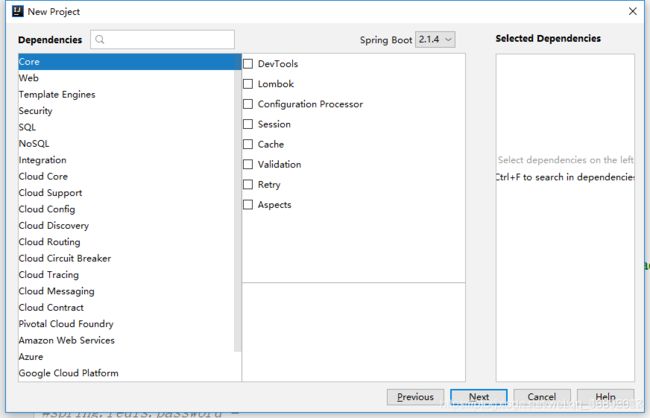
一路next直到项目创建成功
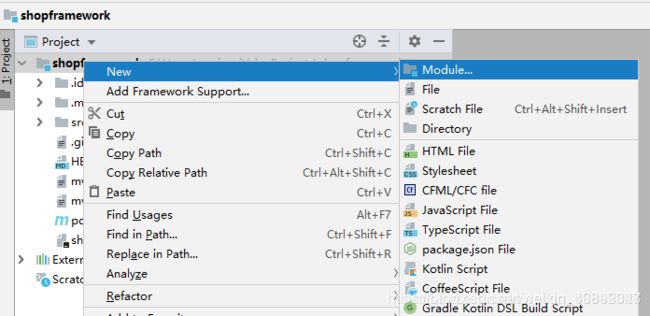
- 创建子模块,eureka注册中心
在项目上新建子模块, New -> Moudle
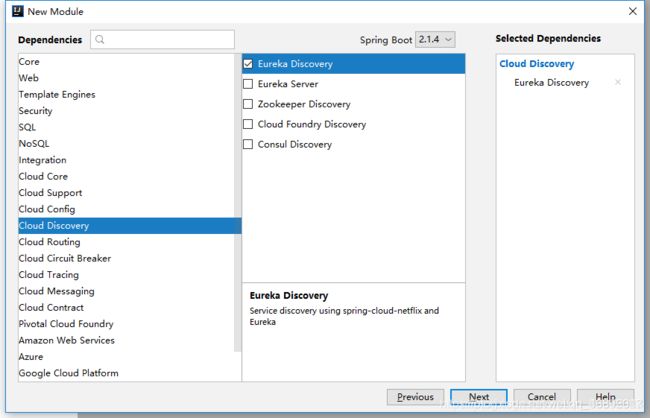
按照第一步选择Spring Initialize项目构建

选择依赖
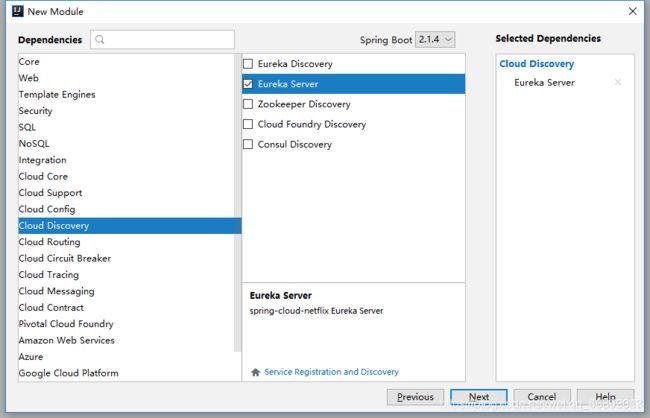

在EurekaServer注册服务的启动类上添加注解 @EnableEurekaServer
package cn.playcall.eurekaserver;

import org.springframework.boot.SpringApplication;
import org.springframework.boot.autoconfigure.SpringBootApplication;
import org.springframework.cloud.netflix.eureka.server.EnableEurekaServer;

@SpringBootApplication
@EnableEurekaServer
public class EurekaServerApplication {

    public static void main(String[] args) {
        SpringApplication.run(EurekaServerApplication.class, args);
    }

}
编写application.yml配置文件,也可以使用application.properties
  # 服务监听端口
    server:
      port: 8040

    eureka:
      instance:
        hostname: localhost
      client:
        register-with-eureka: false # 禁止注册到eureka中心, 当前这个应用就是Eureka Server,所以不需要把自己注册
    fetch-registry: false # 禁止从中心获取文件, 这是一个单点的Eureka Server,
                          # 不需要同步其他Eureka Server节点的数据,设为false
  serviceUrl:
    defaultZone: http://${eureka.instance.hostname}:${server.port}/eureka/
运行启动类,打开 http://localhost:8040
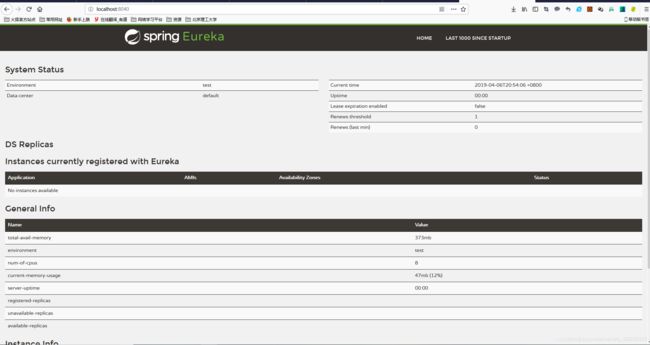
可以发现目前还没有注册的服务,接下来我们编写注册一个服务类
- 注册服务
按照之前的步骤,新建一个子模块 serviceA
选择对应的依赖–这里记得选择web,这个模块其实就是开发模块
添加注解 @EnableEurekaClient
package cn.playcall.servicea;

import org.springframework.boot.SpringApplication;
import org.springframework.boot.autoconfigure.SpringBootApplication;
import org.springframework.cloud.netflix.eureka.EnableEurekaClient;

@SpringBootApplication
@EnableEurekaClient
public class ServiceAApplication {

    public static void main(String[] args) {
        SpringApplication.run(ServiceAApplication.class, args);
    }

}
编写对应的配置文件
spring:
  application:
    name: service-a # 服务名称

# 服务注册中心
eureka:
  client:
    serviceUrl:
      defaultZone: http://localhost:8040/eureka

server:
  port: 8041
运行启动类,打开Eureka Server页面,可以发现服务端被成功注册了
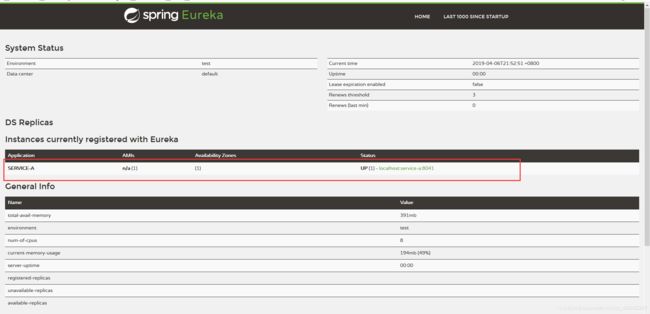
我们先编写一个简单的控制类,在后面的阶段会用到,暂且先通过服务提供方地址简单验证下服务功能。

访问 http://localhost:8041/hi

服务端没有问题。
按照以上步骤,再创建一个service-b。
![]()
3.网关
新建一个子模块,搭建网关
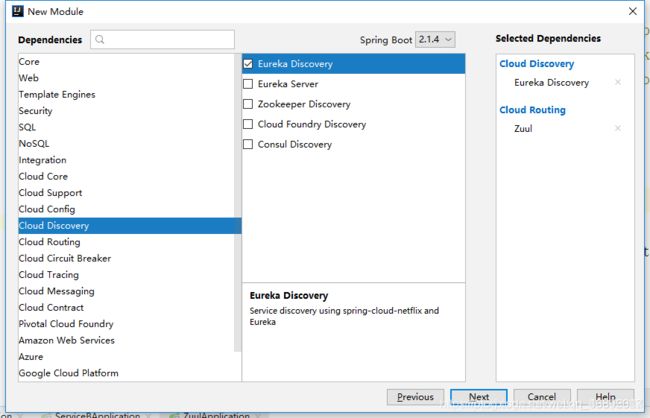
在启动类上添加注解 @EnableZuulProxy和@EnableEurekaClient,将zuul网关服务注册到eureka,可以通过服务名称调用其他的服务
import org.springframework.boot.SpringApplication;
import org.springframework.boot.autoconfigure.SpringBootApplication;
import org.springframework.cloud.netflix.eureka.EnableEurekaClient;
import org.springframework.cloud.netflix.zuul.EnableZuulProxy;

@SpringBootApplication
@EnableZuulProxy
@EnableEurekaClient
public class ZuulApplication {

    public static void main(String[] args) {
        SpringApplication.run(ZuulApplication.class, args);
    }

}
编写配置文件
server:
  port: 8043
spring:
  application:
    name: service-zuul
eureka:
  client:
    serviceUrl:
      defaultZone: http://localhost:8040/eureka
    register-with-eureka: true
    fetch-registry: true
zuul:
  routes:
    api-a:
      serviceId: service-a
      path: /api-a/**
    api-b:
      serviceId: service-b
      path: /api-b/**
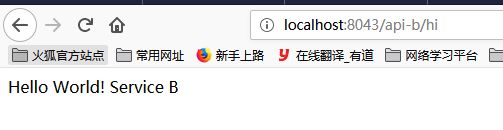
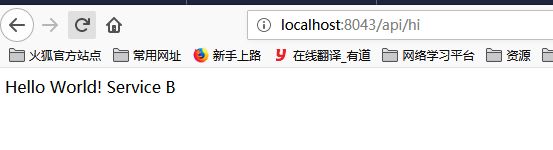
在浏览器打开 http://localhost:8043/api-a/hi 和 http://localhost:8043/api-b/hi, 可以发现对应的服务能够进行转发了

3.1 zuul配置多实例
但现在还是单个路由指向单个服务,在分布式的场景下,我们可能一个服务会有多个节点,如何利用zuul进行简单的负载均衡呢。我们把之前的提供服务的 配置文件稍作修改,将服务名称设置为一样的。
![]()
修改之后两个服务除了端口不一样,服务名称是一样的。
eureka:
  client:
    serviceUrl:
      defaultZone: http://localhost:8040/eureka
    register-with-eureka: true
    fetch-registry: true
zuul:
  routes:
    api-a:
      serviceId: comput-service
      path: /api/**
这样就可以做到简单的轮询了,重复打开http://localhost:8043/api/hi

如果要制定更加好的负载均衡策略,则需要使用到ribbon等其他的,这里就不在继续做展示了。
————————————————
版权声明:本文为CSDN博主「Four5Fire」的原创文章,遵循CC 4.0 by-sa版权协议,转载请附上原文出处链接及本声明。
原文链接:https://blog.csdn.net/qq_36845328/article/details/89060067