实验一OpenStack云计算平台的环境设计及系统准备
链接:https://pan.baidu.com/s/19VtyH5kM8VadLcF5HP3ahA
提取码:305c
XianDian-IaaS-v2.2
【实验介绍】
-
概述
本项目主要帮助读者掌握搭建OpenStack云计算平台的环境设计及系统准备,包括硬件基本需求,OpenStack云计算平台的搭建所需的软件包,部署一个实际的OpenStack云计算平台拓扑结构,并在单个环境下进行系统安装基础工作。 -
实验目标
掌握构建云计算平台的系统拓扑结构。
掌握系统拓扑结构下的网络配置。
掌握正确搭建云计算平台的安装基础工作。
- 实验环境
CentOS 7.2 Linux操作系统。
【实验准备】
虚拟化技术IaaS是基础架构设施平台,实现底层资源虚拟化,最后部署实际云应用平台。谈到云计算、OpenStack都离不开虚拟化的内容,因为虚拟化是云计算重要的支撑技术之一。
【实验步骤】
- 修改主机名和网卡配置
(1)修改当前节点的主机名
[root@localhost ~]# hostnamectl set-hostname xiandian
修改主机名执行成功后没有返回结果。
通过bash刷新,主机名会变为xiandian。
[root@localhost ~]# bash
(2)在全部节点的/etc/hosts文件中添加域名解析
[root@xiandian ~]# vi /etc/hosts
按i键进入编译模式,添加以下内容:
10.24.2.37 xiandian
注:在最后面添加自己虚拟机的IP和主机名,注意IP和主机名之间有一个空格。按Esc键并输入:wq命令保存退出。
- 配置环境配置防火墙规则
清除所有 chains 链(INPUT/OUTPUT/FORWARD)中所有的rule规则。
[root@xiandian ~]# iptables -F
清空所有chains链(INPUT/OUTPUT/FORWARD)中包及字节计数器。
[root@xiandian ~]# iptables -X
清除用户自定义chains链(INPUT/OUTPUT/FORWARD)中的rule规则。
[root@xiandian ~]# iptables -Z
执行清除命令没有返回结果,通过/usr/sbin/iptables-save保存。
[root@xiandian ~]# /usr/sbin/iptables-save
图1 执行结果
- yum 安装
(1)在当前节点挂载镜像制作源路径
挂载CentOS-7-x86_64-DVD-1511.iso:
[root@xiandian ~]# mount -o loop /opt/CentOS-7-x86_64-DVD-1511.iso /mnt/
[root@xiandian ~]# mkdir /opt/centos
[root@xiandian ~]# cp -rf /mnt/* /opt/centos/
[root@xiandian ~]# umount /mnt/
挂载CentOS-7-x86_64-DVD-1511.iso:
[root@xiandian ~]# mount -o loop /opt/XianDian-IaaS-v2.2.iso /mnt/
[root@xiandian ~]# cp -rf /mnt/* /opt/
[root@xiandian ~]# umount /mnt/
图2 挂载情况
(2)配置yum路径
将网络yum源路径移除yum目录。
[root@xiandian ~]# mv /etc/yum.repos.d/* /opt
执行没有返回结果。
(3)在当前节点创建repo文件
在/etc/yum.repos.d创建centos.repo源文件。
[root@xiandian ~]# vi /etc/yum.repos.d/local.repo
按i键进入编译模式,添加以下内容到local.repo文件里:
[centos]
name=centos
baseurl=file:///opt/centos
gpgcheck=0
enabled=1
[iaas]
name=iaas
baseurl=file:///opt/iaas-repo
gpgcheck=0
enabled=1
按Esc键并输入:wq命令保存退出。
(4)配置IP
根据服务器自身的IP地址配置网卡信息。
[root@xiandian ~]# vi /etc/sysconfig/network-scripts/ifcfg-eth0
按i键进入编译模式,将文件修改为以下形式:
TYPE=Ethernet
BOOTPROTO=static
NM_CONTROLLED=yes
DEVICE=eth0
ONBOOT=yes
IPADDR=10.24.2.37
PREFIX=23
GATEWAY=10.24.2.1
按Esc键并输入:wq命令保存退出。
注:将获取IP方式改为静态。
在IPADDR输入自己虚拟机的IP。
网关也是结合服务器所在网段填写。
[root@xiandian ~]# vi /etc/sysconfig/network-scripts/ifcfg-eth1
按i键进入编译模式,将文件修改为以下形式:
TYPE=Ethernet
BOOTPROTO=static
NM_CONTROLLED=yes
DEVICE=eth1
ONBOOT=yes
IPADDR=10.24.3.37
PREFIX=24
按Esc键并输入:wq命令保存退出。
将获取IP方式改为静态。
注:在IPADDR输入自己虚拟机的IP。
外网段不能和虚拟机IP在同一个网段。
重启网络:
[root@xiandian ~]# systemctl restart network
(5)虚拟机和计算节点
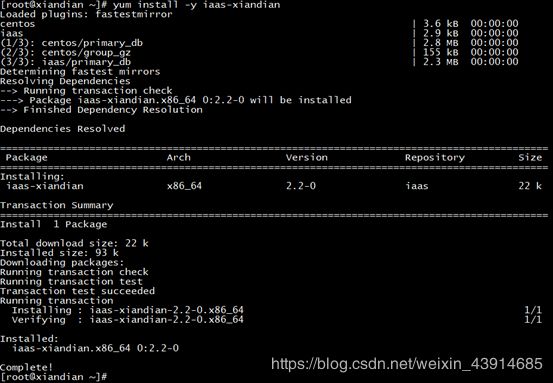
安装iaas-xiandian安装包
[root@xiandian ~]# yum install -y iaas-xiandian -y
图3下载情况
编辑文件/etc/xiandian/openrc.sh(配置环境变量)。
[root@xiandian ~]# vi /etc/xiandian/openrc.sh
按i键进入编译模式,按以下参数修改配置文件。
PS:原配置文件中是有“#”号的,填写好配置后删除注释“#”。
HOST_IP=127.0.0.1
HOST_NAME=xiandian
HOST_IP_NODE=127.0.0.1
HOST_NAME_NODE=xiandian
RABBIT_USER=openstack
RABBIT_PASS=000000
DB_PASS=000000
DOMAIN_NAME=demo(自定义)
ADMIN_PASS=000000
DEMO_PASS=000000
KEYSTONE_DBPASS=000000
GLANCE_DBPASS=000000
GLANCE_PASS=000000
NOVA_DBPASS=000000
NOVA_PASS=000000
NEUTRON_DBPASS=000000
NEUTRON_PASS=000000
METADATA_SECRET=000000
INTERFACE_NAME=eth1
CINDER_DBPASS=000000
CINDER_PASS=000000
BLOCK_DISK=vda3
SWIFT_PASS=000000
OBJECT_DISK=vda4
STORAGE_LOCAL_NET_IP=127.0.0.1
HEAT_DBPASS=000000
HEAT_PASS=000000
CEILOMETER_DBPASS=000000
CEILOMETER_PASS=000000
AODH_DBPASS=000000
AODH_PASS=000000
按Esc键并输入:wq命令保存退出。
(6)在当前节点增加Swift、Cinder分区
[root@xiandian ~]# fdisk /dev/vda
Welcome to fdisk (util-linux 2.23.2).
Changes will remain in memory only, until you decide to write them.
Be careful before using the write command.
Command (m for help): p
Disk /dev/vda: 107.4 GB, 107374182400 bytes, 209715200 sectors
Units = sectors of 1 * 512 = 512 bytes
Sector size (logical/physical): 512 bytes / 512 bytes
I/O size (minimum/optimal): 512 bytes / 512 bytes
Disk label type: dos
Disk identifier: 0x000eb66b
Device Boot Start End Blocks Id System
/dev/vda1 * 2048 1026047 512000 83 Linux
/dev/vda2 1026048 62808063 30891008 8e Linux LVM
Command (m for help): n
Partition type:
p primary (2 primary, 0 extended, 2 free)
e extended
Select (default p): p
Partition number (3,4, default 3):
##这里使用默认值##
First sector (62808064-209715199, default 62808064):
Using default value 62808064
Last sector, +sectors or +size{K,M,G} (62808064-209715199, default 209715199): +5G
Partition 3 of type Linux and of size 5 GiB is set
Command (m for help): n
Partition type:
p primary (3 primary, 0 extended, 1 free)
e extended
Select (default e): p
Selected partition 4
First sector (73293824-209715199, default 73293824):
##这里使用默认值##
Using default value 73293824
Last sector, +sectors or +size{K,M,G} (73293824-209715199, default 209715199): +5G
Partition 4 of type Linux and of size 5 GiB is set
Command (m for help): wq
The partition table has been altered!
Calling ioctl() to re-read partition table.
WARNING: Re-reading the partition table failed with error 16: Device or resource busy.
The kernel still uses the old table. The new table will be used at
the next reboot or after you run partprobe(8) or kpartx(8)
Syncing disks.
[root@xiandian ~]# fdisk /dev/vda -l
Disk /dev/vda: 107.4 GB, 107374182400 bytes, 209715200 sectors
Units = sectors of 1 * 512 = 512 bytes
Sector size (logical/physical): 512 bytes / 512 bytes
I/O size (minimum/optimal): 512 bytes / 512 bytes
Disk label type: dos
Disk identifier: 0x000eb66b
Device Boot Start End Blocks Id System
/dev/vda1 * 2048 1026047 512000 83 Linux
/dev/vda2 1026048 62808063 30891008 8e Linux LVM
/dev/vda3 62808064 73293823 5242880 83 Linux
/dev/vda4 73293824 83779583 5242880 83 Linux
(7)在虚拟机上执行
[root@xiandian ~]# iaas-pre-host.sh
重启设备,重启会卡住需要点击关机并退出按钮,退出虚拟机,然后再次进入实验。
[root@xiandian ~]# reboot
(8)部署脚本安装平台
在虚拟机执行脚本iaas-install-mysql.sh进行数据库及消息列表服务安装。
[root@xiandian ~]# iaas-install-mysql.sh
在虚拟机执行脚本iaas-install-keystone.sh进行keystone认证服务安装。
[root@xiandian ~]# iaas-install-keystone.sh
在虚拟机执行脚本iaas-install-glance.sh进行glance镜像服务安装。
[root@xiandian ~]# iaas-install-glance.sh
在虚拟机执行脚本iaas-install-nova-controller.sh进行nova计算服务安装。
[root@xiandian ~]# iaas-install-nova-controller.sh
在虚拟机执行脚本iaas-install-nova-compute.sh进行nova计算服务安装。
[root@xiandian ~]# iaas-install-nova-compute.sh
在虚拟机执行脚本iaas-install-neutron-controller.sh进行neutron网络服务安装。
[root@xiandian ~]# iaas-install-neutron-controller.sh
在虚拟机执行脚本iaas-install-neutron-compute.sh进行neutron网络服务安装。
[root@xiandian ~]# iaas-install-neutron-compute.sh
在虚拟机执行脚iaas-install-neutron-controller-gre.sh进行gre网络安装配置。
[root@xiandian ~]# iaas-install-neutron-controller-gre.sh
在虚拟机执行脚本iaas-install-neutron-compute-gre.sh进行gre网络安装配置。
[root@xiandian ~]# iaas-install-neutron-compute-gre.sh
(9)在虚拟机执行脚本iaas-install-dashboard.sh进行dashboard服务安装。
[root@xiandian ~]# iaas-install-dashboard.sh
在虚拟机执行脚本iaas-install-cinder-controller.sh进行cinder块存储服务安装。
[root@xiandian ~]# iaas-install-cinder-controller.sh
在虚拟机执行脚本iaas-install-cinder-compute.sh进行cinder块存储服务安装。
[root@xiandian ~]# iaas-install-cinder-compute.sh
在虚拟机执行脚本iaas-install-swift-controller.sh进行swift对象存储服务安装。
[root@xiandian ~]# iaas-install-swift-controller.sh
在虚拟机执行脚本iaas-install-swift-compute.sh进行swift对象存储服务安装。
[root@xiandian ~]# iaas-install-swift-compute.sh
执行这个脚本时输入:yes回车,然后输入:000000回车。
在虚拟机执行脚本iaas-install-heat.sh进行heat编配服务安装。
[root@xiandian ~]# iaas-install-heat.sh
在虚拟机执行脚本iaas-install-ceilometer-controller.sh进行ceilometer监控服务安装。
[root@xiandian ~]# iaas-install-ceilometer-controller.sh
在虚拟机执行脚本iaas-install-ceilometer-compute.sh进行ceilometer监控服务安装。
[root@xiandian ~]# iaas-install-ceilometer-compute.sh
在虚拟机执行脚本iaas-install-alarm.sh进行alarm告警服务安装。
[root@xiandian ~]# iaas-install-alarm.sh
(10)验证安装基础工作完成
上述操作完成后,打开网页 http://10.24.2.37/dashboard 进行验证服务,如图4所示是dashboard 登录界面,包含管理员账号和密码登录;如图5所示是 dashboard 管理界面,表示安装基础工作正确完成。(注:这里填写自己虚拟机的IP地址进入Dashboard)。
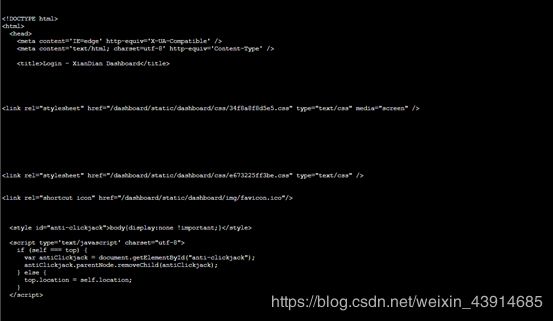
如果Dashboard界面不能访问,则通过另外一种方式检验
[root@xiandian ~]# curl -L http://10.24.2.37/dashboard
返回结果是一个HTML网页代码量较多,截图只截取了开始的一部分。
图6 返回结果


