asp.net mvc 项目进行画面跳转,响应ajax请求,传递参数
文章目录
- 1、创建asp.net mvc项目
- 2、画面跳转
- 3、发送AJAX请求
- 4、DEMO实例下载
1、创建asp.net mvc项目
开发环境为Visio Studio 2015
选择“文件”-“新建”-“项目”

在“模板”中,选择“Visual C#”-“ASP.NET Web应用程序”,输入项目名称和保存位置

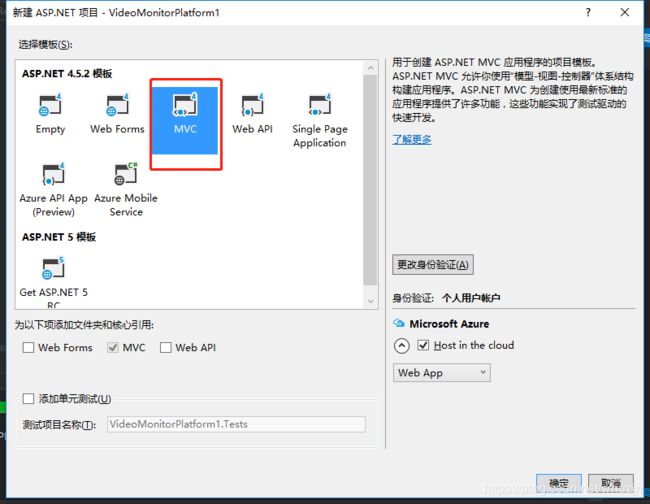
在“模板”中选择“MVC”

创建完毕后,会生成响应模板的文件,包括配置文件和示例页面,后台处理类等
2、画面跳转
(1)、在“_LoginPartial.cshtml”文件中添加超链接
其中,第一个超链接“监控”为新加内容,这个按钮在启动页的右上角
(2)、在“Views”目录下新建“Monitor”目录,在该目录下新建“Center.cshtml”文件,如下图:

(3)、在“Controllers”目录下新建“MonitorController.cs”类,内容如下:
using System;
using System.Collections.Generic;
using System.Web.Mvc;
using System.Reflection;
using System.Threading.Tasks;
using VideoMonitorPlatform.Models;
using Newtonsoft.Json;
using VideoMonitorPlatform.Utils;

namespace VideoMonitorPlatform.Controllers
{
    public class MonitorController : Controller
    {
        // GET: /Monitor/Center
        [AllowAnonymous]
        public ActionResult Center()
        {
            return View();
        }
    }
}
再次运行程序,点击画面右上角的“监控”按钮,即可跳转到新建的“Center.cshtml”页面上
3、发送AJAX请求
(1)在“Center.cshtml”文件中添加js代码,提交AJAX请求:
@{
Layout = null;
}
(2)在“MonitorController”类中添加响应POST请求的方法,如下:
        // POST: /Monitor/Center
        [HttpPost]
        [AllowAnonymous]
        public ActionResult Center(NvrModel nvrModel)
        {
            Object result = new
            {
                ip = nvrModel.ip,
                port = nvrModel.port,
                username = nvrModel.username,
                password = nvrModel.password
            };
            string jsonstr = JsonConvert.SerializeObject(result);
            return Content(jsonstr);
        }
(3)接收参数需要写一个和前台传递过来参数相匹配的Model类,内容如下:
using System;
using System.Collections.Generic;

namespace VideoMonitorPlatform.Models
{
    public class MonitorModels
    {
    }

    public class NvrModel
    {
        public string ip { get; set; }

        public string port { get; set; }

        public string username { get; set; }

        public string password { get; set; }
    }

}
注:前台传递/接收参数,使用javascript方法JSON.stringify()
后台接收参数,使用和前台传递JSON对象相匹配的Model类
后台返回结果,使用JsonConvert.SerializeObject()和Content()方法,将对象转成JSON格式返回
4、DEMO实例下载
下载地址