jenkins+gitlab+ansible持续集成平台部署(二)
一、jenkins集成openldap认证
进入jenkins系统管理----->插件管理,安装插件LDAP Plugin
进入系统管理----->全局安全配置,勾选Enable security,启用安全配置
在Security Realm选择LDAP,点击Advanced Server Configuration,配置LDAP服务器
主要配置如下:
#LDAP服务器地址
Server:ldap://10.10.10.1:56389
#root DN指搜索的根,并非LDAP服务器的root dn
root DN:dc=test,dc=com
#定义登陆的“用户名”对应LDAP中的哪个字段
User search filter:cn={0}
#LDAP管理员账号
Manager DN:cn=root,dc=test,dc=com
#LDAP管理员密码
Manager Password:123456
配置完成后点击Test LDAP settings,测试是否成功连接LDAP服务器 在弹出的对话框中输入已存在的LDAP用户,然后点击Test,测试是否可以正常登录
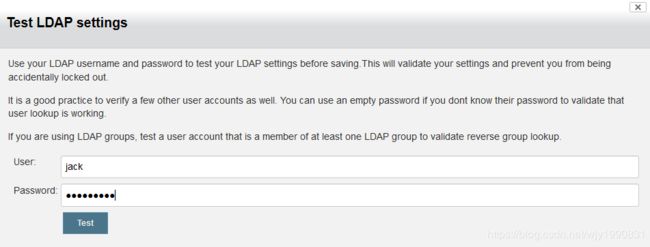 如出现Authentication: successful及对应的用户信息,说明配置成功,后面就可以使用LDAP账户登录jenkins。
二、gitlab集成openldap认证
编辑gitlab配置文件gitlab.rb,取消如下注释,并修改配置
gitlab_rails['ldap_enabled'] = true
gitlab_rails['ldap_servers'] = YAML.load <<-'EOS'
   main: # 'main' is the GitLab 'provider ID' of this LDAP server
     label: 'LDAP'
     host: '10.10.10.1'
     port: 56389
     uid: 'cn'
     bind_dn: 'cn=root,dc=test,dc=com'
     password: '123456'
     encryption: 'plain'
     verify_certificates: true
     active_directory: false
     allow_username_or_email_login: false
     lowercase_usernames: false
     block_auto_created_users: false
     base: 'DC=test,DC=com'
     user_filter: ''
EOS
保存配置,运行gitlab-ctl reconfigure 重新加载配置
进入gitlab关闭用户注册功能,Admin Area----->Settings----->General----->Sign-up restrictions,去掉Sign-up enabled的勾选,然后点击Save Changes保存配置
进入gitlab关闭用户普通登录功能,Admin Area----->Settings----->General----->Sign-in restrictions,去掉Password authentication enabled for web interface的勾选,然后点击Save Changes保存配置
退出重新登录,可以看到只允许使用LDAP账号登录
