EOS实际操作
参考: https://bihu.com/article/179190
ref: https://www.jianshu.com/p/3f18aa973f7c
ref: http://www.cnblogs.com/think8848/p/9215439.html
-
准备构建环境
- 依赖包与工具
#sudo apt-get install clang-4.0 lldb-4.0 libclang-4.0-dev cmake make libbz2-dev libssl-dev libgmp3-dev autotools-dev build-essential libbz2-dev libicu-dev python-dev autoconf libtool git mongodb
- 安装boost1.66
#cd ~
#wget -c 'https://sourceforge.net/projects/boost/files/boost/1.66.0/boost_1_66_0.tar.bz2/download' -O boost_1.66.0.tar.bz2
#tar xjf boost_1.66.0.tar.bz2
#cd boost_1_66_0
#echo "export BOOST_ROOT=$HOME/boost_1_66_0" >> ~/.bash_profile
#source ~/.bash_profile
#./bootstrap.sh "--prefix=$BOOST_ROOT"
#./b2 install
#source ~/.bash_profile
- 安装mangodb的C++驱动
#cd ~
#sudo apt install curl
#curl -LO https://github.com/mongodb/mongo-c-driver/releases/download/1.9.3/mongo-c-driver-1.9.3.tar.gz
----#//(下载mongo c 的驱动,若被refused,需要多试几次)
#tar xf mongo-c-driver-1.9.3.tar.gz
#cd mongo-c-driver-1.9.3
#./configure --enable-static --enable-ssl=openssl --disable-automatic-init-and-cleanup --prefix=/usr/local
#make -j 16
#sudo make install
#cd src/libbson
#./configure
#make
#sudo make install
#sudo apt-get install pkg-config libssl-dev libsasl2-dev
--#git clone https://github.com/mongodb/mongo-cxx-driver.git --branch releases/stable --depth 1
#git clone --depth 1 -b releases/v3.0 git://github.com/mongodb/mongo-cxx-driver
#cd mongo-cxx-driver/build
#cmake .. -DBSONCXX_POLY_USE_MNMLSTC=1 -DBUILD_SHARED_LIBS=OFF -DCMAKE_BUILD_TYPE=Release -DCMAKE_INSTALL_PREFIX=/usr/local
#sudo make EP_mnmlstc_core
#sudo make -j 16 && sudo make install
-----期间会发生test类程序assert错误,目前是直接忽视
ref: https://mongodb.github.io/mongo-cxx-driver/mongocxx-v3/installation/
ref: https://github.com/mongodb/mongo-cxx-driver.git
4、安装椭圆曲线加密算法包并编译
#cd ~
#git clone https://github.com/cryptonomex/secp256k1-zkp.git
#cd secp256k1-zkp
#./autogen.sh
#./configure
#make
#sudo make install
5、下载LLVM和clang
#mkdir ~/wasm-compiler
#cd ~/wasm-compiler
#git clone --depth 1 --single-branch --branch release_40 https://github.com/llvm-mirror/llvm.git
#cd llvm/tools
#git clone --depth 1 --single-branch --branch release_40 https://github.com/llvm-mirror/clang.git
------这里有个坑,经常会取不到包,可能又要多试几次。
#cd ..
#mkdir build
#cd build
#cmake -G "Unix Makefiles" -DCMAKE_INSTALL_PREFIX=.. -DLLVM_TARGETS_TO_BUILD= -DLLVM_EXPERIMENTAL_TARGETS_TO_BUILD=WebAssembly -DCMAKE_BUILD_TYPE=Release ..
#make -j16 install
6、上面所有的依赖包都安装好以后,才能开始官方推荐的自动安装三步骤。
#cd ~
#git clone https://github.com/eosio/eos --recursive
#cd eos
#./eosio_build.sh
7、机器物理内存必须大于8GB,否则会无法执行eosio的编译。
在./eosio-build.sh的过程中,若缺少某个包,就执行脚本命令重新下载,如:
#sudo apt-get install python3-dev
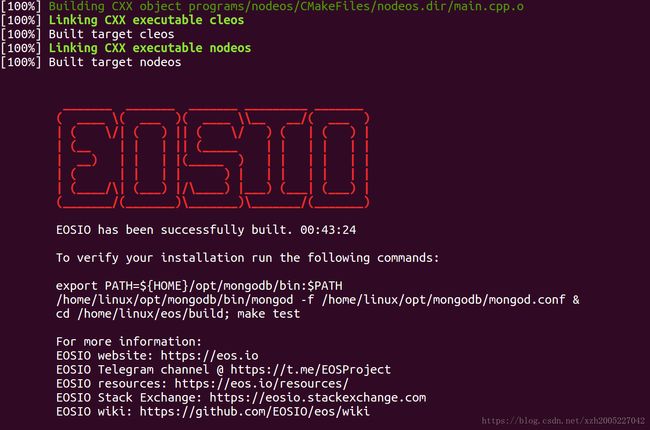
8、当如下大红的EOSIO出现的时候,说明我们的EOS安装成功了。
-
使用正确版本的代码
1、第一步通过git clone获得项目代码
#git clone https://github.com/eosio/eos --recursive
2、check出之前的稳定版本
#cd eos
#git branch
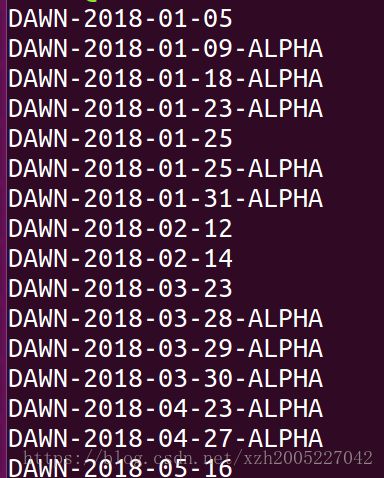
#git tag
#git checkout DAWN-2018-03-23

