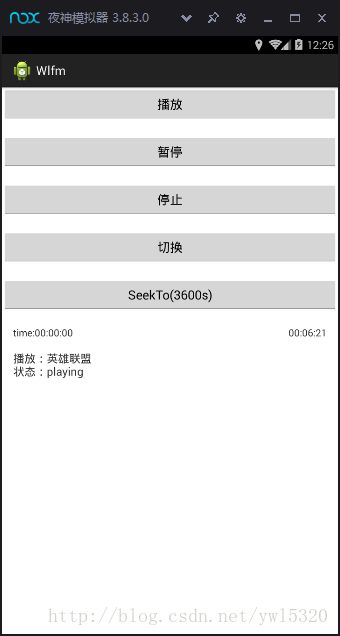
先说SDL(Simple DirectMedia Layer)的作用吧,SDL是套跨平台的多媒体库,代码是用c语言写的,在Android应用开发上多是和FFmpeg合作来开发我们常用的视音频播放器。关于FFmpeg移植到Android可参加博客:FFmpeg(3.3.2)移植Android平台和Android Studio通过cmake创建FFmpeg项目就可以了。先上一张FFmpeg+SDL2实现的音频播放器效果(后面开发完了也会开源出来的,可做网络音乐或FM等SDK的使用)
SDL2和FFmpeg开发的音频播放器
我在上一篇博客中(Android编译SDL2和demo展示(2.0.5))已经实现了把SDL2移植到Android平台上,但是是在eclipse+NDK下面编译的,随着Android Studio的兴起,现在开发Android都不用eclipse了,所以就打算用AS再编译一次。
在编译的过程中发现AS已经不支持低版本的NDK了,只好用最新版本的NDK(NDK国内下载地址)这里我用的是13b版本的,但是新的NDK已经改变了编译clang来编译不再是gcc了,直接移植源码发现编译到了和OpenGL相关的库时就报错了,找不到相应的引用,尝试了各种方法都误解,最终想到了通过移植SDL2.so库和.c源文件的方式来移植,这种方式完全不影响我们添加自己的C代码,也算一种比较好的解决办法了。
一、用AS创建C/C++项目,这里需要注意,由于Java和c语言的调用是个包名类名方法名相关的,所以当我们在SDL中编译SDL2.so库时使用了怎样的包名结构和类结构,这里也需要一样的结构才行,不然不能调用,新项目的包名可以不一样,新建包的包名和SDL2.so库里面的一样就可以了。这里就用默认的包名和类名开演示。
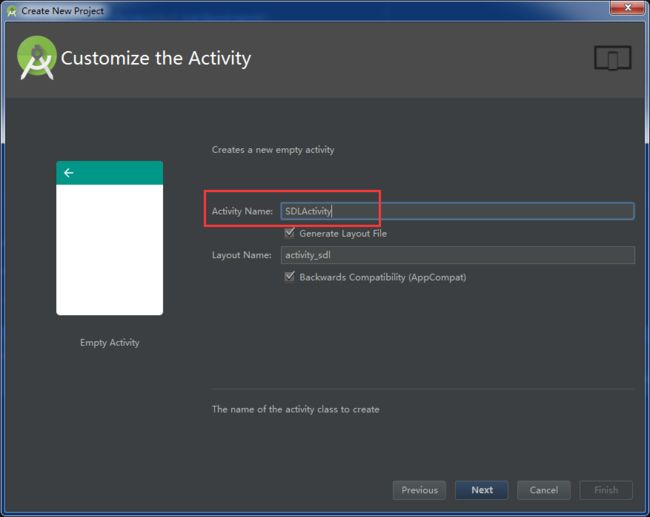
1、用AS创建C/C++项目,包名为:org.libsdl.app,启动activity为:SDLActivity,因为这些信息都打包到了SDL2.so在了里面。
AS创建c/c++项目
更改activity为SDLActivity
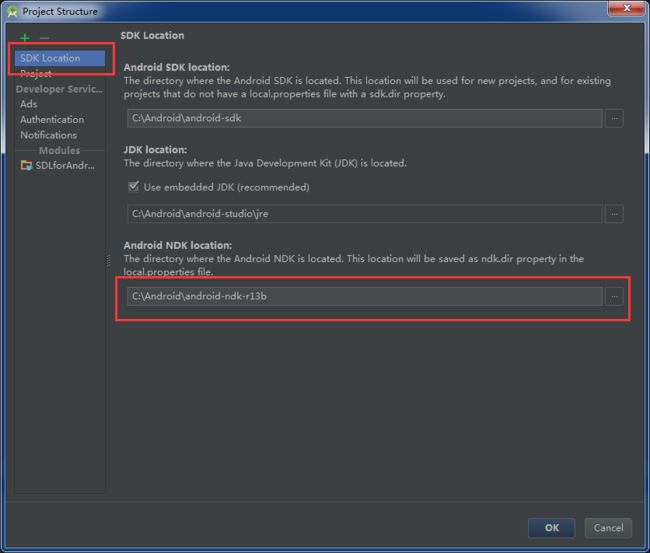
2、刚创建的项目还不能编译成功,需要设置NDK路径
添加NDK路径
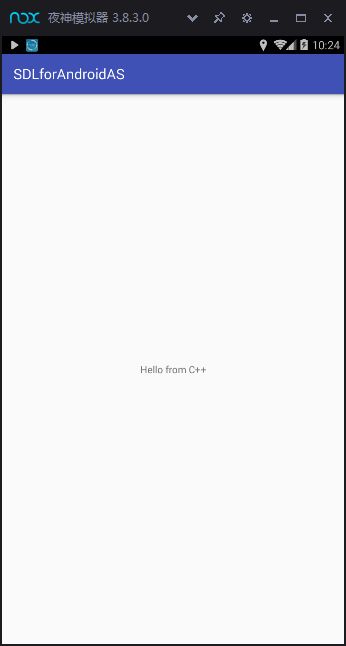
运行AS C/C++默认项目成功
二、改造默认工程
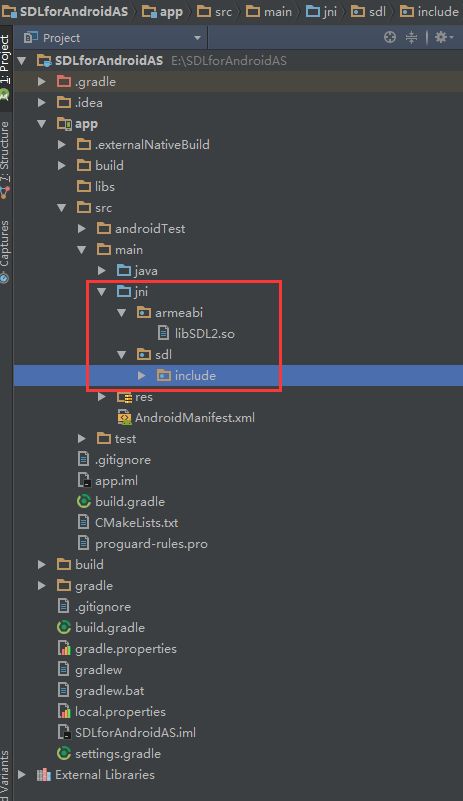
1、删掉原来的main中cpp文件夹,创建jni文件夹(习惯了jni,用cpp文件夹也行)。然后在jni文件夹中创建armeabi文件夹,然后把在Android编译SDL2和demo展示(2.0.5)中生成的libSDL2.so复制到armeabi文件夹中;再在jni文件夹中创建sdl文件夹,并将SDL中的头文件include拷贝到里面;如图:
导入SDL库和头文件
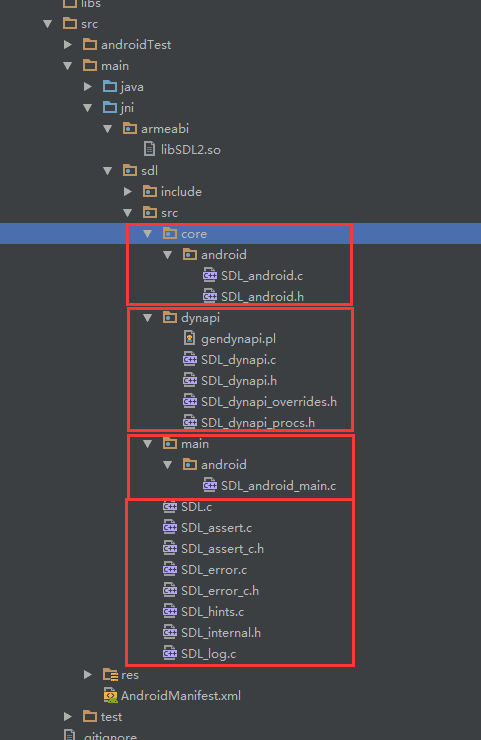
2、在sdl中创建src文件夹,然后导入需要的文件:SDL中src根目录下的所以文件、core文件夹中的android文件夹中所以文件(这里面就是实现的SDLActivity.java中的本地方法)、dynapi文件夹中所以文件、main文件夹中android文件夹中的所有文件。如图:
导入SDL中src需要文件
这样就算改造完成了。
三、编写CMakeLists编译脚本
1、更改生成的动态库名称:sdlmain
add_library( # Sets the name of the library.
sdlmain
# Sets the library as a shared library.
SHARED
# Provides a relative path to your source file(s).
src/main/jni/sdl/src/main/android/SDL_android_main.c
src/main/jni/SDL4Android.c)
其中SDL_android_main.c会调用SDL_android中的函数,然后还作为入口方法调用我们自己SDL4Android.c文件中的main方法,SDL4Android.c是我们自己添加的c文件。
2、导入SDL头文件:
include_directories(src/main/jni/sdl/include)
3、添加SDL2.so库:
add_library( SDL2
SHARED
IMPORTED)
set_target_properties( SDL2
PROPERTIES IMPORTED_LOCATION
${CMAKE_SOURCE_DIR}/src/main/jni/armeabi/libSDL2.so)
4、链接SDL2.so和libsdlmain.so
target_link_libraries( # Specifies the target library.
sdlmain
SDL2
# Links the target library to the log library
# included in the NDK.
${log-lib} )
这样CMakeLists配置好了,全部如下:
# For more information about using CMake with Android Studio, read the
# documentation: https://d.android.com/studio/projects/add-native-code.html
# Sets the minimum version of CMake required to build the native library.
cmake_minimum_required(VERSION 3.4.1)
# Creates and names a library, sets it as either STATIC
# or SHARED, and provides the relative paths to its source code.
# You can define multiple libraries, and CMake builds them for you.
# Gradle automatically packages shared libraries with your APK.
include_directories(src/main/jni/sdl/include)
add_library( # Sets the name of the library.
                    sdlmain
                    # Sets the library as a shared library.
                    SHARED
                    # Provides a relative path to your source file(s).
                    src/main/jni/sdl/src/main/android/SDL_android_main.c
                    src/main/jni/SDL4Android.c)
# Searches for a specified prebuilt library and stores the path as a
# variable. Because CMake includes system libraries in the search path by
# default, you only need to specify the name of the public NDK library
# you want to add. CMake verifies that the library exists before
# completing its build.
find_library( # Sets the name of the path variable.
                    log-lib
                    # Specifies the name of the NDK library that
                    # you want CMake to locate.
                    log )
# Specifies libraries CMake should link to your target library. You
# can link multiple libraries, such as libraries you define in this
# build script, prebuilt third-party libraries, or system libraries.
add_library( SDL2
                    SHARED
                    IMPORTED)
set_target_properties( SDL2
                    PROPERTIES IMPORTED_LOCATION
                    ${CMAKE_SOURCE_DIR}/src/main/jni/armeabi/libSDL2.so)
target_link_libraries( # Specifies the target library.
                    sdlmain
                    SDL2
                    # Links the target library to the log library
                    # included in the NDK.
                    ${log-lib} )
四、配置build.gradle,因为只编译了arm平台的,所以要指定一下只生成arm平台和jniLibs目录:
externalNativeBuild {
        cmake {
                cppFlags""
        }
        ndk {
                abiFilters"armeabi"
        }
}
sourceSets{
        main{
                jniLibs.srcDirs = ['src/main/jni']
        }
}
五、最好把SDL4Android.c添加到jni根目录下:
#include
#include
#include
#include"SDL.h"
typedef structSprite
{
    SDL_Texture* texture;
    Uint16 w;
    Uint16 h;
} Sprite;
/* Adapted from SDL's testspriteminimal.c */
Sprite LoadSprite(const char* file,SDL_Renderer* renderer)
{
    Sprite result;
    result.texture = NULL;
    result.w =0;
    result.h =0;
    SDL_Surface* temp;
    /* Load the sprite image */
    temp = SDL_LoadBMP(file);
    if(temp == NULL)
    {
        fprintf(stderr,"Couldn't load %s: %s\n",file,SDL_GetError());
        returnresult;
    }
    result.w = temp->w;
    result.h = temp->h;
    /* Create texture from the image */
    result.texture = SDL_CreateTextureFromSurface(renderer,temp);
    if(!result.texture) {
        fprintf(stderr,"Couldn't create texture: %s\n",SDL_GetError());
        SDL_FreeSurface(temp);
        returnresult;
    }
    SDL_FreeSurface(temp);
    returnresult;
    }
    voiddraw(SDL_Window* window,SDL_Renderer* renderer,constSprite       sprite)
{
    intw,h;
    SDL_GetWindowSize(window,&w,&h);
    SDL_Rect destRect = {w/2- sprite.w/2,h/2- sprite.h/2,sprite.w,sprite.h};
    /* Blit the sprite onto the screen */
    SDL_RenderCopy(renderer,sprite.texture,NULL,&destRect);
    }
    intmain(intargc,char*argv[])
    {
        SDL_Window *window;
        SDL_Renderer *renderer;
        if(SDL_CreateWindowAndRenderer(0,0,0,&window,&renderer) <0)
        exit(2);
        Sprite sprite = LoadSprite("zx.bmp",renderer);
        if(sprite.texture == NULL)
            exit(2);
        /* Main render loop */
        Uint8 done =0;
        SDL_Event event;
        while(!done)
            {
                /* Check for events */
                while(SDL_PollEvent(&event))
                {
                    if(event.type == SDL_QUIT || event.type == SDL_KEYDOWN || event.type == SDL_FINGERDOWN)
                    {
                        //done = 1;
                    }
                }
                /* Draw a gray background */
                SDL_SetRenderDrawColor(renderer,0xA0,0xA0,0xA0,0xFF);
                SDL_RenderClear(renderer);
                draw(window,renderer,sprite);
                /* Update the screen! */
                SDL_RenderPresent(renderer);
                SDL_Delay(10);
            }
        exit(0);
}
然后把SDL中的SDLActivity.java中的代码复制到我们的SDLActivity中。最好在main中添加资源文件assets,拷贝一张需要展示的图片来运行demo,这样就完成了移植:
[图片上传中。。。(8)]最终目录结构
运行效果图
就这样了,有疑问的地方可以留言,demo下载地址:Github:SDLforAndroidAS,下一篇就写SDL和FFmpeg的整合。
