Windows 10 安装 Cuda, Tensorflow, 和keras,附CPU/GPU切换小技巧
Originally published on Medium, reblogged in case of blocking
I’ve tried months ago to install the GPU-based Machine learning framework, namely keras with tensorflow, but get stuck following the official indication of the latter, and the issue remained unresolved until yesterday because of loads of patients in summer vocation, and I finally managed to get m1000m working.
I basically followed instructions written in Chinese in http://blog.csdn.net/u012898521/article/details/69611800, with a few modifications according to keras documentation in Chinese HERE, and actually I did a combination of both.
Step 1 — python
By far tensorflow only support python 3 but no newer than major version of 3.5, and last time I got a lot of trouble tried to install the dependencies especially scipy. I didn’t use anaconda because it starts rather slow and Google said you could install tensorflow without it, and it was later I found scipy itself WILL encounter problems when installed on windows.
SO, just install Anaconda with python 3.5 (I installed Anaconda 4.2.0 with python 3.5.2) HERE, and it will save you all the troubles.
Step 2 — CUDA and CuDNN
CUDA is toolkit enables you to all the fun programming with NVIDIA GPU, you’re welcomed unless your GPU is prior to GTX 5XX.
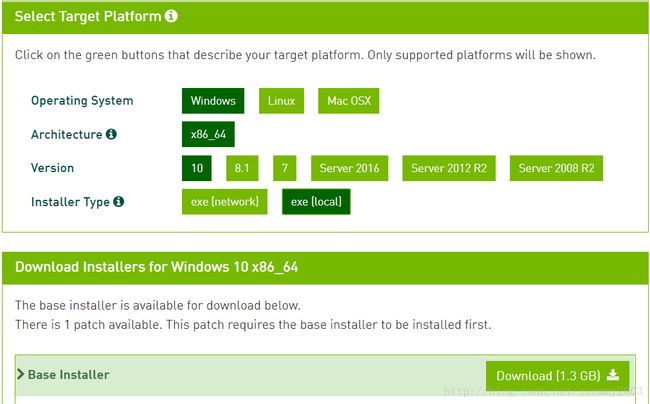
You can download it HERE, and you’ll find it a bit of time consuming.
Installation is simple a series of ‘Next’s.
And now you can install CuDNN, an acceleration library for CUDA. You’ll require to signed a developer account in order to get it HERE, and then unzip the folders and overwrite folders atC:\Program Files\NVIDIA GPU Computing Toolkit\CUDA\8.0 with same names.
Step 3 — Tensorflow
Simply use pip with installation.
To install CPU version(required)
>pip install tensorflowTo install GPU version(optional)
>pip install tensorflow-gpuIf it says pip is outdated or cannot find resource,try upgrading pip
python.exe -m pip install — upgrade pipThen, test with import and it should not return any errors
>python
>>>import tensorflow as tf
Step 4 — Keras
A line of code will do
pip install kerasKeras will be installed with theano by default, but it will use tensorflow as the back-end, so don’t panic, and test if keras is installed correctly by
import kerasNow we could run the MNIST example in Keras with either CPU or GPU
Step 4 — Run and switch between CPU and GPU
Download keras testing data sets HERE, or if you have git run
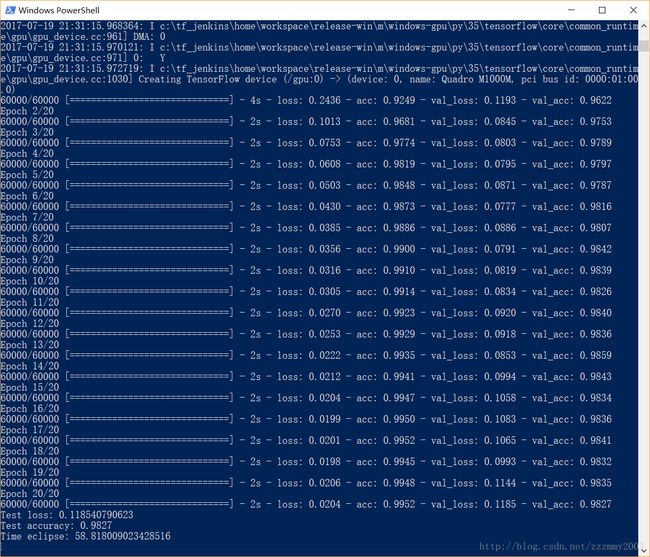
git clone https://github.com/fchollet/keras.gitLocate at keras/examples/, and run mnist_mlp.py, if you installed CUDA and CuDNN correctly, it will run on GPU by default, and here’s my running on GPU:
Sadly I have only a M1000M on a laptop, whose performance is compromised. ��
If you want to know how it will be on using CPU, you may Googled and get a suggestion os.environ["CUDA_VISIBLE_DEVICES"] ="", which you may well find vitiate.
And here’s the trick, simply change the value to -1 will do. More specifically, add these two lines whenever you want to run it on CPU:
import os
os.environ[“CUDA_VISIBLE_DEVICES”] = ‘-1’
My i7–6850HQ runs two times slower than the ‘weak’ GPU M1000M
Finally, we have GPU based computer��


