windows下使用SGX
前言:
这个是简单对于毫无经验的人的入门博客,杠精勿扰,大神离开。
我觉得每当下载一个新的工具的时候要先看一看他自己带的文档。
何谓SGX?不解释,您可以去看其介绍,百度搜搜即可。
win10如何下载SGX?
确保你有Visual Studio 2015 或其以上。
1.搜索SGX SDK,进入,其中的账号注册等等智障操作不谈,直接下载。(下载这一个即可)
2.下载出来解压,出现安装exe和开发文档,点击exe。
3.装在C盘就好,一路点击就行。
4.再次打开Visual Studio,新建项目的时候你发现有了enclave项目。
以上就使得你能用SGX了。
那么怎么用SGX呢?
我参考了这篇文章:https://blog.csdn.net/weixin_43965454/article/details/96099976
1.建立两个工程,一个是enclave工程,一个平常console工程。console工程就是为了调用enclave。
2.然后从console工程里面导入enclave工程。怎么导入?上方菜单 “文件” -> “添加” -> “已有项目” 找你的enclave工程,加入即可。
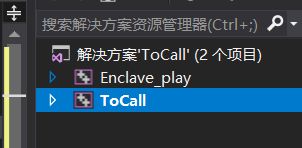
搞完你的项目应该这个样子。(我的console名字叫ToCall,enclave叫Enclave_play)
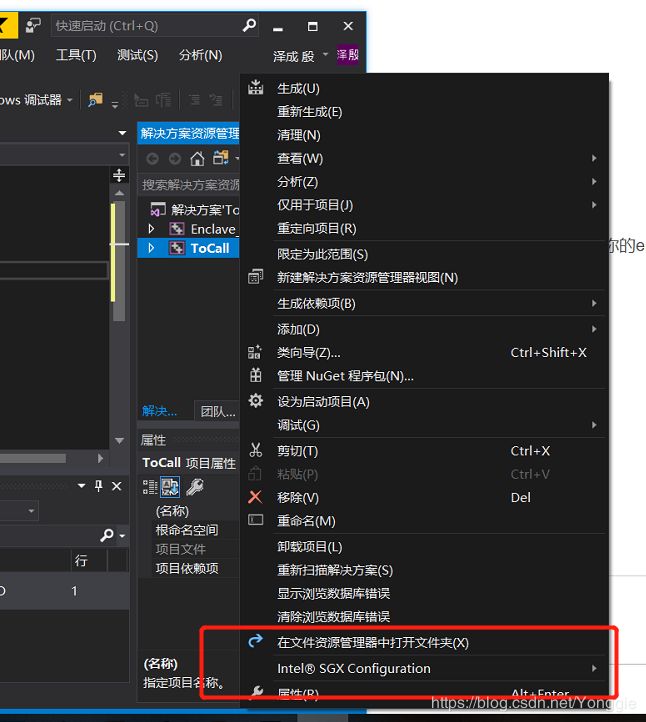
3.修改console工程的SGX属性,在SGX configuration里面导入enclave工程的edl文件。
4.下面就编写你console中的代码和enclave中的代码。
我用的是这些,你可以复制粘贴,记得改改这些代码里面的工程名字!!!
我很简单写了一个a+b函数。
具体的edl声明,怎么outcall之类的,可以看edl_teaching.pdf文件,里面详细介绍。
console.cpp:(也就是你非enclave工程的编写代码的文件)
// ToCall.cpp : 此文件包含 "main" 函数。程序执行将在此处开始并结束。
//

#include "pch.h"
#include
#include
#include
#include "sgx_urts.h"
#include "Enclave_play_u.h"

#define ENCLAVE_FILE _T("Enclave_play.signed.dll")

int main(){
	sgx_enclave_id_t eid;
	sgx_status_t ret = SGX_SUCCESS;
	sgx_launch_token_t token = { 0 };
	int updated = 0;

	//create an enclave with above launch token
	ret = sgx_create_enclave(ENCLAVE_FILE, SGX_DEBUG_FLAG, &token, &updated, &eid, NULL);
	if (ret != SGX_SUCCESS) {
		printf("failed to create an enclave.\n");
		return -1;
	}

	//call enclave function.
	int temp,*res=&temp;
	int a = 2, b = 5;
	Add(eid, res,a, b);
	printf("congratulations, you've succeeded call the enclave.");

	//destroy enclave
	if (SGX_SUCCESS != sgx_destroy_enclave(eid))
		return -1;
	return 0;

}
enclave.cpp:
#include "Enclave_play_t.h"
#include

#include "sgx_trts.h"

void Add(int *res, int a, int b) {
	*res = (a + b);
}


int main() {


}
enclave的edl文件:
这个edl文件相当于两个工程的桥梁,定义各种接口。
enclave {
    from "sgx_tstdc.edl" import *;

    trusted {
        /* define ECALLs here. */
		public void Add([user_check]int *res,int a,int b);
    };

    untrusted {
        /* define OCALLs here. */

    };
};
5.虽然打完代码了,但是要运行接下来修改的很多。
Intel SGX不支持32位的操作系统,所以运行的时候记得把模式改成x64
①把两个工程的“属性”中的“调试”中的工作目录改为$(OutDir)。我说的是两个工程的,两个。
②把调试方式改为“模拟(simulation)”。在哪里改?找找上方运行箭头左边是啥?就是它,改成simulation。
③先右键点击enclave工程,先生成它,看看有错没。没错就能生成签名,就可以整体运行了。
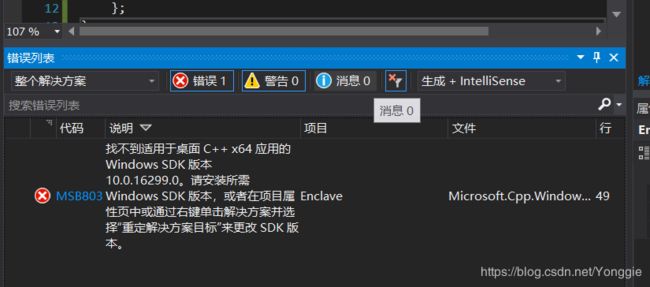
如果不可以,会出现这个:
那么你就按照它提示的做就行。重定解决方案目标。
重定之后它的工作路径如果又变成ProjectDir了,你就再把它改回来。
一些其他错误供参考:https://stackoverflow.com/questions/41944179/error-loading-enclave-couldnt-open-file-with-createfile
如果你出现“could not open file xxx, createFile()xxx”什么的,那是你的那个#define文件写错了,你看看有没有打错字母,或者看看OutDir有没有设置。
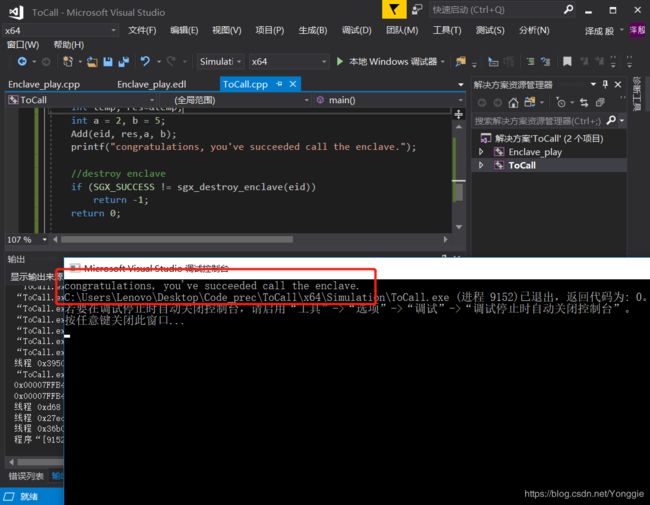
6.运行成功有如下画面。


