Canvas的drawBitmap以及Paint的PorterDuffXfermode使用心得
转载请注明出处:http://blog.csdn.net/binbinqq86/article/details/78327834
项目中经常会用到Canvas来绘图,制作一些自定义view等,其实绘图相关的东西是挺庞大的一个面,涉及很多,此次我们主要讲解一下其中的几个点,也是我在项目中用到的,算是做一个笔记。
首先来说一下drawBitmap这个方法:
public void drawBitmap(@NonNull Bitmap bitmap, float left, float top, @Nullable Paint paint) {
        throwIfCannotDraw(bitmap);
        native_drawBitmap(mNativeCanvasWrapper, bitmap, left, top,
                paint != null ? paint.getNativeInstance() : 0, mDensity, mScreenDensity, bitmap.mDensity);
    }
public void drawBitmap(@NonNull Bitmap bitmap, @Nullable Rect src, @NonNull RectF dst,
@Nullable Paint paint) {
if (dst == null) {
throw new NullPointerException();
}
throwIfCannotDraw(bitmap);
final long nativePaint = paint == null ? 0 : paint.getNativeInstance();
float left, top, right, bottom;
if (src == null) {
left = top = 0;
right = bitmap.getWidth();
bottom = bitmap.getHeight();
} else {
left = src.left;
right = src.right;
top = src.top;
bottom = src.bottom;
}
native_drawBitmap(mNativeCanvasWrapper, bitmap, left, top, right, bottom,
dst.left, dst.top, dst.right, dst.bottom, nativePaint, mScreenDensity,
bitmap.mDensity);
}显然呢,这里最终都是调用的native方法,这里我们就看这两个方法是怎么用的,具体里面参数的含义(其他几个drawBitmap方法本次暂不讨论)。
第一个方法,里面传入的是要绘制的bitmap,left,top,paint,看下注释:
/**
     * Draw the specified bitmap, with its top/left corner at (x,y), using
     * the specified paint, transformed by the current matrix.
     *
     * Note: if the paint contains a maskfilter that generates a mask which
     * extends beyond the bitmap's original width/height (e.g. BlurMaskFilter),
     * then the bitmap will be drawn as if it were in a Shader with CLAMP mode.
     * Thus the color outside of the original width/height will be the edge
     * color replicated.
     *
     * If the bitmap and canvas have different densities, this function
     * will take care of automatically scaling the bitmap to draw at the
     * same density as the canvas.
     *
     * @param bitmap The bitmap to be drawn
     * @param left   The position of the left side of the bitmap being drawn
     * @param top    The position of the top side of the bitmap being drawn
     * @param paint  The paint used to draw the bitmap (may be null)
     */
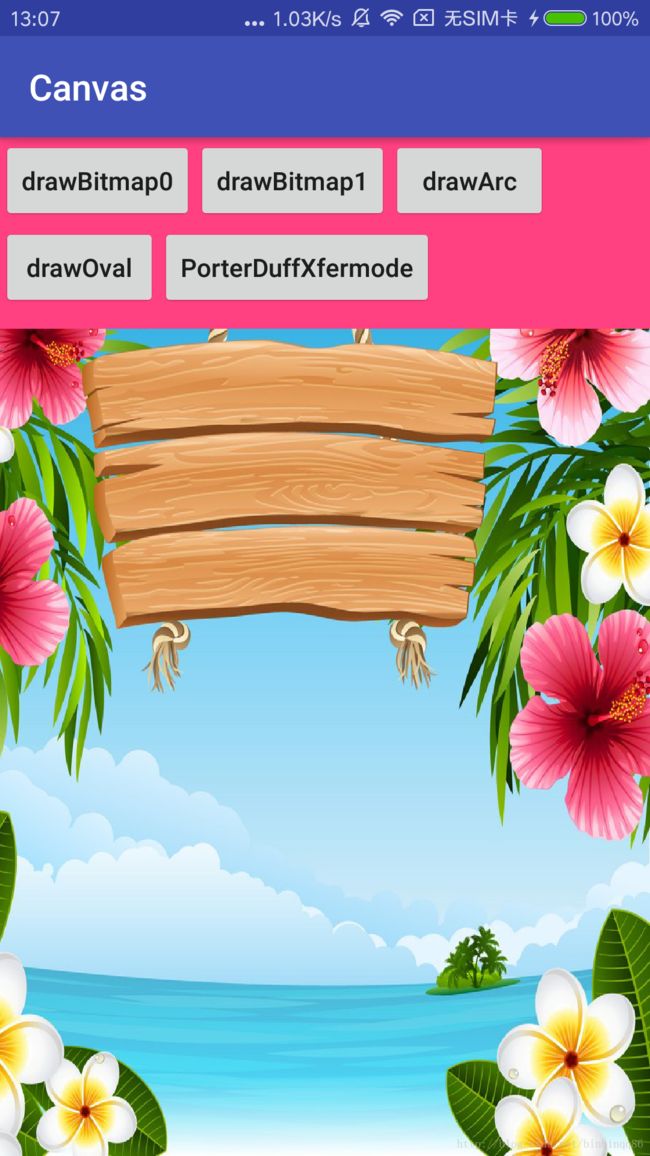
很明显,left和top就是我们要绘制的画布的x,y起始坐标,来看一下我们的效果图:(代码:canvas.drawBitmap(bitmap,0,0,mPaint);)
改变参数:canvas.drawBitmap(bitmap,50,50,mPaint);效果图:
可以看到绘制原点偏移了我们设置的距离,这就是这个方法的简单用法。下面来看一下第二个方法:
/**
     * Draw the specified bitmap, scaling/translating automatically to fill
     * the destination rectangle. If the source rectangle is not null, it
     * specifies the subset of the bitmap to draw.
     *
     * Note: if the paint contains a maskfilter that generates a mask which
     * extends beyond the bitmap's original width/height (e.g. BlurMaskFilter),
     * then the bitmap will be drawn as if it were in a Shader with CLAMP mode.
     * Thus the color outside of the original width/height will be the edge
     * color replicated.
     *
     * This function ignores the density associated with the bitmap.
     * This is because the source and destination rectangle coordinate
     * spaces are in their respective densities, so must already have the
     * appropriate scaling factor applied.
     *
     * @param bitmap The bitmap to be drawn
     * @param src    May be null. The subset of the bitmap to be drawn
     * @param dst    The rectangle that the bitmap will be scaled/translated
     *               to fit into
     * @param paint  May be null. The paint used to draw the bitmap
     */
这段注释的大致意思就是说绘制指定内容的bitmap在指定的画布。里面传递两个矩形,第一个src代表要绘制的bitmap的区域,可以为null,这个时候就是绘制整张图(可以从上面的源码中看出),第二个dst代表画板大小,下面我们看看具体效果:
这是绘制整张图到整个画布的效果:
Rect srcf=new Rect(0,0,bitmap.getWidth(),bitmap.getHeight());
RectF dstf=new RectF(0,0,width,height);
canvas.drawBitmap(bitmap,null,dstf,mPaint);
这是从图片100,100处开始绘制到整个画布的效果:
Rect srcf=new Rect(100,100,bitmap.getWidth(),bitmap.getHeight());
RectF dstf=new RectF(0,0,width,height);
canvas.drawBitmap(bitmap,null,dstf,mPaint);
这是从图片100,100处开始绘制到画布100,100处的效果:
Rect srcf=new Rect(100,100,bitmap.getWidth(),bitmap.getHeight());
RectF dstf=new RectF(100,100,width,height);
canvas.drawBitmap(bitmap,null,dstf,mPaint);
看了这些效果相信你对这个方法有了自己深刻的理解。下面我们来看下另外一个方法:drawArc。
/**
     * Draw the specified arc, which will be scaled to fit inside the
     * specified oval.
     *
     * If the start angle is negative or >= 360, the start angle is treated
     * as start angle modulo 360.
     *
     * If the sweep angle is >= 360, then the oval is drawn
     * completely. Note that this differs slightly from SkPath::arcTo, which
     * treats the sweep angle modulo 360. If the sweep angle is negative,
     * the sweep angle is treated as sweep angle modulo 360
     *
     * The arc is drawn clockwise. An angle of 0 degrees correspond to the
     * geometric angle of 0 degrees (3 o'clock on a watch.)
     *
     * @param oval       The bounds of oval used to define the shape and size
     *                   of the arc
     * @param startAngle Starting angle (in degrees) where the arc begins
     * @param sweepAngle Sweep angle (in degrees) measured clockwise
     * @param useCenter If true, include the center of the oval in the arc, and
                        close it if it is being stroked. This will draw a wedge
     * @param paint      The paint used to draw the arc
     */
    public void drawArc(@NonNull RectF oval, float startAngle, float sweepAngle, boolean useCenter,
            @NonNull Paint paint) {
        drawArc(oval.left, oval.top, oval.right, oval.bottom, startAngle, sweepAngle, useCenter,
                paint);
    }
这个方法在使用的时候也要注意,看参数和注释可以明白,里面分别是要绘制的圆弧的外接矩形,开始的角度,绘制扫过的角度,第三个暂时不说,最后一个就是画笔来,这里的注释写的很明白,圆弧是按照表盘的逻辑来绘制的,3点钟方向是0度,startAngle如果是负数或者>=360,则统一认为startAngle%360,sweepAngle如果>=360,则认为绘制整个360圆弧(这里与Path.arcTo方法不同的是,arcTo的sweepAngle会模360来处理最终结果),如果是负数则为sweepAngle%360。明白了这些,使用起来应该就随心所欲了,下面看效果:
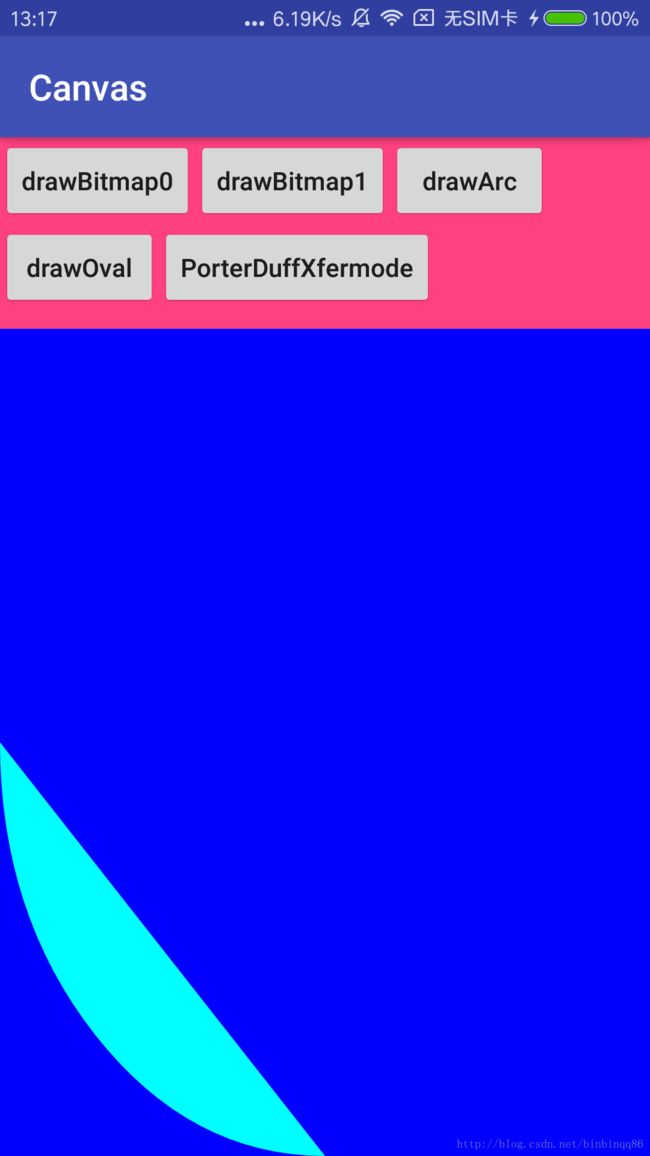
画布为画布大小,从90度开始,扫过90度
RectF rf=new RectF(0,0,width,height);
mPaint.setColor(Color.BLUE);
canvas.drawRect(rf,mPaint);
mPaint.setColor(Color.CYAN);
canvas.drawArc(rf,90,90,false,mPaint);
画布为画布四分之一大小,从90度开始,扫过90度,且useCenter为true
RectF rf=new RectF(0,0,width/2f,height)/2f;
mPaint.setColor(Color.BLUE);
canvas.drawRect(rf,mPaint);
mPaint.setColor(Color.CYAN);
canvas.drawArc(rf,90,90,true,mPaint);
看完这里相信你应该明白第三个参数useCenter是什么含义了吧。。。
画布为画布四分之一大小,从90度开始,扫过90度,且useCenter为true,这里可以让你更清楚的看到useCenter这个参数的作用:就是把圆心和圆弧起始和终止点连接起来。
RectF rf=new RectF(0,0,width/2f,height/2f);
mPaint.setColor(Color.BLUE);
canvas.drawRect(rf,mPaint);
mPaint.setColor(Color.CYAN);
mPaint.setStyle(Paint.Style.STROKE);
canvas.drawArc(rf,90,90,true,mPaint);
下面还有一个drawOval,这个也比较简单了,就是绘制椭圆,看一下代码和效果:
                RectF rf1=new RectF(0,0,width/2f,height/2f);
                mPaint.setColor(Color.BLUE);
                canvas.drawRect(rf1,mPaint);
                mPaint.setColor(Color.CYAN);
                canvas.drawOval(rf1,mPaint);
关于Canvas的绘制还有很多很多,这里就不一一展开了,只讲了使用时比较迷惑的几个函数,下面还有一个重要的概念,不过它是paint相关的:PorterDuffXfermode。看到这个长长的名字相信很多人就害怕了,其实这个类很有用,在做一些特殊效果的时候就会用到了,比如橡皮擦功能。这个类继承于Xfermode,里面有一个PorterDuff,这里面包含了具体的绘制模式,目前已经增加到18种了(原来16个)
/** [0, 0] */
        CLEAR       (0),
        /** [Sa, Sc] */
        SRC         (1),
        /** [Da, Dc] */
        DST         (2),
        /** [Sa + (1 - Sa)*Da, Rc = Sc + (1 - Sa)*Dc] */
        SRC_OVER    (3),
        /** [Sa + (1 - Sa)*Da, Rc = Dc + (1 - Da)*Sc] */
        DST_OVER    (4),
        /** [Sa * Da, Sc * Da] */
        SRC_IN      (5),
        /** [Sa * Da, Sa * Dc] */
        DST_IN      (6),
        /** [Sa * (1 - Da), Sc * (1 - Da)] */
        SRC_OUT     (7),
        /** [Da * (1 - Sa), Dc * (1 - Sa)] */
        DST_OUT     (8),
        /** [Da, Sc * Da + (1 - Sa) * Dc] */
        SRC_ATOP    (9),
        /** [Sa, Sa * Dc + Sc * (1 - Da)] */
        DST_ATOP    (10),
        /** [Sa + Da - 2 * Sa * Da, Sc * (1 - Da) + (1 - Sa) * Dc] */
        XOR         (11),
        /** [Sa + Da - Sa*Da,
             Sc*(1 - Da) + Dc*(1 - Sa) + min(Sc, Dc)] */
        DARKEN      (16),
        /** [Sa + Da - Sa*Da,
             Sc*(1 - Da) + Dc*(1 - Sa) + max(Sc, Dc)] */
        LIGHTEN     (17),
        /** [Sa * Da, Sc * Dc] */
        MULTIPLY    (13),
        /** [Sa + Da - Sa * Da, Sc + Dc - Sc * Dc] */
        SCREEN      (14),
        /** Saturate(S + D) */
        ADD         (12),
        OVERLAY     (15);
这里的具体的算法都是native层去做的,更详细的解释可以移步官网:
https://developer.android.google.cn/reference/android/graphics/PorterDuff.Mode.html
下面我们就来一探究竟,看看到底都是什么效果。
具体用法如下:
/**
     * 采用layer分层绘制的概念,把最终绘制的内容保存在新建的图层
     * @param canvas
     */
    private void type1(Canvas canvas) {
        int count=canvas.saveLayer(0,0,width,height,mPaint,Canvas.ALL_SAVE_FLAG);
        //绘制dst
        canvas.drawBitmap(bitmap,0,0,mPaint);

        //创建遮罩层bitmap(宽高覆盖整个绘制区域,这样clear模式直接清画布了)
        Bitmap bb=Bitmap.createBitmap(width,height, Bitmap.Config.ARGB_8888);
        Canvas cc=new Canvas(bb);
        mPaint.setColor(Color.YELLOW);
        cc.drawCircle(width/2f,height/2f,width/2f>height/2f?height/2f:width/2f,mPaint);

        //设置模式
        mPaint.setXfermode(new PorterDuffXfermode(xfermode));
        //绘制src
        canvas.drawBitmap(bb,0,0,mPaint);
        //还原
        mPaint.setXfermode(null);
        canvas.restoreToCount(count);
    }
我们也可以采用如下方式:
/**
     * 另外一种方案,不用saveLayer,把需要绘制的东西放在一张临时的bitmap中
     * @param canvas
     */
    private void type2(Canvas canvas) {
        //创建一张临时bitmap来存放最终要绘制的内容
        Bitmap bT=Bitmap.createBitmap(width,height, Bitmap.Config.ARGB_8888);
        Canvas cT=new Canvas(bT);
        //绘制dst
        cT.drawBitmap(bitmap,0,0,mPaint);

        //创建遮罩层bitmap(宽高覆盖整个绘制区域,这样clear模式直接清画布了)
        Bitmap bb=Bitmap.createBitmap(width,height, Bitmap.Config.ARGB_8888);
        Canvas cc=new Canvas(bb);
        mPaint.setColor(Color.YELLOW);
        cc.drawCircle(width/2f,height/2f,width/2f>height/2f?height/2f:width/2f,mPaint);

        //绘制src
        mPaint.setXfermode(new PorterDuffXfermode(xfermode));
        cT.drawBitmap(bb,0,0,mPaint);

        mPaint.setXfermode(null);
        //绘制最终内容
        canvas.drawBitmap(bT,0,0,mPaint);
    }
这两种方式原理都是一样的,就是把要最终绘制的东西临时保存到其他载体,当处理完这些内容后,一并绘制到Canvas上。下面我们来看一看18种具体效果:
可以看到,跟官网的效果是一致的,这样我们就可以实现我们自己想要的各种结果了,比如我们下一篇要讲的仿钉钉头像,就是用的里面的DST_IN,最后要说明一点:
//关闭硬件加速,否则clear,darken,lighten,overlay绘制不正常
setLayerType(View.LAYER_TYPE_SOFTWARE, null);
同样,最后源码奉上,有疑问的小伙伴可以在下面留言。


