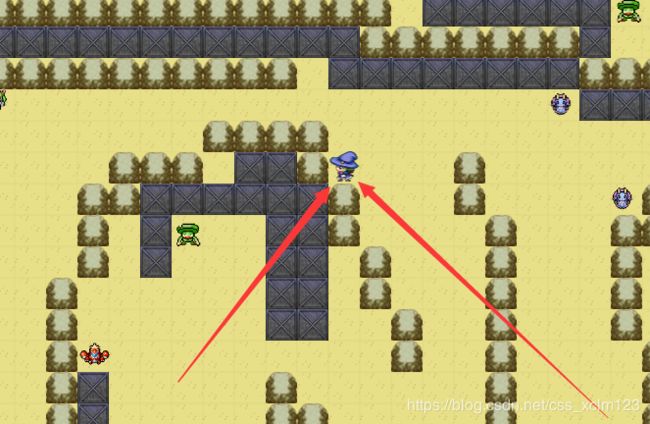
cocosCreator游戏实战之《炸弹人》(二)
上一篇已经把地图制作完并加载了,那么这一篇该让怪物和玩家入场了。在场景创建一个渲染节点,选择精灵,创建player。
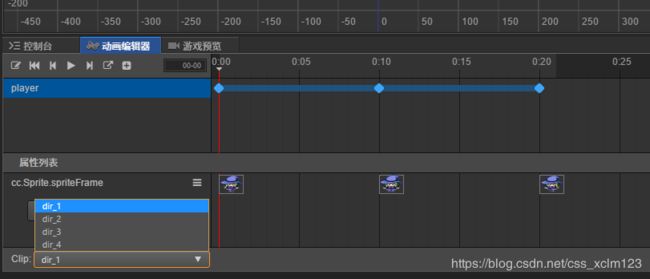
然后切到动画编辑器,增加4个帧动画(此处不多唠叨动画如何制作,百度一堆,官方还有视频教程)。
分别是上下左右行走时的动画,对了,读者没有图片资源的话可以自己上网找找类似的,也可以问笔者要。(但我也是上网随便拿了几张来用)动画做完后,在assert下新建release文件夹,把player精灵拖拽到此文件夹,成为预制。(同理制作怪物预制和炸弹预制)
怪物预制笔者并没有制作行走的动画,原因是种类太多,一个个制作要累死啊!笔者选择用代码循环做。在场景里新建monster.js脚本,然后打开monster预制,挂上去。先在monster里面声明一些属性。(这些属性很理所当然的应该有)
cc.Class({
    extends: cc.Component,

    properties: {
       _type:0,                         //类型
       speed:0,                         //移动速度
       dir:0,                           //移动方向
       mapPos:null,                     //在瓦片地图上的坐标
   }
});
然后在场景里创建一个空节点monsterMgr,并新建一个monsterMgr.js挂上去。
cc.Class({
    extends: cc.Component,

    properties: {
        monsterPre:{                            //怪物预制
            type:cc.Prefab,
            default:null
        },
        monsterFrameArr:{                       //怪物图片数组,因为预制就一个,怪物图片动态换
            type:[cc.SpriteFrame],
            default:[]
        },
        monsterAniFrame:{                       //plist文件
            type:cc.SpriteAtlas,
            default:null
        },
    }
});
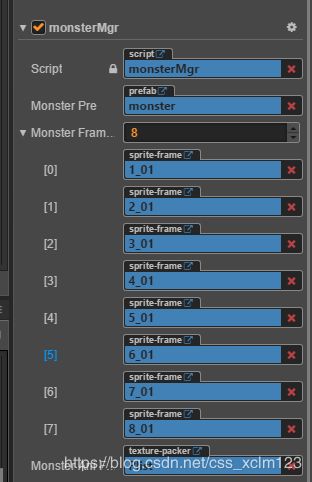
然后把需要的资源拖拽一下。
这里怪物的plist,笔者是找了一个,然后自己重命名了一下,方便以后代码循环创建。
总计有八种,也就是1_XX ~ 8_XX,这一点可以从上面的截图看出来。然后X_01 ~ X_04是一个方向的帧动画需要的图集(4张图一个方向帧动画)。然后在monster.js里增加函数:
createMonster:function(type,pos)
{
        //创建怪物
        let monster = cc.instantiate(this.monsterPre)
        monster.getComponent(cc.Sprite).spriteFrame = this.monsterFrameArr[type - 1]
        monster.setPosition(pos)
        this.map.node.addChild(monster)
        //帧动画赋值
        let ani = monster.addComponent(cc.Animation)
        for(let i = 1; i <= 4; i++)
        {
            ani.addClip(this.getMonsterMoveClip(type,i),("dir" + i))
        }
        let jsMonster = monster.getComponent("monster")
        jsMonster.mapPos = this.map.nodePosToMapPos(pos)
        jsMonster._type = type
        let randNum=Number((Math.random()*10).toFixed(0))
        //随机方向
        jsMonster.dir=(randNum%4)+1
        jsMonster.map = this.map
}
看到了getMonsterMoveClip?这就是动画组件了。
 getMonsterMoveClip:function(type,dir)
    {
        let temp = new Array()
        let began = 1
        switch(dir)
        {
            case dir_up_down:
            {
                began = 1
                break
            }
            case dir_down_up:
            {
                began = 13
                break
            }
            case dir_left_right:
            {
                began = 9
                break
            }
            case dir_right_left:
            {
                began = 5
                break
            }
        }
        for(let i = began; i < began + 4; i++)
        {
            let str = type + "_"
            str = i < 10 ? str + "0" + i : str + i
            let frame = this.monsterAniFrame.getSpriteFrame(str)
            temp[temp.length] = frame         //这里要确保每个frame的值是成功获取到的,笔者之前只获取到第一个,导致动画闪烁
        }
        let clip = cc.AnimationClip.createWithSpriteFrames(temp,10)       //参数1是祯数组,参数2是帧率,帧率越大,持续时间越短
        clip.speed = 1
        clip.wrapMode = cc.WrapMode.Loop
        clip.name = "dir"+dir
        return clip
    },
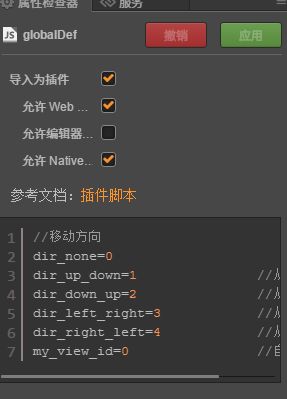
dir_up_down是预先定义好的枚举变量在globalDef.js里。读者还没有,可以新建globalDef.js文件:
//移动方向
dir_none=0
dir_up_down=1               //从上往下移动
dir_down_up=2               //从下往上移动
dir_left_right=3            //从左往右移动
dir_right_left=4            //从右往左移动
my_view_id=0                //自己视角
在cocosCreator里,选中它,然后勾选为插件(勾选插件能使它被全局访问,而无需requere包含这个脚本才能用)。
细心的读者可以发现上面的代码里出现了this.map.nodePosToMapPos(pos),好吧我又乱入了一句代码。那么我们新建一个map.js脚本,并把它挂在tiled map节点上。
cc.Class({
    extends: cc.Component,

    properties: {
        monsterMgr:{
            type:cc.Node,
            default:null
        },
        playerPre:{
            type:cc.Prefab,
            default:null
        },
    }

    //将节点坐标转换为地图中的横坐标与纵坐标
    nodePosToMapPos:function(pos)
    {
        let _pos = {}
        _pos.x = Math.floor(pos.x / this.ttSize.width)
        _pos.y = Math.floor((this.mapSize.height * this.ttSize.height - pos.y) / this.ttSize.height)
        return _pos
    },

    //将地图中的横坐标与纵坐标转换为节点坐标
    mapPosToNodePos:function(pos)
    {
        let _pos = {}
        _pos.x = Math.floor(pos.x * this.ttSize.width) + this.ttSize.width / 2
        _pos.y = Math.floor((this.mapSize.height - pos.y) * this.ttSize.height) - this.ttSize.height / 2
        return _pos
    },
});
然后在编辑器里拖拽一下。
在monsterMgr里面增加一个map声明
cc.Class({
    extends: cc.Component,

    properties: {
        monsterPre:{                            //怪物预制
            type:cc.Prefab,
            default:null
        },
        // ... 省略了之前的一些代码
        map:null
    },
    // ...省略了之前的一些代码
});
同样,在monster.js里也增加一个map声明。
在map.js里面增加一个初始化函数。
    //初始化
    initMap:function()
    {
        this.tiledMap = this.node.getComponent(cc.TiledMap)               //地图
        this.ttSize = this.tiledMap.getTileSize()                         //一块瓦片大小
        this.mapSize = this.tiledMap.getMapSize()                         //地图大小,注意它的width和height指的是由几片瓦片构成哦!
        this.boxLayer = this.tiledMap.getLayer("box")                     //箱子层
        this.stoneLayer = this.tiledMap.getLayer("stone")                 //石头层
        this.flootLayer = this.tiledMap.getLayer("floot")                 //地板层

        let jsMonsterMgr = this.monsterMgr.getComponent("monsterMgr")
        jsMonsterMgr.map = this
        //初始化怪物
        this.monsterObjLayer = this.tiledMap.getObjectGroup("monster")    //怪物对象层
        let monsterObjs = this.monsterObjLayer.getObjects()               //怪物对象数组
        for(let i = 0;i < monsterObjs.length; i++)
        {
            let type = (Math.random() * 10).toFixed(0) % (jsMonsterMgr.monsterFrameArr.length) + 1
            let pos = cc.p(Number(monsterObjs[i].x) , Number(monsterObjs[i].y))
            jsMonsterMgr.createMonster(type,pos)
        }
    },
然后在map.js里的start函数里面调用一下它。
    start () {
        this.initMap()
    },
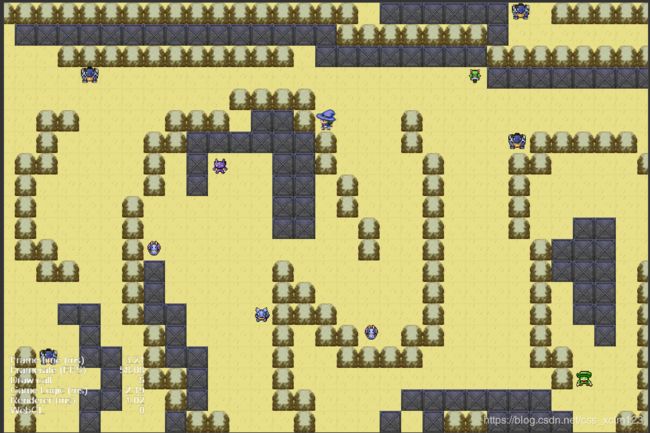
运行一下,现在怪物应该已经出来了。
接下来新建player.js脚本,打开player预制挂上去。
cc.Class({
    extends: cc.Component,

    properties: {
       dir:0,                           //移动的方向
       mapPos:null,                     //在地图上的位置
       bKeepMove:false,                 //是否保持移动,你可能希望按住方向键,玩家一直在走而不用多次点方向键。
       bMoving:false,                   //是否正在移动
       map:null,                        //地图引用
       speed:0,                         //速度
       currAniName:""                   //当前移动播放的帧动画名
    },
});
在map.js中增加createPlayer函数:
    //创建玩家
    createPlayer:function()
    {
        this.playerObjLayer = this.tiledMap.getObjectGroup("player")    //玩家对象层
        let playerObjs = this.playerObjLayer.getObjects()                //玩家对象数组
        this.playerArr = new Array()
        for(let i = 0;i < playerObjs.length; i++)
        {
            let player = cc.instantiate(this.playerPre)
            let pos = cc.p(Number(playerObjs[i].x) , Number(playerObjs[i].y))
            player.setPosition(pos)
            this.node.addChild(player)
            this.playerArr[i] = player                      //多玩家数组(目前就一个玩家),这是后面笔者可能会制作成网络游戏用的,读者可以不必理会
            if(i == my_view_id)
            {
                let jsPlayer = player.getComponent("player")
                jsPlayer.mapPos = this.nodePosToMapPos(pos)
                jsPlayer.map = this
            }
        }
    },
然后在initMap里调用一下:
    initMap:function()
    {
        this.tiledMap = this.node.getComponent(cc.TiledMap)               //地图
        // ... 省略了一些代码
        //创建玩家
        this.createPlayer()
    },
接下来运行可以看到玩家也出现了。
下一篇,笔者将会让怪物动起来。

