Android NDK Bionic API篇(三)
Android NDK Bionic API篇
前言
本篇重点学习一下NDK的核心开发库Bionic API库,通过Bionic API我们可以开发各种各样的原生功能,真正发挥原生开发的强大功能。
Bionic基础
Bionic是什么
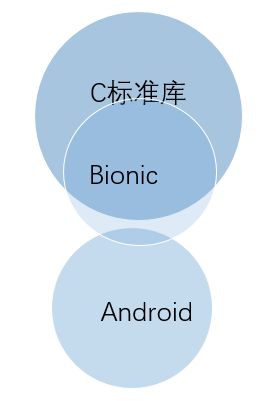
Bionic是Android平台为了使用C/C++进行原生应用程序开发所有提供的POSIX标准C库。它是Google为Android操作系统提供的BSD标准C库的衍生库。同时Bionic是专门为移动计算而精心设计的,针对移动设备上有限的CPU周期和可用内存进行了裁剪以提高工作效率。
Bionic兼容性怎么样
Bionic尽管是C标准库,但是它不以任何方式与其它C库二进制兼容。也就是说Bionic和其它C库不兼容,无法进行交叉编译和相互引用。
Bionic提供什么功能
Bionic提供了C标准库,类型定义,函数和少数Android特有的特性。
主要功能可以概括如下:
1. 内存管理
2. 文件输入输出
3. 字符串操作
4. 数学函数
5. 日期和时间
6. 进程控制
7. 信号处理
8. 网络套接字
9. 多线程
10. 用户和组
11. 系统配置
12. 命名服务切换
Bionic还缺什么功能
Bionic是专门为移动计算而精心设计的,所以Bionic不会支持所有C标准库函数。也就是说它是C标准库的一个子集。
如图
Bionic内存管理
内存分配方式
静态内存分配
适用于在代码中定义的静态变量和全局变量,静态分配在应用程序启动时自动发生。
自动内存分配
适用于函数参数和函数内的局部变量,自动内存分配在函数调用时和函数内部有效,在函数使用完会自动释放。
动态内存分配
动态分配是在程序运行时进行的,取决于当时的内存环境,如果需要的内存较大,可能会出现分配不成功的情况。
C语言内存管理
C语言不提供对内置动态内存管理的支持,不像C++,可以使用new关键字来动态生成一个对象。C语言必须使用C库提供的函数来使用动态内存。
C语言使用内存管理函数,需要包括stdlib.h头文件
C语言动态分配内存
C语言使用malloc函数来动态分配内存,malloc函数原型如下:
void* malloc(size_tbyte_count);
示例如下:
const char *str2="hello world";
char *str=(char*)malloc(strlen(str2));
strcpy(str,str2);
C语言调整内存大小
C语言使用realloc函数来调整内存大小,realloc函数原型如下:
void* realloc(void* p, size_t byte_count)
示例如下:
const char *str2="hello world";
int len=strlen(str2);
char *str=(char*)malloc(strlen(str2));
strcpy(str,str2);
str=(char*)realloc(str,len+4);
str=(char*)realloc(str,len-4);
C语言动态释放内存
C语言使用free函数来释放用malloc,realloc函数分配的内存,不能使用free函数释放C++通过new关键字分配的内存。
free函数原型如下:
void free(void* p);
示例如下:
const char *str2="hello world";
int len=strlen(str2);
char *str=(char*)malloc(strlen(str2));
strcpy(str,str2);
free(str);
C++语言内存管理
C++提供了对动态内存管理的内置支持,可以通过new和delete关键字来管理动态内存。
在C++中,强烈建议使用new和delete关键字来管理动态内存,因为new关键字会调用C++类的构造函数,delete关键字同样会调用C++类的析构函数。而C语言的内存分配函数则无法实现类似的功能。
C++动态内存分配
std::string *str3=new std::string("hello world");
printf(str3->c_str());
C++释放动态内存
std::string *str3=new std::string("hello world");
printf(str3->c_str());
delete str3;

int *array=new int32_t[10];
for(int i=0;i<10;i++)
{
    array[i]=i;
}
delete[] array;
Bionic I/O
需要引入stdio.h头文件
Bionic提供的I/O函数
| fopen |
打开文件流 |
| fread |
从文件流里面读取数据 |
| fwrite |
往文件流里面写入数据 |
| fprintf |
把格式化的内容写入文件流 |
| fscanf |
从文件流里面读取格式化的内容 |
| fgets |
从文件流里面读取一行文本 |
| fputs |
把以换行符结尾的文本写入文件流 |
| fgetc |
从文件流中读取一个字符 |
| fputc |
把一个字符写入到文件流 |
| fseek |
移动文件指针 |
| ftell |
返回当前文件指针的位置 |
| feof |
判断文件指针是否已经到达文件结尾 |
| ferror |
判断文件流是否有错误 |
| fflush |
把文件流中的数据刷新到文件中 |
| fclose |
关闭文件流 |
一个读取文件的示例:
void readFile(const char * filePath){
    if(filePath==NULL) return;
    FILE *file=fopen(filePath,"r");
    fseek(file,SEEK_END);
    long fileSize=ftell(file);
    fseek(file,SEEK_SET);
    char *data=new char[fileSize];
    fread(data, sizeof(char),fileSize/sizeof(char),file);
    fclose(file);
}
一个写入文件的示例:
void writeFile(const char * filePath){
    if(filePath==NULL) return;
    FILE *file=fopen(filePath,"w");
    const char *data="hello world";
    int len=strlen(data);
    fwrite(data, sizeof(char),len,file);
    fflush(file);
    fclose(file);
}
Bionic与进程交互
Bionic允许原生代码启动并与其它进行交互。原生代码可以执行shell命令,也可以在后台启动一个进程并与之通信。
需要引入stdlib.h头文件
Bionic执行shell命令
用system函数向shell传递命令
int result=system("mkdir /data/data/com.kgdwbb.jnidemo/files/file1");
if(result==-1 || result==127){
    //shell 命令执行失败
}
Bionic与子进程通信
system函数不提供向进程发送和接收命令的通道,我们需要使用popen函数,popen函数的原型如下:
FILE *popen(const char * cmd, const char * type);
第一个参数是要执行的命令,比如向shell传递”ls”命令
第二个参数是打开通道的方式,比如“r”读取,“w”写入
示例如下:
FILE *file=popen("ls","r");
if(file==NULL) return;
char *line=new char[1024];
while (fgets(line,1024,file)!=NULL){
    //do something
}
fclose(file);
Bionic访问系统配置
通过Bionic提供的API我们可以很方便的访问Android系统属性。
需要引入的头文件是:#include
访问系统属性的函数表
int __system_property_get(const char *name, char *value); |
获取系统属性 |
int __system_property_set(const char *key, const char *value); |
改变系统属性 |
int __system_property_read(const prop_info *pi, char *name, char *value); |
读取系统属性 |
const prop_info *__system_property_find(const char *name); |
查找系统属性 |
示例如下:
const char *propName="ro.product.model";
char *value=new char;
__system_property_get(propName,value);

__system_property_set(propName,"newModel");

const prop_info *info= __system_property_find(propName);
char *name=new char;
char *value2=new char;
__system_property_read(info,name,value2);
Bionic API访问用户和组数组
需要引入的头文件是:#include
获取应用程序的用户ID和组ID
getuid函数用来获取用户ID
getgid函数用来获取用户的组ID
示例如下:
uid_t uid=getuid();

gid_t gid=getgid();
获取安装应用程序的用户名
getlogin函数用来获取安装应用程序的用户名
示例如下:
char *userName=getlogin();
结束语
本篇重点介绍了Bionic库相关的基础知识,相信大家学完这一篇,对Bionic库应该有比较深刻的认识。当然还有一些Bionic库的特性没有介绍,后面几篇文章会重点介绍。
