UE4:快速入门蓝图(Blueprint)的方法之一
UE4:快速入门蓝图(Blueprint)的方法之一
前言:
不久前因为工作的需要,学习了一下UE4的蓝图,发现并没有想象中的那么难以入门。今天把入门的方法和大家分享:D
适读人群:
1 有一定编程基础,对游戏引擎有一些了解和掌握,如会用u3d开发小游戏
2 没用过蓝图但是感兴趣的爱好者
官方的案例:
https://docs.unrealengine.com/en-US/Engine/Blueprints/QuickStart
以上的链接给出的案例是一个非常好的快速入门实例,根据实例给出的步骤一步一步做完,就可以基本入门UE4的蓝图逻辑了。文档中给出的步骤1-6本文不再赘述。针对7给出的几个扩展问题,本文给出一些思路,但是并不一定我这样做就很对,只是一个初学者的思考,也欢迎大家来批评指正哈~
案例中的步骤7中的几个扩展思考题目的翻译如下:
1. Play a sound when your Character is launched using an Audio Component.
当你的角色被发射的时候,使用Audio Componet(声音组件)来播放声音。
2. Create a variable to store your Launch Velocity, and expose it so you can set it on each copy in the level.
创建一个变量来存储你的发射速度(Lauch Velocity),并且暴露出它来让你可以在当前关卡中对每一个副本进行设置。
3. Add a Particle System Component to your Blueprint and use one of the Particle Systems from the Starter Content
在你的蓝图中添加一个粒子系统组件(Particle System Component),并且从初学者内容(Starter Content)中选择一个粒子系统。
4. Add an Arrow Component and use it's rotation to define the direction to launch the character.
添加一个箭头组件(Arrow Component),使用它的旋转参数来定义角色发射的方向。
5. Using Timelines, add some animation to the Box Mesh to represent it launching the character.
使用时间线(Timelines),在盒子(Box Mesh)上添加一些代表发射角色的动画。
中文:http://api.unrealengine.com/CHN/Engine/Blueprints/QuickStart/7/index.html
下面根据每个问题来进行一一的解答:
1. Play a sound when your Character is launched using an Audio Component.
当你的角色被发射的时候,使用Audio Componet(声音组件)来播放声音。
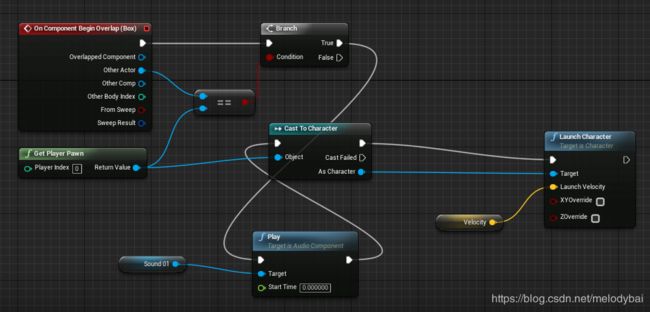
步骤6给出的最终蓝图中,在分支(Branch)节点给出的True接口处连接了Cast To Character,然后再Launch Character上面定义了角色接触踏板后给出的向上速度,因此,要添加的Audio Componet要和Cast To Character串联
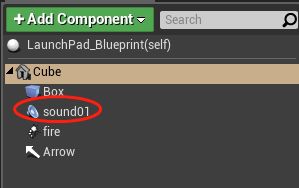
添加一个声音组件,并命名为sound01,
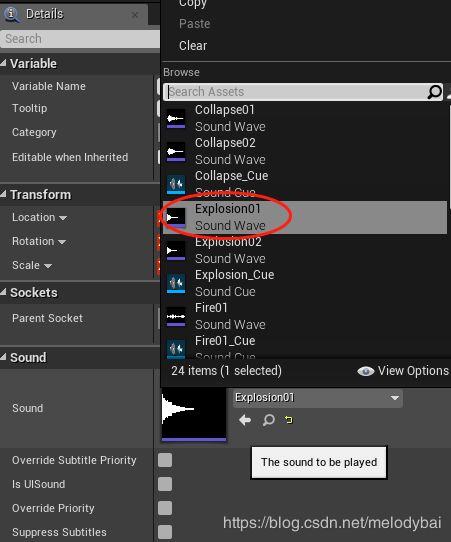
给sound1的sound属性里面定义一个声音文件
在蓝图中创建一个声音组件的Play函数,并在target上连上Sound01组件,定义要播放的声音,按下图所示连好;
编译运行程序的时候发现初始化的时候所有的launchpad都播放声音,因此需要对sound1的参数进行调整,去掉 Auto Activate的勾,再次编译运行,就不会有一开始的炸裂声了。
【另一种声音初始化的方法】,刚开始接触Blueprint发现每个组件都有好多参数,当时没找到初始自动播放的选项,所以自己做了一个初始化停止播放的功能,也给大家展示一下:
2. Create a variable to store your Launch Velocity, and expose it so you can set it on each copy in the level.
创建一个变量来存储你的发射速度(Lauch Velocity),并且暴露出它来让你可以在当前关卡中对每一个副本进行设置。
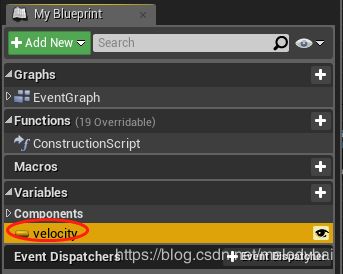
创建一个变量,并命名为Velocity,并单击右侧的显示按钮,默认为闭眼,单击让它睁眼:
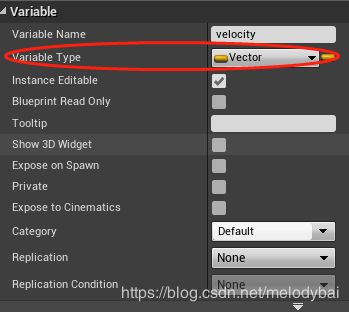
然后选择变量的类型为Vector
把变量velocity连在Launch Character函数的Launch Velocity上:
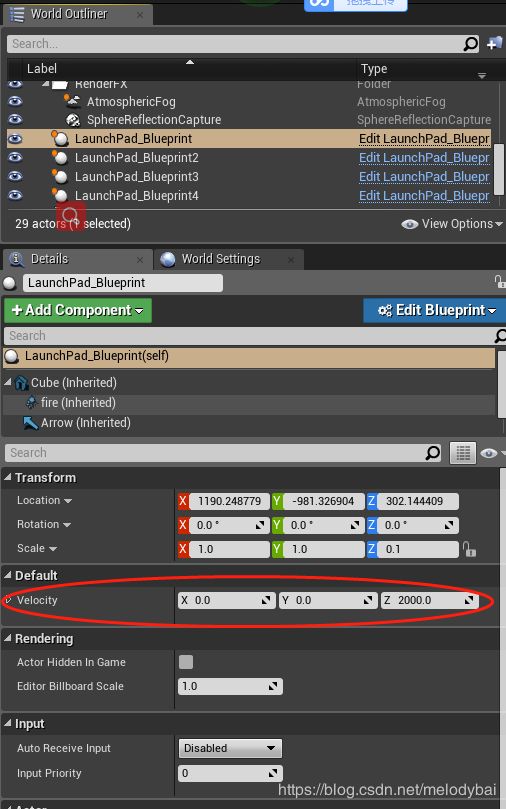
编译关闭蓝图编辑窗口,在主界面的右侧单击任一launchpad实例,可以看到default下面有Velocity的属性,用户可以在此编辑,这个方法很实用;
3. Add a Particle System Component to your Blueprint and use one of the Particle Systems from the Starter Content
在你的蓝图中添加一个粒子系统组件(Particle System Component),并且从初学者内容(Starter Content)中选择一个粒子系统。
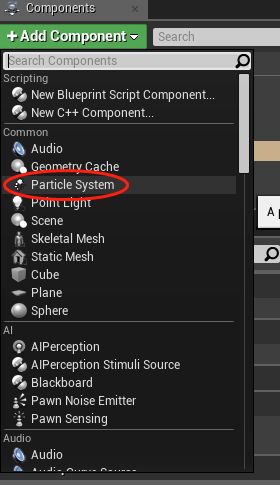
在蓝图编辑窗口里面添加一个粒子系统组件:
其他的步骤可以参考添加声音组件的方法,这里不再赘述。
4. Add an Arrow Component and use it's rotation to define the direction to launch the character.
添加一个箭头组件(Arrow Component),使用它的旋转参数来定义角色发射的方向。
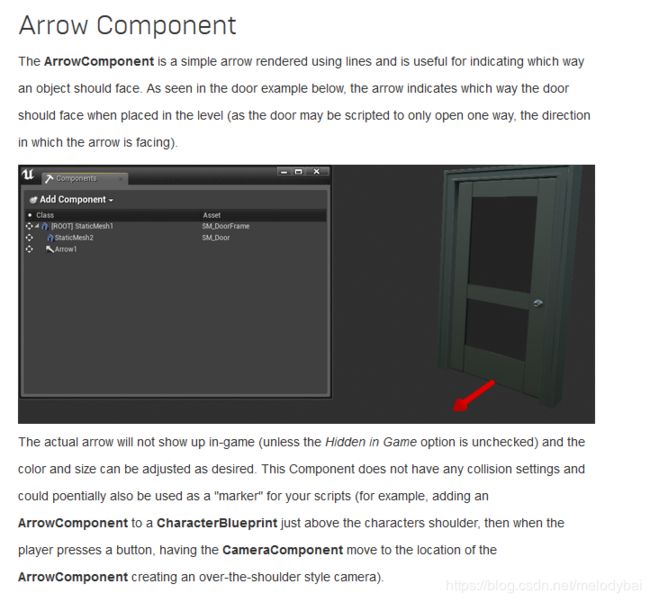
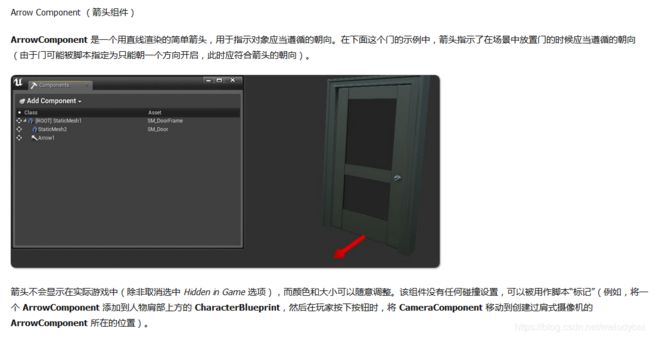
单击原教程里面的Arrow Componet链接,可以大概了解箭头组件的用法:
(网址:https://docs.unrealengine.com/en-us/Engine/Components/Shapes)
中文:http://api.unrealengine.com/CHN/Engine/Components/Shapes/index.html
5. Using Timelines, add some animation to the Box Mesh to represent it launching the character.
使用时间线(Timelines),在盒子(Box Mesh)上添加一些代表发射角色的动画。
官方给出很好的学习时间线的教程和案例可以参考,
英文:https://docs.unrealengine.com/en-us/Engine/Blueprints/UserGuide/Timelines
中文:http://api.unrealengine.com/CHN/Engine/Blueprints/UserGuide/Timelines/index.html
大家可以根据兴趣和需求进行学习,本文不再赘述过程。
总结:
官方的快速入门还是很实用的,大家可以多看看官网的案例,跟着做一做,入门不会很难。
如果 有任何疑问欢迎给我邮件:[email protected] 或者留言

