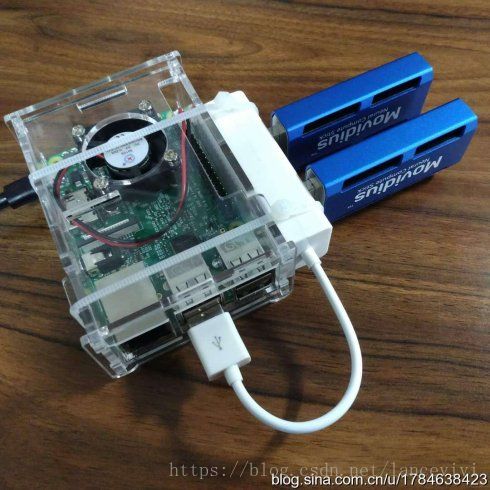
搭配Movidius神经计算棒的树莓派3B安装笔记
1、安装树莓派系统
要使用Movidius,树莓派需要使用最新版的Raspbian-Stretch系统,到树莓派官网下载img映像后,使用适当的烧录工具(USB Image Tool)烧录到TF卡中,用于Movidius的树莓派系统的TF卡最小需要16G。不要使用8G的卡,分分钟就用完剩余空间了。
http://director.downloads.raspberrypi.org/raspbian/images/raspbian-2018-03-14/2018-03-13-raspbian-stretch.zip
树莓派系统安装好后,可以进入系统修改Raspberry Pi Configuration来修改以下几个参数:
a、打开VNC,使得能通过外部电脑vnc连接树莓派
b、打开Camara
c、打开Remote GPIO
d、设置Resolution,调整到外部电脑显示器适配的分辨率,比如DMT82 1920x1080
e、修改树莓派系统名字,只是为了方便我们自己识别
f、树莓派默认用户名为pi,密码为raspberry,可以修改为自己需要的密码
查看一下本树莓派的ip地址,方便vnc远程连接。
重启树莓派系统后,使用PC上安装的VNC Viewer来远程连接树莓派。
2、更新apt-get和更新系统
sudo apt-get update
sudo apt-get upgrade
3、在适当目录下创建一个自己的工作目录(这里用根目录下的lance目录作为工作目录)
cd /
sudo mkdir lance
4、在工作目录下git Movidius的ncsdk和ncappzoo
cd /lance
sudo git clone https://github.com/movidius/ncsdk.git
sudo git clone https://github.com/movidius/ncappzoo.git
补充:有时候git clone会慢得出奇,ncsdk百来兆的内容会下载一整天,这时候可以修改/etc/hosts文件,在其中增加github的内容:
# GitHub Start
192.30.253.112 github.com
192.30.253.119 gist.github.com
151.101.100.133 assets-cdn.github.com
151.101.100.133 raw.githubusercontent.com
151.101.100.133 gist.githubusercontent.com
151.101.100.133 cloud.githubusercontent.com
151.101.100.133 camo.githubusercontent.com
151.101.100.133 avatars0.githubusercontent.com
151.101.100.133 avatars1.githubusercontent.com
151.101.100.133 avatars2.githubusercontent.com
151.101.100.133 avatars3.githubusercontent.com
151.101.100.133 avatars4.githubusercontent.com
151.101.100.133 avatars5.githubusercontent.com
151.101.100.133 avatars6.githubusercontent.com
151.101.100.133 avatars7.githubusercontent.com
151.101.100.133 avatars8.githubusercontent.com
# GitHub End
这样git起来就会快一点。
5、安装ncsdk
cd /lance/ncsdk
sudo make install
到此为止,树莓派系统和ncsdk以及官方范例库ncappzoo都已经安装好,可以开始测试设备了。
6、在树莓派usb口中插入Movidius NCS(神经计算棒)我们这里用两根来测试一下ncsdk和ncs设备是否正常
cd /lance/ncappzoo/apps/hello_ncs_py
在这个目录下创建一个Python文件multi_ncs.py,内容如下:
#! /usr/bin/env python3
# Copyright(c) 2017 Intel Corporation.
# License: MIT See LICENSE file in root directory.
# Python script to open and close a single NCS device
import mvnc.mvncapi as fx
# main entry point for the program
def main():
    # set the logging level for the NC API
    fx.SetGlobalOption(fx.GlobalOption.LOG_LEVEL, 0)
    # get a list of names for all the devices plugged into the system
    ncs_names = fx.EnumerateDevices()
    if (len(ncs_names) < 1):
        print("Error - no NCS devices detected, verify an NCS device is connected.")
        quit()
    else:
        print("We have %d NCS devices!"%len(ncs_names))
    dev = [0 for x in range(len(ncs_names))]
    for i in range (len(ncs_names)):
        dev[i] = fx.Device(ncs_names[i])
        try:
            dev[i].OpenDevice()
        except:
            print("Error - Could not open the NO.%d NCS device."%i)
            quit()
        print("Hello NCS! The NO.%d device opened normally."%i)
        try:
            dev[i].CloseDevice()
        except:
            print("Error - could not close the NO.%d NCS device."%i)
            quit()
        print("Goodbye NCS! The NO.%d device closed normally."%i)
        print("The NO.%d NCS device working."%i)
# Initial here:
if __name__=="__main__":
main()We have 2 NCS devices!
Hello NCS! The NO.0 device opened normally.
Goodbye NCS! The NO.0 device closed normally.
The NO.0 NCS device working.
Hello NCS! The NO.1 device opened normally.
Goodbye NCS! The NO.1 device closed normally.
The NO.1 NCS device working.
7、安装OpenCV3.3.0,由于ncappzoo中的范例需要用到的opencv版本是3.3的,所以我们安装这个版本
cd /lance
安装依赖包:
sudo apt-get update -y && sudo apt-get upgrade -y
sudo apt-get install -y build-essential cmake pkg-config
sudo apt-get install -y libjpeg-dev libtiff5-dev libjasper-dev libpng12-dev
sudo apt-get install -y libavcodec-dev libavformat-dev libswscale-dev libv4l-dev
sudo apt-get install -y libxvidcore-dev libx264-dev
sudo apt-get install -y libgtk2.0-dev libgtk-3-dev
sudo apt-get install -y libatlas-base-dev gfortran
sudo apt-get install -y python2.7-dev python3-dev
下载opencv3.3并解压到工作目录:
cd /lance
wget -O opencv.zip https://github.com/Itseez/opencv/archive/3.3.0.zip
unzip opencv.zip
wget -O opencv_contrib.zip https://github.com/Itseez/opencv_contrib/archive/3.3.0.zip
unzip opencv_contrib.zip
安装opencv
cd /lance/opencv-3.3.0/
mkdir build
cd build
cmake -D CMAKE_BUILD_TYPE=RELEASE \
-D CMAKE_INSTALL_PREFIX=/usr/local \
-D INSTALL_PYTHON_EXAMPLES=OFF \
-D WITH_V4L=ON \
-D BUILD_opencv_cnn_3dobj=OFF \
-D BUILD_opencv_dnn_modern=OFF \
-D OPENCV_EXTRA_MODULES_PATH=/lance/opencv_contrib-3.3.0/modules \
-D BUILD_EXAMPLES=OFF ..
make
sudo make install
sudo ldconfig
8、我们再来试一个ncappzoo里面的TinyYolo神经网络的例子
cd /lance/ncappzoo/caffe/TinyYolo
make profile
make compile
make run_py
好了,如果每一步中,屏幕上打印出来的信息中没有错误,并且最后能看到识别信息(一张图片上框住的识别出来的目标物体),那么代表已经能用这个树莓派上安装的ncs进行预测工作了。接下来我们就可以进行更复杂的Object Detection工作了。
9、备份系统
关闭树莓派,取出TF卡,使用烧录工具(USB Image Tool)备份此TF卡,以备后面系统被折腾坏了的话,可以迅速恢复。
