Redis复制的高可用---Redis Sentinel:哨兵
Redis的主从复制可用解决主从备份,容量瓶颈,单点故障等问题,还可用实现读写分离提升QPS。
但是当主从节点发生故障时,需要我们手动的进行故障转移,比如主节点变得不可用时,我们需要选择新的主节点,修改其他节点的主节点,同时还要通知客户端主节点的变化等等一系列的操作,这个手动故障转移的过程耗时耗力,所以Redis官方提出了一种高可用的复制策略–Redis Sentinel,用来解决Redis主从复制时的自动故障转移。
本文是我的Redis Sentinel学习笔记,推荐学习慕课实战《redis从入门到高可用》课程,以及多多查看官方文档。
—–kayfen
以下是参考文档:
Redis sentinel英文官方文档
https://redis.io/topics/sentinel
Redis sentinel中文翻译文档
http://www.redis.cn/topics/sentinel.html
1.Redis Sentinel配置
主从配置
在一台机器上模拟,ip都是127.0.0.1 ,主节点端口 7000,从节点端口 7001、 7002
最基本配置(7000端口示例)
port 7000
daemonize yes
pidfile /var/run/redis-7000.pid
logfile "7000.log"
dir /usr/local/redis/data在7001和7002配置文件添加slaveof 127.0.0.1 7000成为从节点
开启redis服务
配置 redis-sentinel
来看一下redis提供的默认开启的配置(该文件在redis安装目录下)
#sentinel.conf 默认开启的配置
port 26379 #默认端口
dir /tmp   #工作目录
logfile "${port}.log"
sentinel monitor mastername ip port quorum  #主节点名称 ip 端口 quorum:判定master失效的sentinel个数
sentinel down-after-milliseconds mymaster 30000 #指定Sentinel 认为服务器已经断线所需的毫秒数
sentinel parallel-syncs mymaster 1 #指定了在执行故障转移时, 最多可以有多少个从服务器同时对新的主服务器进行同步, 这个数字越小, 完成故障转移所需的时间就越长
sentinel failover-timeout mymaster 180000 #故障转移超时时间
将默认配置文件复制一份,配置我们的redis-sentinel-26379.conf
port 26379
logfile "26379.log"
dir "/usr/local/redis/data"
sentinel monitor mymaster 127.0.0.1 7000 2
sentinel down-after-milliseconds mymaster 30000
sentinel parallel-syncs mymaster 1
sentinel failover-timeout mymaster 180000
启动
[root@localhost config]# redis-sentinel redis-sentinel-26379.conf
复制26379的配置,修改port,建立26380,26381另外2个sentinel配置,并启动
[root@localhost config]# redis-sentinel redis-sentinel-26380.conf
[root@localhost config]# redis-sentinel redis-sentinel-26381.conf
启动sentinel之后,sentinel互相发现和发现主从节点等,会重写配置,查看配置改变:
[root@localhost config]# cat redis-sentinel-26379.conf
port 26379
daemonize yes
dir "/usr/local/redis/data"
logfile "26379.log"
sentinel myid cd8c908d92762884f42482260f61dfdf25df0c90
sentinel monitor mymaster 127.0.0.1 7000 2
sentinel config-epoch mymaster 0
sentinel leader-epoch mymaster 0
# Generated by CONFIG REWRITE
sentinel known-slave mymaster 127.0.0.1 7001
sentinel known-slave mymaster 127.0.0.1 7002
sentinel current-epoch 0
通过查看进程可用看到都启动起来了

使用redis-cli -p port info命令查看节点信息:
redis-cli -p 26379 info
redis-cli -p 26380 info
redis-cli -p 26381 info
在其中可以看到Sentinel的描述,都可以看到有3个sentinel,3个sentinel之间可用互相感知,此时主redis节点为7000端口

2.客户端对Redis Sentinel的连接
以下采用Java的redis客户端Jedis测试
Jedis客户端测试 Redis Sentinel自动故障转移:
package com.kay;
import org.slf4j.Logger;
import org.slf4j.LoggerFactory;
import redis.clients.jedis.Jedis;
import redis.clients.jedis.JedisSentinelPool;
import java.util.HashSet;
import java.util.Random;
import java.util.Set;
import java.util.concurrent.TimeUnit;

/**
 * Created by kay.
 */
public class RedisSentinelTest {

    private static final Logger logger = LoggerFactory.getLogger(RedisSentinelTest.class);

    public static void main(String[] args) {
        String masterName = "mymaster";
        Set sentinelSet = new HashSet<>();
        sentinelSet.add("172.16.1.114:26379"); //注意,若是本机测试此处为 127.0.0.1
        sentinelSet.add("172.16.1.114:26380"); //上面的配置文件都是对本地配置,我这里是虚拟机
        sentinelSet.add("172.16.1.114:26381");
        JedisSentinelPool jedisSentinelPool = new JedisSentinelPool(masterName, sentinelSet);
        int counter = 1;
        while (true) {
            Jedis jedis = null;
            counter++;
            try {
                jedis = jedisSentinelPool.getResource();
                int index = new Random().nextInt(1000000);
                String key = "k_" + index;
                String value = "v_" + index;
                jedis.set(key, value);
                if (counter % 200==0) {
                    logger.info("{} value is {}",key,jedis.get(key));
                }
                TimeUnit.MILLISECONDS.sleep(10);
            } catch (Exception e) {
                logger.error(e.getMessage(),e);
            }finally {
                if (jedis != null) {
                    jedis.close();
                }
            }
        }

    }
}
报错:
redis.clients.jedis.exceptions.JedisDataException:
DENIED Redis is running in protected mode because protected mode is enabled, no bind address was specified, no authentication password is requested to clients. In this mode connections are only accepted from the loopback interface.
If you want to connect from external computers to Redis you may adopt one of the following solutions: 1) Just disable protected mode sending the command 'CONFIG SET protected-mode no' from the loopback interface by connecting to Redis from the same host the server is running, however MAKE SURE Redis is not publicly accessible from internet if you do so.
Use CONFIG REWRITE to make this change permanent. 2) Alternatively you can just disable the protected mode by editing the Redis configuration file, and setting the protected mode option to 'no', and then restarting the server. 3) If you started the server manually just for testing, restart it with the '--protected-mode no' option. 4) Setup a bind address or an authentication password. NOTE: You only need to do one of the above things in order for the server to start accepting connections from the outside..
可能是因为我用的Redis 4.0.2版本较新,需要把保护模式关闭,
在redis配置文件中添加如下配置:
protected-mode no利用流重定点快速添加:(主从节点也需要添加)
[root@localhost config]# echo "protected-mode no" >> redis-sentinel-26379.conf
[root@localhost config]# echo "protected-mode no" >> redis-sentinel-26380.conf
[root@localhost config]# echo "protected-mode no" >> redis-sentinel-26381.conf
#最后重启redis-server
在linux 先查看一下进程:

可以看到现在有主从节点(7000,7001,7002)redis-sentinel(26379,26380,26381)
运行测试代码,查看日志:

通过日志可以看到redis-sentinel将master地址告诉了客户端,然后客户端直接连接master节点进行set
此时主节点是 172.16.1.114:7001(因为之前我测试过几次了,把主节点由7000已经切换成了7001)
使用kill -9 2946停止主节点进程, 模拟主节点故障

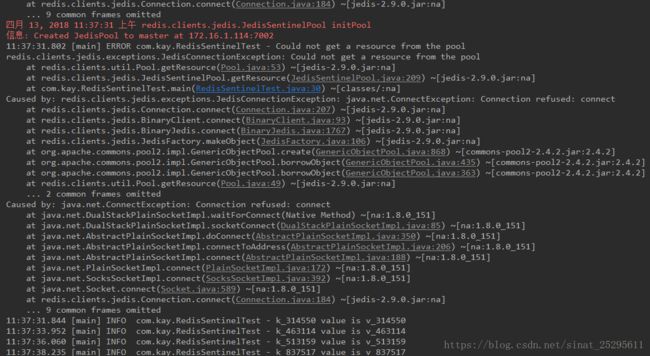
查看控制台信息,发现连接丢失,一段时间后又重新连接上redis,可以看到主节点已经切换成 172.16.1.114:7002

通过远程查看redis-sentinel info 也可以看到主节点已经切换到 172.16.1.114:7002
主节点下线时,客户端可用感知到,同时完成切换后会进行重连。
[root@localhost config]# redis-cli -p 26379 info

重新启动 7000 redis节点,该节点会成为新的从节点,info replication中都可以看到。
至此,Redis Sentinel自动故障转移测试完毕。
redis sentinel 分析
sentinel故障转移的整个过程
- 从slave节点种选择一个合适节点成为新的master节点(slave节点可以配置优先级别,或者根据offset选取数据最完整的salve)
- 对选择成为新master的slave节点做
slaveof no one命令让其成为Master - 向其他slave节点执行slaveof 新master_ip 新master_port命令让他们成为新节点的slaves
- 监控原来master节点的状态,并将其配置为新master节点的子节点,使其恢复后复制新master的数据
sentinel的定时任务
每10秒每个sentinel对master 和 slave 执行info,用来发现slave节点和确认主从关系
每2秒每个sentinel通过对master节点的channel交换信息(pub/sub),通过
_sentinel_:hello频道交互各节点状态每秒每个sentinel对其他sentinel和redis实例执行PING,进行心跳检测
通过以上定时任务,sentinels对各节点进行监控,提醒以及处理自动的故障转移。
sentisel对节点下线的判断
主观下线和客观下线
Redis Sentinel has two different concepts of being down, one is called a Subjectively Down condition (SDOWN) and is a down condition that is local to a given Sentinel instance. Another is called Objectively Down condition (ODOWN) and is reached when enough Sentinels (at least the number configured as the quorum parameter of the monitored master) have an SDOWN condition, and get feedback from other Sentinels using the SENTINEL is-master-down-by-addr command.
Redis Sentinel 下线分为2种不同的概念:
一种称为主观下线(sdown),指单个的sentinel实例发现服务器下线;
另外一种称为客观下线(odown),指当有足够多的sentinels实例(最少达到quorum参数配置的个数)认为主节点下线(sdwon),并通过is-master-down-by-addr命令达成共识之后认为主节点下线。
主观下线适用于任一节点,客观下线只适用于主节点。原因是当节点被认为是客观下线时会触发sentinel的自动故障转移策略,而子节点并不需要这样做。
总结与思考:
主节点发生故障时,sentinel通过发现和选举新的master来切换(is-master-down-by-addr),Redis的各种客户端(比如Jedis),通过对sentinel指令的监听发现主节点,对主节点的连接采用连接池的方式进行连接,主节点故障和切换时可以及时发现和重连。
Redis Sentinel主要实现了Redis复制的高可用性,如果Redis的主从实现为读写分离的架构,势必存在多个客户端也连接在Redis从节点的情况,如果从节点发生故障,客户端又无法感知,那么该做如何处理呢?
依照Jedis对Sentinel的监听实现主节点的连接的切换,我们同样也可以对从节点的变化进行监听实现客户端连接的重连或切换。
————–>>Redis读写分离的高可用————————->> Redis Cluster