centos6.5下安装oracle10.2.0.5软件
参考地址:http://blog.csdn.net/lyq19870515/article/details/43194707
工具:xshell,VMware workstation12
os:Centos6.5 磁盘40G内存2G,swap分4G,剩余给/
关于如何安装Centos6.5:http://blog.csdn.net/ssrmygod/article/details/70037780
关闭防火墙和selinux
[root@mygod ~]# service iptables stop
iptables: Setting chains to policy ACCEPT:filter [ OK ]
iptables: Flushing firewall rules: [ OK ]
iptables: Unloading modules: [ OK ]
[root@mygod ~]# chkconfig iptables off
[root@mygod ~]# vi /etc/selinux/config
[root@mygod ~]# cat /etc/selinux/config
# This file controls the state of SELinuxon the system.
# SELINUX= can take one of these threevalues:
# enforcing - SELinux security policy is enforced.
# permissive - SELinux prints warnings instead of enforcing.
# disabled - No SELinux policy is loaded.
SELINUX=disabled
# SELINUXTYPE= can take one of these twovalues:
# targeted - Targeted processes are protected,
# mls - Multi Level Security protection.
SELINUXTYPE=targeted
配置IP和hosts
[root@mygod1 oracle]# ifconfig
eth0 Link encap:Ethernet HWaddr 00:0C:29:28:6D:98
inet addr:192.168.158.41 Bcast:192.168.158.255 Mask:255.255.255.0
inet6 addr: fe80::20c:29ff:fe28:6d98/64 Scope:Link
UP BROADCAST RUNNING MULTICAST MTU:1500 Metric:1
RX packets:3986 errors:0 dropped:0 overruns:0 frame:0
TX packets:3246 errors:0 dropped:0 overruns:0 carrier:0
collisions:0 txqueuelen:1000
RX bytes:342648 (334.6 KiB) TX bytes:606705 (592.4 KiB)
lo Link encap:Local Loopback
inet addr:127.0.0.1 Mask:255.0.0.0
inet6 addr: ::1/128 Scope:Host
UP LOOPBACK RUNNING MTU:16436 Metric:1
RX packets:124 errors:0 dropped:0 overruns:0 frame:0
TX packets:124 errors:0 dropped:0 overruns:0 carrier:0
collisions:0 txqueuelen:0
RX bytes:9216 (9.0 KiB) TX bytes:9216 (9.0 KiB)
[root@mygod1 oracle]# vi /etc/hosts
[root@mygod1 oracle]# cat /etc/hosts
127.0.0.1 localhost localhost.localdomain localhost4 localhost4.localdomain4
::1 localhost localhost.localdomain localhost6 localhost6.localdomain6
192.168.158.41 mygod1
[root@mygod1 oracle]#
配置本地yum源
[root@mygod1 ~]# df
Filesystem 1K-blocks Used Available Use% Mounted on
/dev/sda3 37050048 5933132 29234856 17% /
tmpfs 1019324 224 1019100 1% /dev/shm
/dev/sda1 198337 34463 153634 19% /boot
/dev/sr0 4363088 4363088 0 100% /media/CentOS_6.5_Final
[root@mygod1 ~]# mkdir -p /media/cdrom
[root@mygod1 ~]# mount /dev/cdrom /media/cdrom
mount: block device /dev/sr0 is write-protected, mounting read-only
[root@mygod1 ~]# df
Filesystem 1K-blocks Used Available Use% Mounted on
/dev/sda3 37050048 5933136 29234852 17% /
tmpfs 1019324 224 1019100 1% /dev/shm
/dev/sda1 198337 34463 153634 19% /boot
/dev/sr0 4363088 4363088 0 100% /media/CentOS_6.5_Final
/dev/sr0 4363088 4363088 0 100% /media/cdrom
[root@mygod1 ~]#
[root@mygod1 ~]# cd /etc/yum.repos.d/
[root@mygod1 yum.repos.d]# ls
CentOS-Base.repo CentOS-Debuginfo.repo CentOS-Media.repo CentOS-Vault.repo
[root@mygod1 yum.repos.d]# rm -rf *
[root@mygod1 yum.repos.d]# ls
[root@mygod1 yum.repos.d]#
[root@mygod1 yum.repos.d]# vi mygod.repo
[root@mygod1 yum.repos.d]# cat mygod.repo
[mygod]
name=mygod
baseurl=file:///media/cdrom
enabled=1
gpgcheck=0
[root@mygod1 ~]# yum clean all
Loaded plugins: fastestmirror, refresh-packagekit, security
Cleaning repos: mygod
Cleaning up Everything
Cleaning up list of fastest mirrors
[root@mygod1 ~]# yum repolist
Loaded plugins: fastestmirror, refresh-packagekit, security
Determining fastest mirrors
mygod | 4.0 kB 00:00 ...
mygod/primary_db | 4.4 MB 00:00 ...
repo id repo name status
mygod mygod 6,367
repolist: 6,367
[root@mygod1 ~]#
完成!
安装必须的依赖包:
[root@mygod1 ~]# yum -y install binutils compat-libstdc++-33 compat-libstdc++-33.i686 elfutils-libelf elfutils-libelf-devel gcc gcc-c++ glibc glibc.i686 glibc-common glibc-devel glibc-devel.i686 glibc-headers ksh libaio libaio.i686 libaio-devel libaio-devel.i686 libgcc libgcc.i686 libstdc++ libstdc++.i686 libstdc++-devel make sysstat
Installed:
compat-libstdc++-33.i686 0:3.2.3-69.el6 glibc-devel.i686 0:2.12-1.132.el6
ksh.x86_64 0:20120801-10.el6 libaio.i686 0:0.3.107-10.el6
libaio-devel.i686 0:0.3.107-10.el6 libstdc++.i686 0:4.4.7-4.el6
Complete!
[root@mygod1 ~]#
[root@mygod1 ~]# yum -y install libXp
[root@mygod1 ~]# yum -y install libXp.i686
[root@mygod1 ~]# yum -y install libXt.i686
[root@mygod1 ~]# yum -y install libXtst.i686
Installed:
libXp.i686 0:1.0.0-15.1.el6
Installed:
libXt.i686 0:1.1.3-1.el6
Installed:
libXtst.i686 0:1.2.1-2.el6
Complete!
修改 sysctl.conf 配置文件:
末尾添加
[root@mygod1 ~]# tail -11 /etc/sysctl.conf
#use for Oracle
kernel.shmall = 2097152
kernel.shmmax = 2147483648
kernel.shmmni = 4096
kernel.sem = 250 32000 100 128
net.ipv4.ip_local_port_range = 1024 65000
net.core.rmem_default = 4194304
net.core.rmem_max = 4194304
net.core.wmem_default = 262144
net.core.wmem_max = 262144
kernel.shmall = 4294967296
[root@mygod1 ~]#
[root@mygod1 ~]# sysctl -p 检查一下
net.ipv4.ip_forward = 0
net.ipv4.conf.default.rp_filter = 1
net.ipv4.conf.default.accept_source_route = 0
kernel.sysrq = 0
kernel.core_uses_pid = 1
net.ipv4.tcp_syncookies = 1
net.bridge.bridge-nf-call-ip6tables = 0
net.bridge.bridge-nf-call-iptables = 0
net.bridge.bridge-nf-call-arptables = 0
kernel.msgmnb = 65536
kernel.msgmax = 65536
kernel.shmmax = 68719476736
kernel.shmall = 2097152
kernel.shmmax = 2147483648
kernel.shmmni = 4096
kernel.sem = 250 32000 100 128
net.ipv4.ip_local_port_range = 1024 65000
net.core.rmem_default = 4194304
net.core.rmem_max = 4194304
net.core.wmem_default = 262144
net.core.wmem_max = 262144
kernel.shmall = 4294967296
[root@mygod1 ~]#
设置系统资源限制limits.conf
末尾添加:
[root@mygod1 ~]# tail -5 /etc/security/limits.conf
# End of file
oracle soft nproc 2047
oracle hard nproc 16384
oracle soft nofile 1024
oracle hard nofile 65536
[root@mygod1 ~]#
编辑 /etc/pam.d/login 文件:
末尾添加:
[root@mygod1 ~]# tail -2 /etc/pam.d/login
session required /lib/security/pam_limits.so
session required pam_limits.so
[root@mygod1 ~]#
创建相应的用户名和用户组并设置密码:
[root@mygod1 ~]# groupadd oinstall
[root@mygod1 ~]# groupadd dba
[root@mygod1 ~]# useradd -g oinstall -G dba oracle
[root@mygod1 ~]# echo redhat | passwd --stdin oracle 为oracle用户设置密码为redhat
Changing password for user oracle.
passwd: all authentication tokens updated successfully.
[root@mygod1 ~]#
修改 /etc/profile 限制其他用户使用:
末尾添加:
[root@mygod1 ~]# tail -8 /etc/profile
if [ $USER = "oracle" ]; then
if [ $SHELL = "/bin/ksh" ]; then
ulimit -p 16384
ulimit -n 65536
else
ulimit -u 16384 -n 65536
fi
fi
[root@mygod1 ~]#
Linux修改版本号:
[root@mygod1 ~]# echo redhat-4 >/etc/redhat-release
[root@mygod1 ~]# cat /etc/redhat-release
redhat-4
[root@mygod1 ~]#
创建oralce安装目录以及数据存放目录.
[root@mygod1 ~]# mkdir -p /software/app/oracle
[root@mygod1 ~]# chown -R oracle:oinstall /software/app/oracle
[root@mygod1 ~]# chmod -R 775 /software/app/oracle
[root@mygod1 ~]#
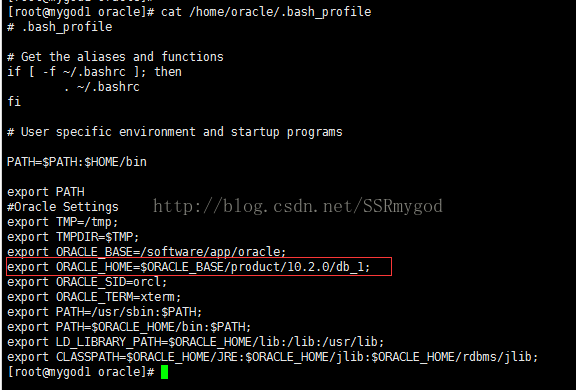
配置Oracle用户环境变量:
末尾添加:
[root@mygod1 ~]# tail -11 /home/oracle/.bash_profile
#Oracle Settings
export TMP=/tmp;
export TMPDIR=$TMP;
export ORACLE_BASE=/software/app/oracle;
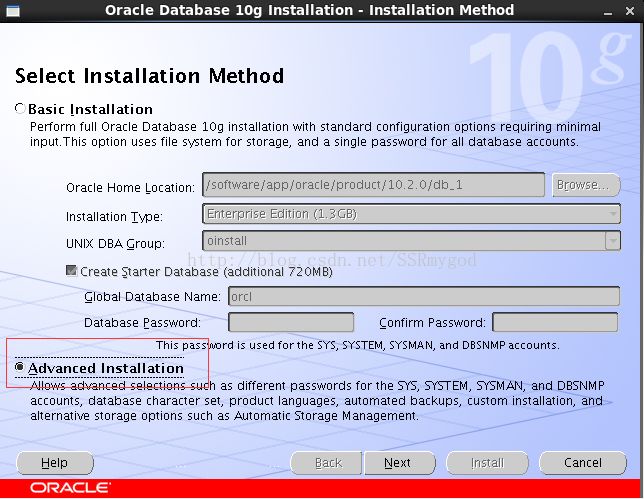
export ORACLE_HOME=$ORACLE_BASE/product/10.2.0/db_1;
export ORACLE_SID=orcl;
export ORACLE_TERM=xterm;
export PATH=/usr/sbin:$PATH;
export PATH=$ORACLE_HOME/bin:$PATH;
export LD_LIBRARY_PATH=$ORACLE_HOME/lib:/lib:/usr/lib;
export CLASSPATH=$ORACLE_HOME/JRE:$ORACLE_HOME/jlib:$ORACLE_HOME/rdbms/jlib;
[root@mygod1 ~]#
[root@mygod1 ~]# source /home/oracle/.bash_profile 使配置生效
[root@mygod1 ~]#
解压安装文件:
先将oracle软件传到/software/app/oracle,关于如何传输请看我另一篇介绍:http://blog.csdn.net/ssrmygod/article/details/69949154
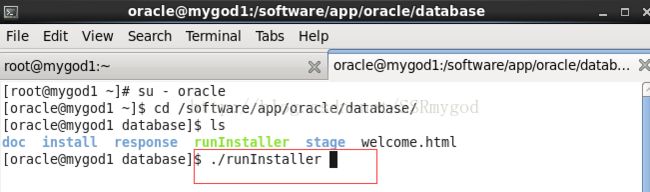
[root@mygod1 tmp]# cd /software/app/oracle
[root@mygod1 oracle]# ls
10201_database_linux_x86_64.cpio.gz
首先解压gz包.
# gzip -d 10201_database_linux_x86_64.cpio.gz
在使用cpio解压出文件.
# cpio -idmv < 10201_database_linux_x86_64.cpio
[root@mygod1 oracle]# ls -rl
total 782824
drwxr-xr-x. 6 94110 42424 4096 Oct 23 2005 database
-r--------. 1 root root 801603584 Apr 11 20:15 10201_database_linux_x86_64.cpio
[root@mygod1 oracle]#
更改解压出来的database文件件及文件的所有者和用户组为oracle和oinstall
[root@mygod1 oracle]# chown -R oracle:oinstall /software/app/oracle/database
[root@mygod1 oracle]# ls -rl
total 782824
drwxr-xr-x. 6 oracle oinstall 4096 Oct 23 2005 database
-r--------. 1 root root 801603584 Apr 11 20:15 10201_database_linux_x86_64.cpio
[root@mygod1 oracle]#
先在root下输入xhost +
然后切到oracle下准备安装


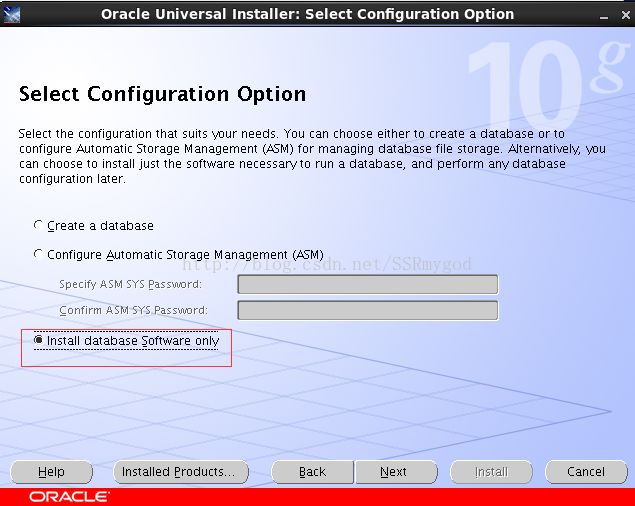
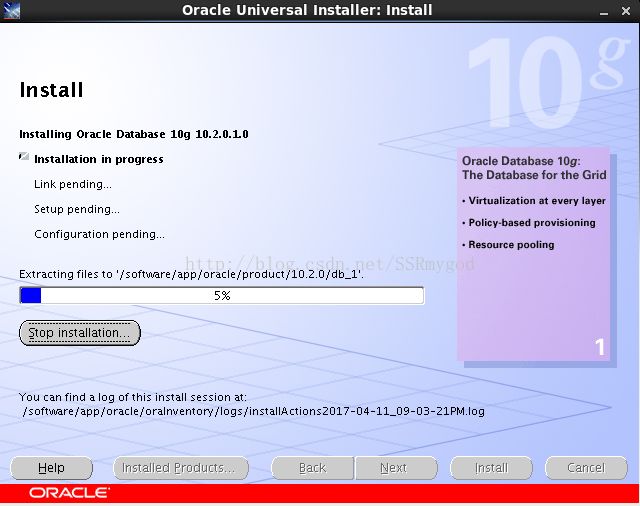
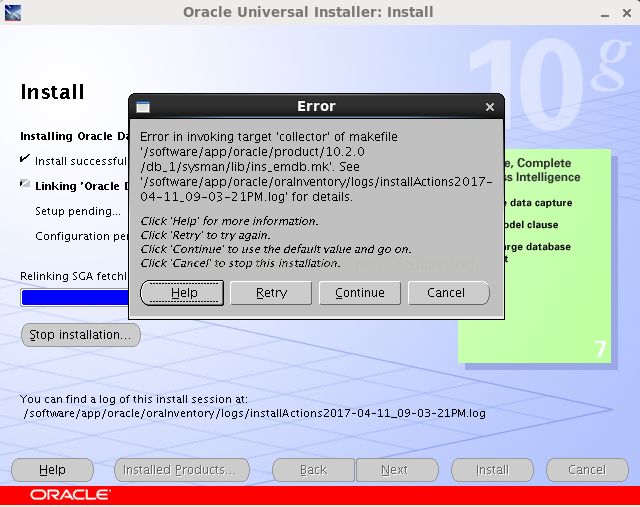
查看日志,看看什么问题:
[root@mygod1 oracle]# tail -f /software/app/oracle/oraInventory/logs/installActions2017-04-11_09-03-21PM.log
INFO: make[1]: *** [/software/app/oracle/product/10.2.0/db_1/sysman/lib/nmccollector] Error 1
make: *** [nmccollector] Error 2
INFO: End output from spawned process.
INFO: ----------------------------------
INFO: Exception thrown from action: make
Exception Name: MakefileException
Exception String: Error in invoking target 'collector' of makefile '/software/app/oracle/product/10.2.0/db_1/sysman/lib/ins_emdb.mk'. See '/software/app/oracle/oraInventory/logs/installActions2017-04-11_09-03-21PM.log' for details.
Exception Severity: 1
我找到了解决方法:http://blog.itpub.net/27099995/viewspace-1258842/
http://openwares.net/database/debian_amd64_install_10g_r2_database.html
安装进度大约到65%时会有错误提示: Error in invoking target 'collector' of makefile '/u01/app/oracle/product/10.2.0/db_1/sysman/lib/ins_emdb.mk'. 这是oracle安装程序的一个bug,可以忽略此错误继续安装,对系统没什么影响。

在root下按顺序执行脚本好了后点击ok
[root@mygod1 oracle]# sh /software/app/oracle/oraInventory/orainstRoot.sh
Changing permissions of /software/app/oracle/oraInventory to 770.
Changing groupname of /software/app/oracle/oraInventory to oinstall.
The execution of the script is complete
[root@mygod1 oracle]# sh /software/app/oracle/product/10.2.0/db_1/root.sh
Running Oracle10 root.sh script...
The following environment variables are set as:
ORACLE_OWNER= oracle
ORACLE_HOME= /software/app/oracle/product/10.2.0/db_1
Enter the full pathname of the local bin directory: [/usr/local/bin]:
Copying dbhome to /usr/local/bin ...
Copying oraenv to /usr/local/bin ...
Copying coraenv to /usr/local/bin ...
Creating /etc/oratab file...
Entries will be added to the /etc/oratab file as needed by
Database Configuration Assistant when a database is created
Finished running generic part of root.sh script.
Now product-specific root actions will be performed.
[root@mygod1 oracle]#
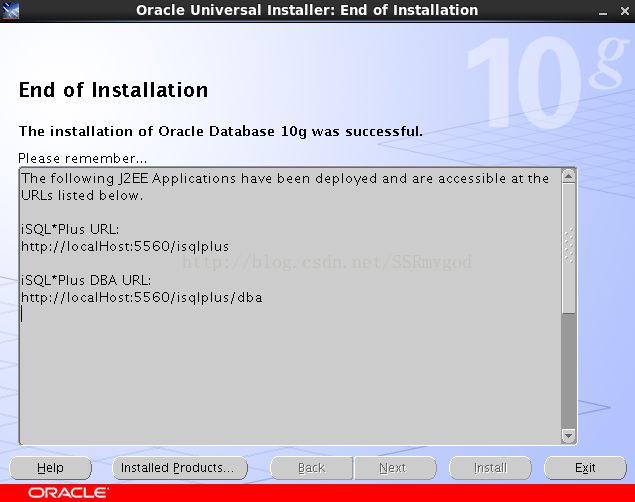
到这里就完成了oracle10g软件的安装
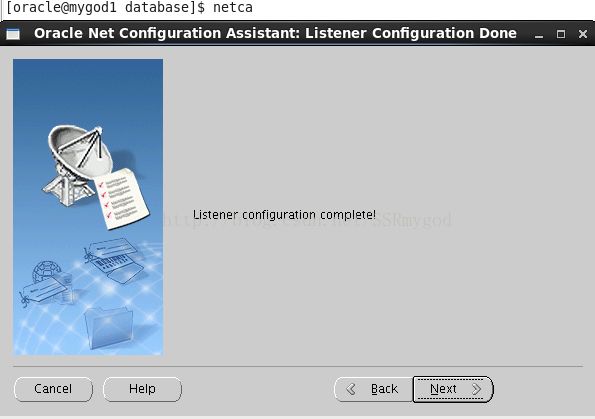
接着配置监听
netca一路回车
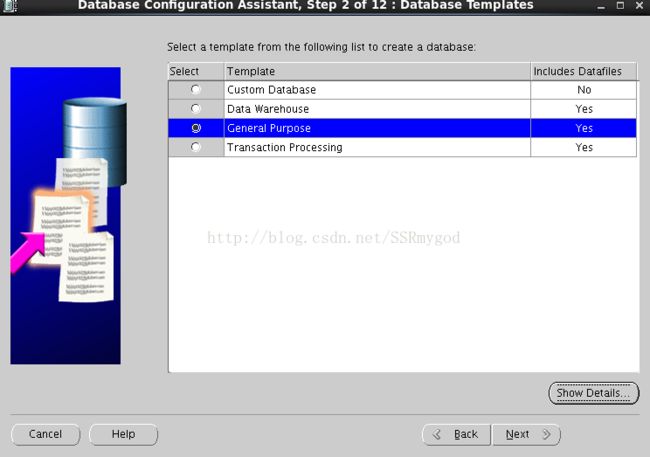
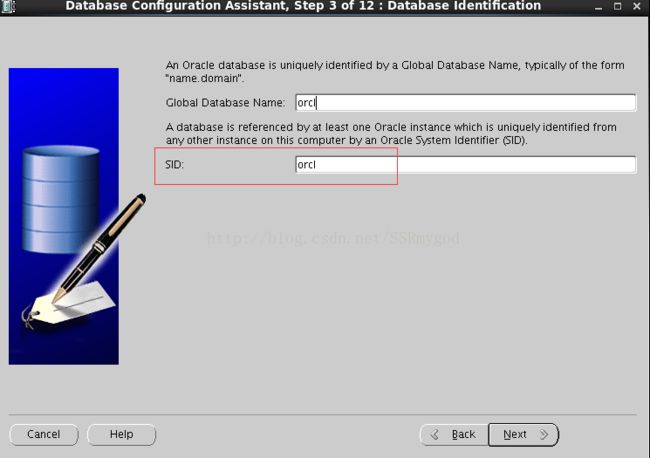
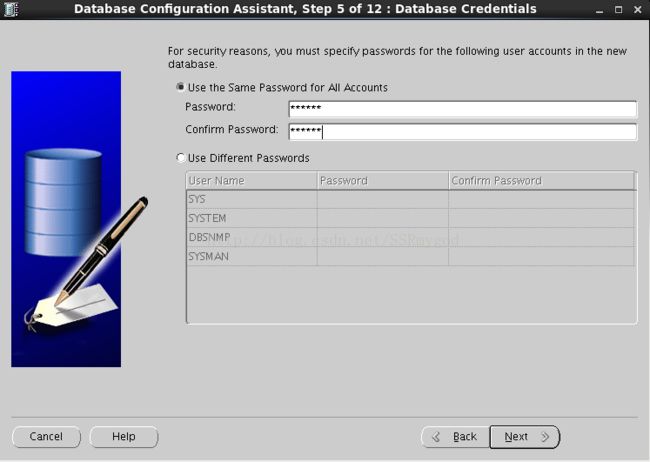
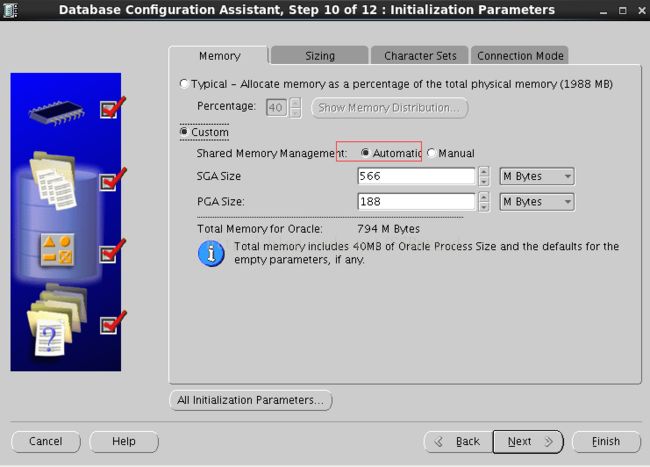
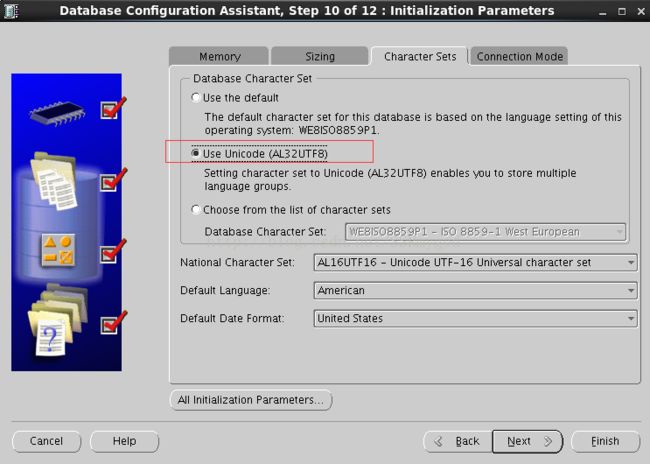
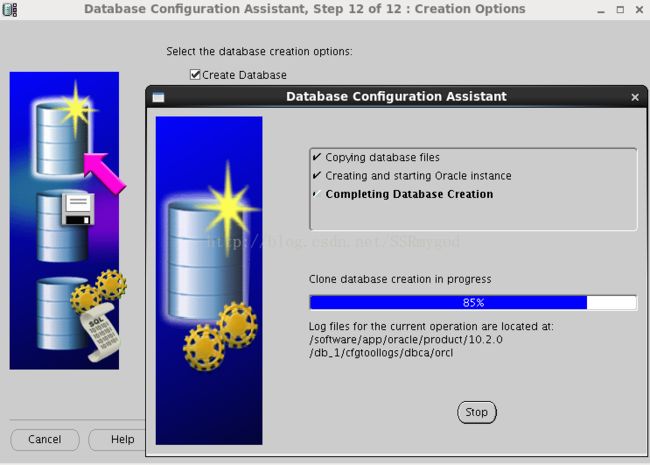
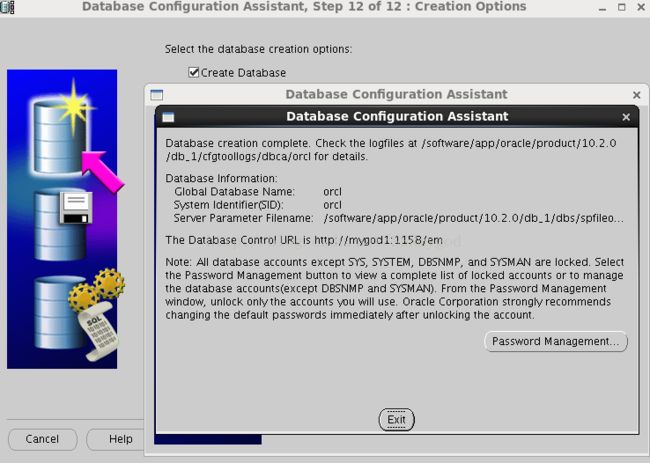
创建一个数据库
dbca
如果不注意SID一致会出现问题,类似情况看:http://blog.csdn.net/ssrmygod/article/details/69944691


这时候可以通过以下操作解决,完成修改后Ignore
[root@mygod1 ~]# id oracle
uid=501(oracle) gid=501(oinstall) groups=501(oinstall),502(dba)
[root@mygod1 ~]#
注意: 此处为dba组的id, 不然可能下次进入服务器的时候. 无法启动数据库.
[root@mygod1 ~]# echo 502 > /proc/sys/vm/hugetlb_shm_group
[root@mygod1 ~]#
如果没有进行下一步.点击retry 重新进行安装就行.
[root@mygod1 ~]# su - oracle
[oracle@mygod1 ~]$ ps -ef |grep pmon
oracle 108135 1 0 22:04 ? 00:00:00 ora_pmon_orcl
oracle 111424 111387 0 22:10 pts/1 00:00:00 grep pmon
[oracle@mygod1 ~]$ sqlplus / as sysdba
SQL*Plus: Release 10.2.0.1.0 - Production on Tue Apr 11 22:10:32 2017
Copyright (c) 1982, 2005, Oracle. All rights reserved.
Connected to:
Oracle Database 10g Enterprise Edition Release 10.2.0.1.0 - 64bit Production
With the Partitioning, OLAP and Data Mining options
SQL> select open_mode from v$database;
OPEN_MODE
----------
READ WRITE
SQL>
完成了。
我这里reboot一下重新连进去
[oracle@mygod1 ~]$ sqlplus / as sysdba
SQL*Plus: Release 10.2.0.1.0 - Production on Tue Apr 11 22:17:34 2017
Copyright (c) 1982, 2005, Oracle. All rights reserved.
Connected to an idle instance.
SQL>
SQL>
SQL>
SQL> startup
ORA-27125: unable to create shared memory segment
Linux-x86_64 Error: 1: Operation not permitted
SQL> ho cat /proc/sys/vm/hugetlb_shm_group
0
SQL> exit
我明明将
/proc/sys/vm/hugetlb_shm_group修改了啊,没成功我就再次修改
[root@mygod1 ~]# ll -d /proc/sys/vm/hugetlb_shm_group
-rw-r--r-- 1 root root 0 Apr 11 22:20 /proc/sys/vm/hugetlb_shm_group
[root@mygod1 ~]# id oracle
uid=501(oracle) gid=501(oinstall) groups=501(oinstall),502(dba)
[root@mygod1 ~]# echo "502" >/proc/sys/vm/hugetlb_shm_group
[root@mygod1 ~]# cat /proc/sys/vm/hugetlb_shm_group
502
[root@mygod1 ~]#
[root@mygod1 ~]# exit
logout
[oracle@mygod1 ~]$ sqlplus / as sysdba
SQL*Plus: Release 10.2.0.1.0 - Production on Tue Apr 11 22:22:46 2017
Copyright (c) 1982, 2005, Oracle. All rights reserved.
Connected to an idle instance.
SQL>
SQL> startup
ORACLE instance started.
Total System Global Area 595591168 bytes
Fixed Size 2022600 bytes
Variable Size 171967288 bytes
Database Buffers 419430400 bytes
Redo Buffers 2170880 bytes
Database mounted.
Database opened.
SQL>
SQL>
SQL>
SQL>
总体来说还是非常简单的,前人栽树后人乘凉就是这么个道理。