基于ESP8266,NodeMCU的自动升级的MQTT客户端
从头开始,构建完整的物联网平台(第一天)
基于ESP8266,NodeMCU的自动升级的MQTT客户端
已经一个星期了,像无头苍蝇似的乱转。在网站上到处逛,还是学到了很多和物联网有关的东西。
9/30晚上我画了一张整体的框架图,今天国庆节开始从头做起,希望能尽快的吧物联网的架构完整的搭建起来。
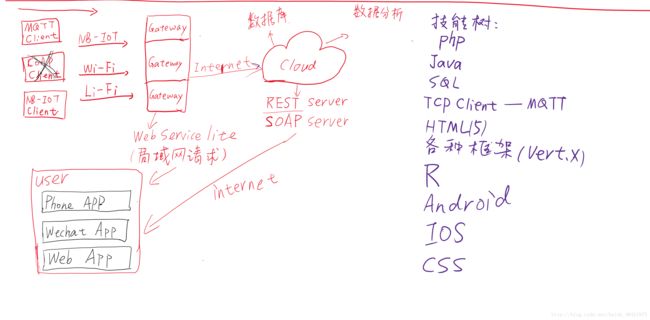
说到搭建,通过传统的UDP协议,Arduino 已经实现了和java的通讯(Arduino通过串口透传ESP13板与java程序交互),但是我们绝对不满足于此,接下来我要用世界通用的技术搭建这个平台,概括来说就是 MQTT->REST->WEB/PHONE APP 不了解MQTT的同学可以自己百度。
ESP8266和ESP**还有NodeMCU都可以按照此教程操作。
再说一句题外话,我买的这个ESP-13板子是真的坑爹,设置非常*,明显只能在实验室用。就叫他ESP8266。
doit.am公司的封装板子。
ESP8266和ESP**还有NodeMCU都可以按照此教程操作。
早上起来,我用USB-ISP给ESP8266刷了一个NodeMCU的固件,希望他能够用Lua语言编程,而不是无脑透传。
居然成功了~!下面分步骤讲解
1.USB-ISP(淘宝随便购买)不多说了,基本接线
| 3V3-3V3 |
|---|
| GND-GND |
| RX-TX |
| TX-RX |
TX-RX反接,所有单片机都这样,具体有一个百度经验讲的很好:
ESP8266固件烧写
2.NodeMCE固件也就是单片机的系统
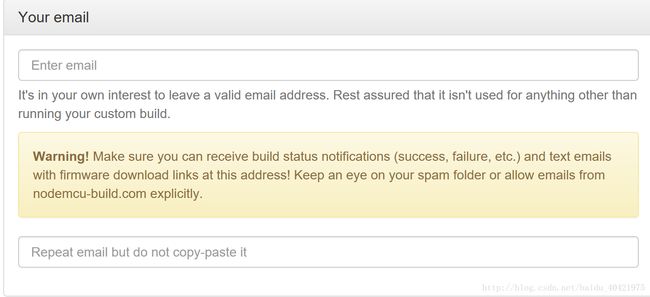
来自https://nodemcu-build.com/
邮箱可以用outlook,gmail……中国的反正就是不行。
版本就选Master。
工具包选择如下,WIFI提供联网支持,MQTT提供MQTT Client支持,Timer是时钟支持,UART是串口通信支持,ADC是数模转换口(ESP13-8266的数模转换口),file是文件系统支持,node是硬件支持(如重启),GPIO是标准数字输入输出支持,SJSON是JSON解析/打包器。就选这些!
你看这就给我来个邮件
印象笔记
Your NodeMCU custom build finished successfully. You may now download the firmware:
- float: http://nodemcu-build.com/builds/nodemcu-master-10-modules-2017-10-01-17-49-37-float.bin
- integer: http://nodemcu-build.com/builds/nodemcu-master-10-modules-2017-10-01-17-49-37-integer.bin

This was built against the master branch and includes the following modules: adc, file, gpio, mqtt, node, sjson, tmr, uart, wifi, tls.
The files are guaranteed to be available for download for 24h.

*** NEW FLASHING TOOL *** NEW FLASHING TOOL *** NEW FLASHING TOOL ***
I invite you to try the new GUI tool https://github.com/marcelstoer/nodemcu-pyflasher

Learn how to flash the firmware: https://nodemcu.readthedocs.io/en/master/en/flash/. If you're upgrading from a previous version you should carefully study the "Upgrading Firmware" instructions on that page.

Please help keep this service alive: http://nodemcu-build.com/faq.php#support
就这个网址,24H内有效,我选择了Float版本的,看起来还高端一些。
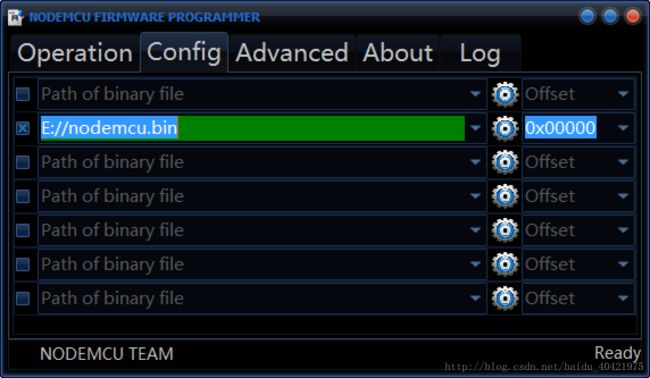
然后打开ESPlorer
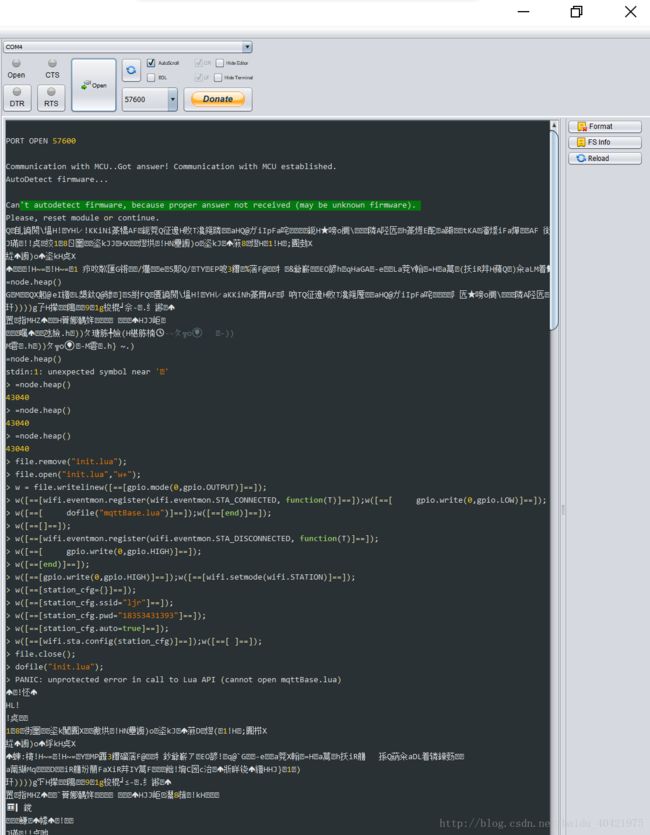
按OPEN打开串口,出现什么都不要惊慌,你按板子上的RESET键会打印乱码,按右下角Heap会出现如下
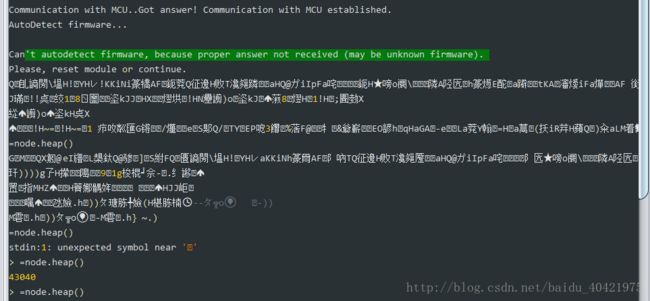
不急不急,我刚才还以为我失败了,结果我成功了。
等到出现正常的稳定的数字就对了。
下面就可以在ESPlorer左边编写Lua脚本了。
NodeMCU固件是带有SNIPPIF文件系统的,只需要
dofile("文件名"),就可以启动文件中的脚本,具体NodeMCU的API参见NodeMCU API
然后程序你随意写,我是写了两个脚本。
注意!你在学习调试的过程中一定要在Snippif选项卡下进行,那样你点RUN就只是运行一下,你在file选项卡下运行,每次都要往单片机里写文件,弄不好就要重新刷固件呢。
一个叫init.lua,开机自动运行的就是他。
gpio.mode(0,gpio.OUTPUT)
wifi.eventmon.register(wifi.eventmon.STA_CONNECTED, function(T)
     gpio.write(0,gpio.LOW)
     dofile("mqttBase.lua")
end)

wifi.eventmon.register(wifi.eventmon.STA_DISCONNECTED, function(T)
     gpio.write(0,gpio.HIGH)
end)
gpio.write(0,gpio.HIGH)
wifi.setmode(wifi.STATION)
station_cfg={}
station_cfg.ssid="你家wifi名字"
station_cfg.pwd="你家wifi密码"
station_cfg.auto=true
wifi.sta.config(station_cfg)
这个就是连我家wifi,连接成功后调用mqttBase.lua这个文件,还有就是链接成功就把我的LED小灯点亮!哈哈哈,今天写文章的心情非常开心,明天就可以见到女朋友了,文字有点飘,凑活着看哈。
第二个就是mqttBase.lua咯
m_dis={}

function dispatch(m,t,pl)
     if pl~=nil and m_dis[t] then
          m_dis[t](m,pl)
     end
end

function scriptfunc(m,pl)
     node.input(pl)
end

function powerfunc(m,pl)
    v = adc.readvdd33() / 1000
     m:publish("sensor/power",v,0,0)
end

function restartfunc(m,pl)
     node.restart()
end

function updatefunc(m,pl)
     local pack = sjson.decode(pl)
     if pack.content then

          if pack.cmd == "open" then file.open(pack.content,"w+")

          elseif pack.cmd == "write" then file.write(pack.content)

          elseif pack.cmd == "close" then file.close()

          elseif pack.cmd == "remove" then file.remove(pack.content)

          elseif pack.cmd == "run" then dofile(pack.content)

          elseif pack.cmd == "read" then pubfile(m, pack.content)

          elseif pack.cmd == "add" then file.open(pack.content,"a+")

          end

     end
end

function uartfunc(m,pl)
    uart.write(0,pl)
end

function handle_mqtt_error(client, reason)
  tmr.create():alarm(1000, tmr.ALARM_SINGLE, do_mqtt_connect)
end

function do_mqtt_connect()
    m:connect("你的阿波罗地址",端口号,0,0,function(client) print("try to connect") end, handle_mqtt_error)
    m:on("connect",
          function(con)
               m:subscribe("sensor/script",2,function(m)  end)
               m:subscribe("sensor/power",2,function(m)  end)
               m:subscribe("sensor/restart",2,function(m)  end)
               m:subscribe("sensor/update",2,function(m)  end)
               m:subscribe("sensor/uart",2,function(m)  end)
               m:publish("initDone","SUCCESS",0,0)
               if file.exists("initSerial.lua") then
                  dofile("initSerial.lua")
               end
          end)
end

m_dis["sensor/script"]=scriptfunc
m_dis["sensor/power"]=powerfunc
m_dis["sensor/update"]=updatefunc
m_dis["sensor/restart"]=restartfunc
m_dis["sensor/uart"]=uartfunc

m = mqtt.Client("0", 60, "用户名", "密码")
m:lwt("/lwt", "0", 0, 0)
m:on("offline", function(con) do_mqtt_connect() end)
m:on("message",dispatch)
do_mqtt_connect()
向NodeMCU烧录的时候,应该先写入mqttBase.lua 再写入init.lua
这个脚本是MQTT客户端最基本的操作,有了这个脚本,你就可以对你的NodeMCU进行OTA远程升级,远程下载文件,上传文件,直接就把单片机做成了电脑。具体细节我就不讲了。可以看NodeMCU源代码
下面进行调试,下载阿帕奇的阿波罗这个MQTT服务器(哈哈哈好名字)http://activemq.apache.org/apollo/download.html
运行就看这个文章吧(感谢作者:那些年的草木灰)MQTT服务器搭建
注意!中间我遇到一个问题,提示我绑定失败,bind failed!address is used!
解决办法:修改D:\apache-apollo-1.7.1\bin\mybroker\etc目录下的apollo.xml文件如图所示,我把61613改成61615,重新运行一下就行了哈哈哈。初始账户密码admin password
重启单片机,nice!就能连上了。很成功。
但是Node有个缺点,无法读取模拟数据,还要外接AD
,于是我就想,反正我这个能直接插在Arduino上,我就写一个让他们两个通过串口通信的吧!
通信协议就用明文,json格式。
所以我还要写一个Lua脚本,Arduino.lua。
所以呢,我今天先睡觉,明天在火车上就有活干了!
晚安。
