Python虚拟环境管理工具之pipenv
一、pipenv简介
pipenv是由Kenneth Reitz编写,用于管理虚拟环境的工具。
二、pipenv的安装、升级与卸载
下面都是使用pip(某些情况下语法为pip3)进行操作。
2.1、安装
windows系统:
>pip install pipenvLinux系统:
$sudo pip install pipenvMac系统:
$ brew install pipenv实例:

2.2、升级
windows系统:
>pip install --upgrade pipenvLinux系统:
$ pip install --upgrade pipenvMac系统:
$ pip install --upgrade pipenv实例:

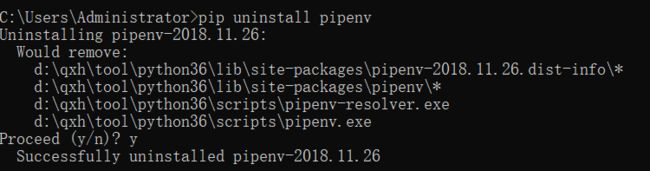
2.3、卸载
windows系统:
> pip uninstall pipenvLinux系统:
$ pip uninstall pipenvMac系统:
$ pip uninstall pipenv实例:
三、pipenv --help
基本每一个库都有一个帮助文档,使用--help即可查看帮助文档。pipenv也是如此,我们可以通过帮助命令对pipenv有一个大致的了解,或者不记得的某个命令的具体用法的时可以查看帮助文档。
实例:
D:\myproject>pipenv --help
Usage: pipenv [OPTIONS] COMMAND [ARGS]...

Options:
  --where             Output project home information.
  --venv              Output virtualenv information.
  --py                Output Python interpreter information.
  --envs              Output Environment Variable options.
  --rm                Remove the virtualenv.
  --bare              Minimal output.
  --completion        Output completion (to be eval'd).
  --man               Display manpage.
  --support           Output diagnostic information for use in GitHub issues.
  --site-packages     Enable site-packages for the virtualenv.  [env var:
                      PIPENV_SITE_PACKAGES]
  --python TEXT       Specify which version of Python virtualenv should use.
  --three / --two     Use Python 3/2 when creating virtualenv.
  --clear             Clears caches (pipenv, pip, and pip-tools).  [env var:
                      PIPENV_CLEAR]
  -v, --verbose       Verbose mode.
  --pypi-mirror TEXT  Specify a PyPI mirror.
  --version           Show the version and exit.
  -h, --help          Show this message and exit.


Usage Examples:
   Create a new project using Python 3.7, specifically:
   $ pipenv --python 3.7

   Remove project virtualenv (inferred from current directory):
   $ pipenv --rm

   Install all dependencies for a project (including dev):
   $ pipenv install --dev

   Create a lockfile containing pre-releases:
   $ pipenv lock --pre

   Show a graph of your installed dependencies:
   $ pipenv graph

   Check your installed dependencies for security vulnerabilities:
   $ pipenv check

   Install a local setup.py into your virtual environment/Pipfile:
   $ pipenv install -e .

   Use a lower-level pip command:
   $ pipenv run pip freeze

Commands:
  check      Checks for security vulnerabilities and against PEP 508 markers
             provided in Pipfile.
  clean      Uninstalls all packages not specified in Pipfile.lock.
  graph      Displays currently-installed dependency graph information.
  install    Installs provided packages and adds them to Pipfile, or (if no
             packages are given), installs all packages from Pipfile.
  lock       Generates Pipfile.lock.
  open       View a given module in your editor.
  run        Spawns a command installed into the virtualenv.
  shell      Spawns a shell within the virtualenv.
  sync       Installs all packages specified in Pipfile.lock.
  uninstall  Un-installs a provided package and removes it from Pipfile.
  update     Runs lock, then sync.

D:\myproject>
四、pipenv创建虚拟环境
4.1创建虚拟环境
创建虚拟环境的过程两步即可实现:一、进入到项目目录;二、运行pipenv install 命令。
windows系统实例(假设项目为D盘下面的myproject):
D:\>cd myproject
D:\myproject>pipenv install
Creating a virtualenv for this project…
Pipfile: D:\myproject\Pipfile
Using d:\qxh\tool\python36\python3.exe (3.6.5) to create virtualenv…
[ ] Creating virtual environment...Already using interpreter d:\qxh\tool\python36\python3.exe
Using base prefix 'd:\\qxh\\tool\\python36'
New python executable in C:\Users\Administrator\.virtualenvs\myproject-1qCvww8S\Scripts\python3.exe
Also creating executable in C:\Users\Administrator\.virtualenvs\myproject-1qCvww8S\Scripts\python.exe
Installing setuptools, pip, wheel...
done.Successfully created virtual environment!
Virtualenv location: C:\Users\Administrator\.virtualenvs\myproject-1qCvww8S
Creating a Pipfile for this project…
Pipfile.lock not found, creating…
Locking [dev-packages] dependencies…
Locking [packages] dependencies…
Updated Pipfile.lock (ca72e7)!
Installing dependencies from Pipfile.lock (ca72e7)…
================================ 0/0 - 00:00:00
To activate this project's virtualenv, run pipenv shell.
Alternatively, run a command inside the virtualenv with pipenv run.D:\myproject>
linux系统实例(假设项目为/var/www/目录下的myproject):
root@iZwz94kwqu5mk9oxpv2m2tZ:/var/www# cd myproject/
root@iZwz94kwqu5mk9oxpv2m2tZ:/var/www/myproject# pipenv install
Creating a virtualenv for this project...
Pipfile: /var/www/myproject/Pipfile
Using /usr/bin/python (2.7.15+) to create virtualenv...
⠴ Creating virtual environment...Already using interpreter /usr/bin/python
New python executable in /root/.local/share/virtualenvs/myproject-jyD3CuVy/bin/python
Please make sure you remove any previous custom paths from your /root/.pydistutils.cfg file.
Installing setuptools, pip, wheel...
done.
✔ Successfully created virtual environment!
Virtualenv location: /root/.local/share/virtualenvs/myproject-jyD3CuVy
Creating a Pipfile for this project...
Pipfile.lock not found, creating...
Locking [dev-packages] dependencies...
Locking [packages] dependencies...
Updated Pipfile.lock (dfae9f)!
Installing dependencies from Pipfile.lock (dfae9f)...
? ▉▉▉▉▉▉▉▉▉▉▉▉▉▉▉▉▉▉▉▉▉▉▉▉▉▉▉▉▉▉▉▉ 0/0 — 00:00:00
To activate this project's virtualenv, run pipenv shell.
Alternatively, run a command inside the virtualenv with pipenv run.
root@iZwz94kwqu5mk9oxpv2m2tZ:/var/www/myproject#
如上图所示,已成功创建虚拟环境。
4.2创建虚拟环境过程解析
4.2.1当运行pipenv install 命令时, pipenv 会在项目目录下寻找Pipfile文件,如果没有则生成一个Pipfile文件。install, uninstall和lock等命令都会生成Pipfile.lock文件。两个文件互相配合,完成虚拟环境的管理工作。
4.2.2 pipenv install 创建的虚拟环境名字格式为:项目目录名+随机字符串。如上面的:myproject-1qCvww8S和myproject-jyD3CuVy。在windows系统中,默认的路径为C:\Users\Administrator\.virtualenvs\下。而在linux环境系统中,默认的路径为:~/.local/share/virtualenvs/。如果你想在项目目录内创建虚拟环境文件夹,可以设置环境变量PIPENV_VENV_IN_PROJECT,这时名为.venv的虚拟环境文件夹将在项目根目录下创建。
4.2.3 创建虚拟环境时,如果要指定Python版本,可以使用--two指定python2版本;使用--three指定Python3版本;或是使用 --python 选项指定具体的版本号。
root@iZwz94kwqu5mk9oxpv2m2tZ:/var/www/myproject# pipenv install --three
Virtualenv already exists!
Removing existing virtualenv...
Creating a virtualenv for this project...
Pipfile: /var/www/myproject/Pipfile
Using /usr/bin/python3 (3.6.8) to create virtualenv...
⠹ Creating virtual environment...Already using interpreter /usr/bin/python3
Using base prefix '/usr'
New python executable in /root/.local/share/virtualenvs/myproject-jyD3CuVy/bin/python3
Also creating executable in /root/.local/share/virtualenvs/myproject-jyD3CuVy/bin/python
Please make sure you remove any previous custom paths from your /root/.pydistutils.cfg file.
Installing setuptools, pip, wheel...
done.
Running virtualenv with interpreter /usr/bin/python3
✔ Successfully created virtual environment!
Virtualenv location: /root/.local/share/virtualenvs/myproject-jyD3CuVy
Creating a Pipfile for this project...
Pipfile.lock not found, creating...
Locking [dev-packages] dependencies...
Locking [packages] dependencies...
Updated Pipfile.lock (ca72e7)!
Installing dependencies from Pipfile.lock (ca72e7)...
? ▉▉▉▉▉▉▉▉▉▉▉▉▉▉▉▉▉▉▉▉▉▉▉▉▉▉▉▉▉▉▉▉ 0/0 — 00:00:00
To activate this project's virtualenv, run pipenv shell.
Alternatively, run a command inside the virtualenv with pipenv run.
root@iZwz94kwqu5mk9oxpv2m2tZ:/var/www/myproject#
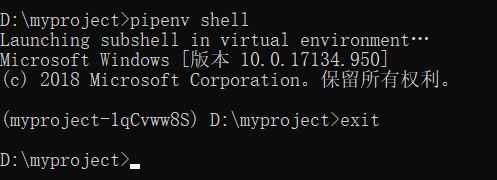
4.4.4 如果要显示激活虚拟环境命令,使用:pipenv shell,退出虚拟环境则使用exit。当然,也可以使用pipenv run命令隐式激活虚拟环境。
五、使用pipenv管理虚拟环境
5.1 安装install
可以使用pipenv install可以安装第三方库。示例:
D:\myproject>pipenv install requests
Installing requests…
Adding requests to Pipfile's [packages]…
Installation Succeeded
Installing dependencies from Pipfile.lock (b14837)…
================================ 5/5 - 00:00:02
To activate this project's virtualenv, run pipenv shell.
Alternatively, run a command inside the virtualenv with pipenv run.D:\myproject>
5.2 更新update
如果要更新依赖,则可以使用pipenv update 命令。
5.3 卸载uninstall
使用pipenv uninstall 可以卸载第三方库。如果要卸载所有的包,使用pipenv uninstall --all。示例:
D:\myproject>pipenv uninstall requests
Uninstalling requests…
Uninstalling requests-2.22.0:
Successfully uninstalled requests-2.22.0Removing requests from Pipfile…
Locking [dev-packages] dependencies…
Locking [packages] dependencies…
Updated Pipfile.lock (ca72e7)!D:\myproject>
5.4 lock
使用pipenv lock用于声明虚拟环境中所有库及其版本。类似于pip freeze >requirements.txt。
5.5 graph
可以使用pipenv graph命令查看当前环境下的依赖情况(类似于在虚拟环境中使用pip list查看依赖)。
六、pipenv常用命令
6.1 查看项目路径
$ pipenv --where D:\helloflask
6.2 查看项目虚拟环境路径(例如在pycharm选择虚拟环境目录的时候用到)
$ pipenv --venv
C:\Users\95232\.virtualenvs\helloflask-hUtz0ICQ
6.3 查看项目python解释器
$ pipenv --py
C:\Users\95232\.virtualenvs\helloflask-hUtz0ICQ\Scripts\python.exe
七、参考资料
[1] 刘江的博客,pipenv 新款Python虚拟环境工具详解:http://www.liujiangblog.com/blog/18/
[2] pipenv 源码:https://github.com/pypa/pipenv
[3] pipenv docs: https://docs.pipenv.org/en/latest/
[4]Kenneth Reitz github:https://github.com/kennethreitz