Swift5.1工程集成Unity总结
目录
前言
IDE的版本
1 准备unity项目,swift项目并做整合
2 修改swift工程配置
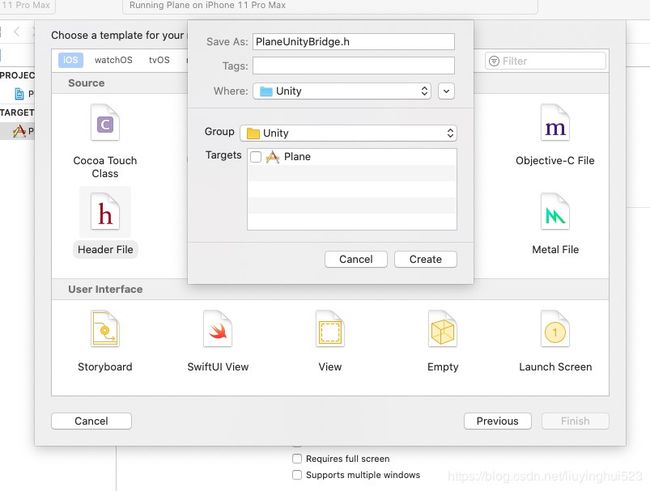
2.1创建桥接文件PlaneUnityBridge.h并在工程中配置 路径就是相对于工程根目录来配置路径的
2.2在PlaneUnityBridge.h添加代码
2.3配置Prefix Header,文件路径根据项目配置
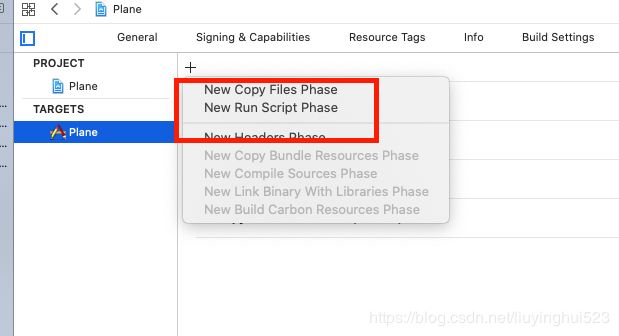
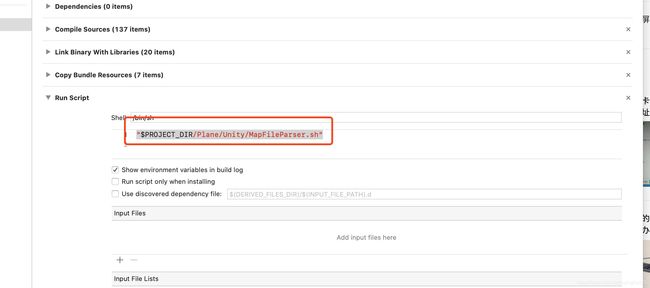
2.4添加UnityUtils.h UnityUtils.mm和Unity工程中的MapFileParser.sh到项目中,并在项目中添加
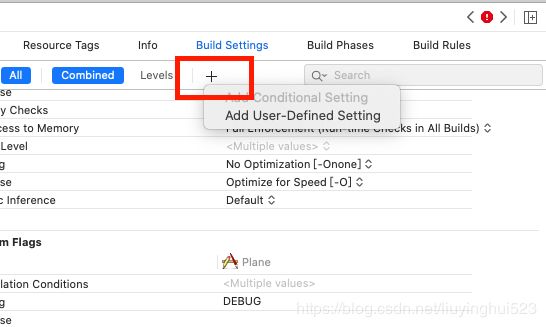
2.5添加工程User-Defined配置
2.6 配置Language C++
2.7 配置Other C Flag
2.8 配置Other C++ Flag
2.9 配置Header Search Paths
2.10 配置Library Search Paths
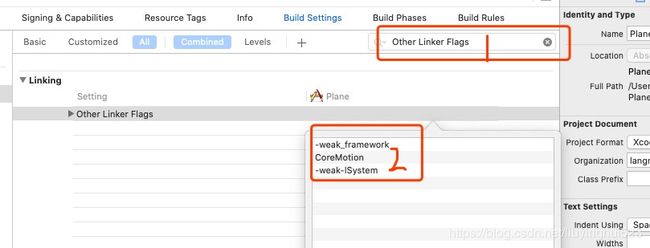
2.11 配置Other Linker Flags
2.12EnableBitCode 设置为No
2.13 main.mm 修改函数名字 main 为 main_unity_default
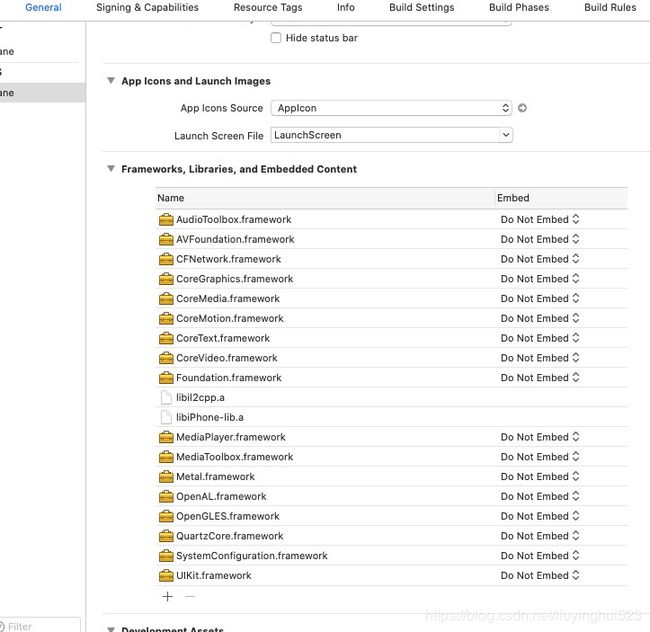
2.14 添加依赖库
3.修改代码文件
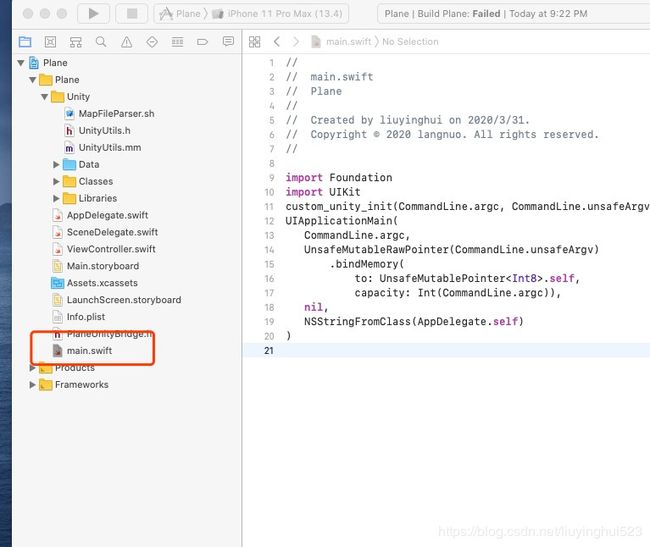
3.1 添加一个新的main.swift文件
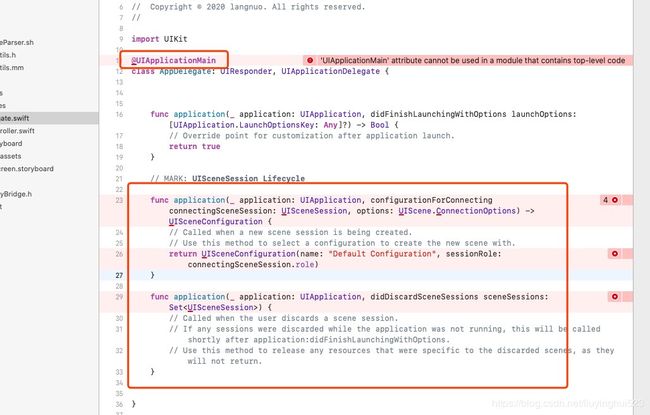
3.2 删除SceneDelegate.swift 并修改Info.pllist文件中的UIApplicationSceneManifest关键字
3.3 替换AppDelegate.swift文件
3.4 修改UnityAppController.mm文件
3.5 修改ViewController.swift文件
4.大功告成
前言
最近有个项目需要在swift工程中引入Unity项目,查了不少的资料,现在做一个总结。
IDE的版本
- Xcode 11.4
- Swift 5.1
- Unity2017.4.34f1
1 准备unity项目,swift项目并做整合
从Unity导出一个iOS项目,先保证导出的项目是可以运行的。
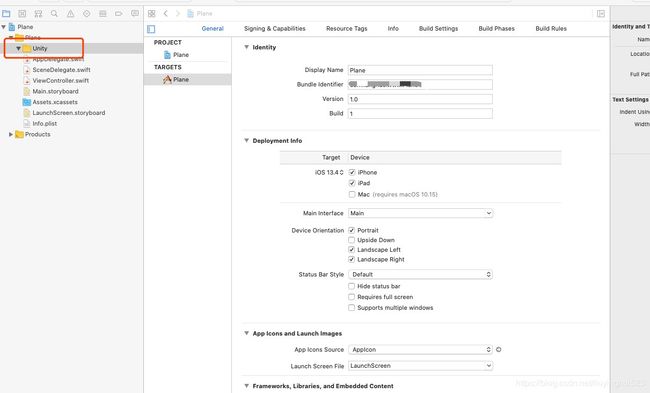
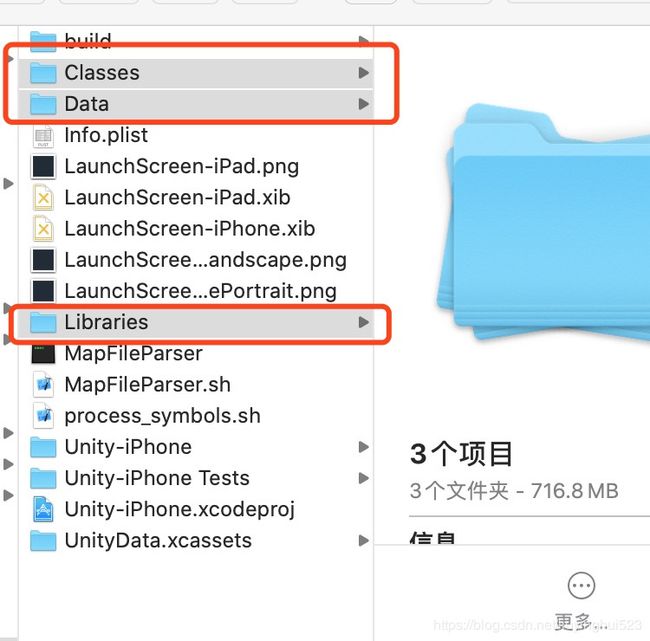
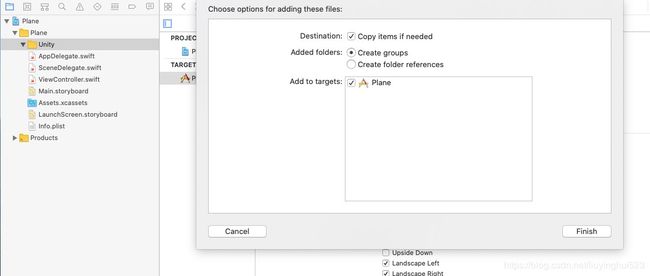
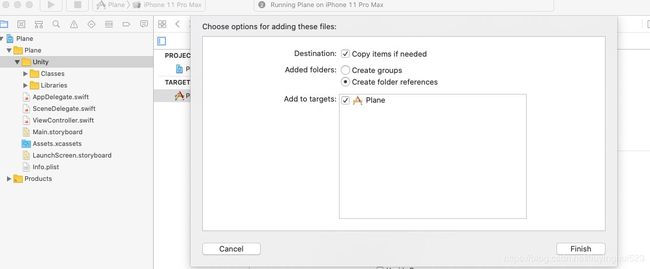
新建一个Swift项目,在工程根目录下创建Unity目录,把Unity项目中的Classes、Library和data三个文件直接拖入到项目中。Classes和Library选择Create groups选项,data选择Create folder references选项。
2 修改swift工程配置
2.1创建桥接文件PlaneUnityBridge.h并在工程中配置 路径就是相对于工程根目录来配置路径的
2.2在PlaneUnityBridge.h添加代码
#import "UnityUtils.h"
#import "UnityAppController.h"
#import "UnityInterface.h"
2.3配置Prefix Header,文件路径根据项目配置
2.4添加UnityUtils.h UnityUtils.mm和Unity工程中的MapFileParser.sh到项目中,并在项目中添加
UnityUtils文件下载
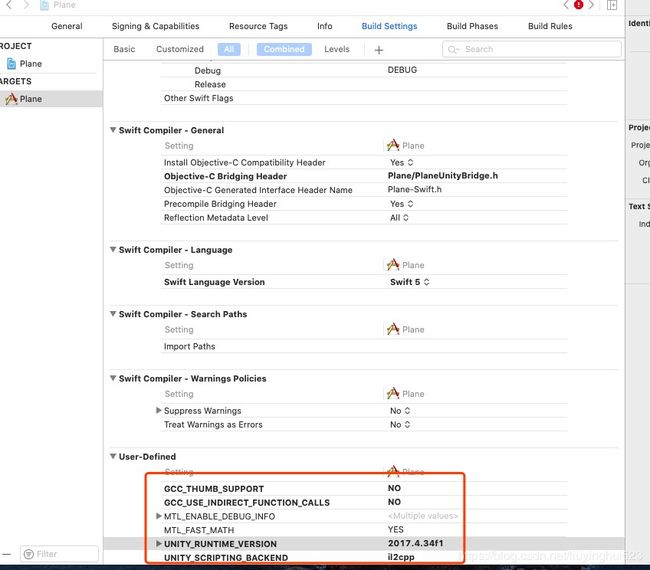
2.5添加工程User-Defined配置
GCC_THUMB_SUPPORT  NO
GCC_USE_INDIRECT_FUNCTION_CALLS  NO
UNITY_RUNTIME_VERSION unity版本号
UNITY_SCRIPTING_BACKEND il2cpp
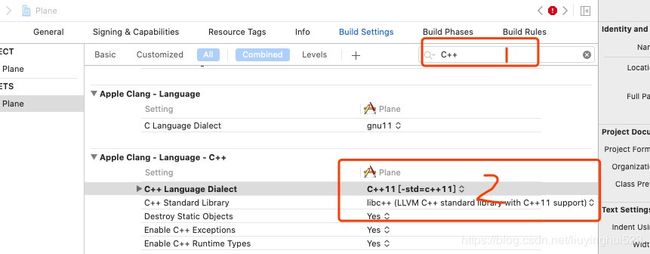
2.6 配置Language C++
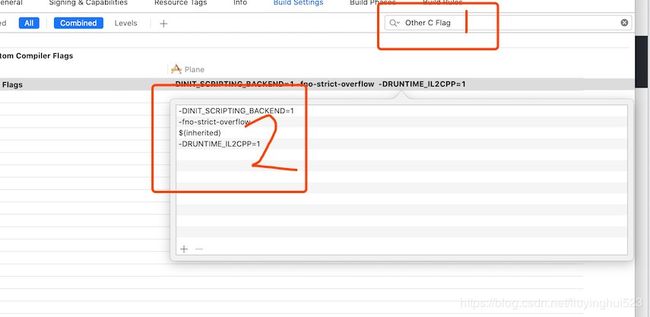
2.7 配置Other C Flag
-DINIT_SCRIPTING_BACKEND=1
-fno-strict-overflow
$(inherited)
-DRUNTIME_IL2CPP=1
2.8 配置Other C++ Flag
$(inherited)
$(OTHER_CFLAGS)
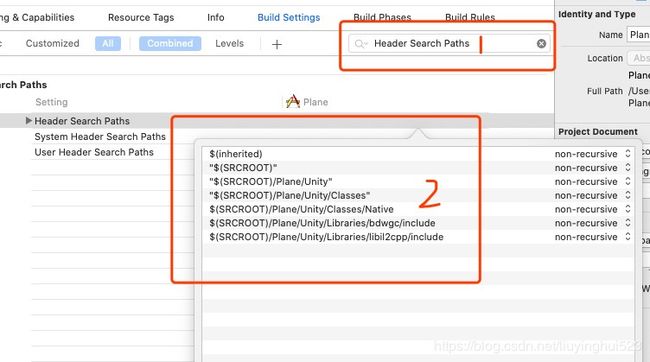
2.9 配置Header Search Paths
一定要注意路径,根据工程配置
$(inherited)
"$(SRCROOT)"
"$(SRCROOT)/Plane/Unity"
"$(SRCROOT)/Plane/Unity/Classes"
$(SRCROOT)/Plane/Unity/Classes/Native
$(SRCROOT)/Plane/Unity/Libraries/bdwgc/include
2.10 配置Library Search Paths
$(inherited)
"$(SRCROOT)"
$(PROJECT_DIR)/Plane/Unity/Libraries
2.11 配置Other Linker Flags
-weak_framework
CoreMotion
-weak-lSystem
2.12EnableBitCode 设置为No
2.13 main.mm 修改函数名字 main 为 main_unity_default
2.14 添加依赖库
3.修改代码文件
3.1 添加一个新的main.swift文件
import UIKit
custom_unity_init(CommandLine.argc, CommandLine.unsafeArgv)
UIApplicationMain(
   CommandLine.argc,
   UnsafeMutableRawPointer(CommandLine.unsafeArgv)
       .bindMemory(
           to: UnsafeMutablePointer.self,
           capacity: Int(CommandLine.argc)),
   nil,
   NSStringFromClass(AppDelegate.self)
)
3.2 删除SceneDelegate.swift 并修改Info.pllist文件中的UIApplicationSceneManifest关键字
AppDelegate.swift 删除不需要的代码
到目前为止 工程应该可以跑起来了!
3.3 替换AppDelegate.swift文件
class AppDelegate: UIResponder, UIApplicationDelegate {

        var window: UIWindow?
        var currentUnityController: UnityAppController!

        var isUnityRunning = false
        var application: UIApplication?

        func application(_ application: UIApplication, didFinishLaunchingWithOptions launchOptions: [UIApplication.LaunchOptionsKey: Any]?) -> Bool {
            // Override point for customization after application launch.
            self.application = application
            currentUnityController = UnityAppController()
            currentUnityController.application(application, didFinishLaunchingWithOptions:launchOptions)

            return true
        }

        func applicationWillResignActive(_ application: UIApplication) {
            if isUnityRunning {
                currentUnityController.applicationWillResignActive(application)
            }
        }

        func applicationDidEnterBackground(_ application: UIApplication) {
            if isUnityRunning {
                currentUnityController.applicationDidEnterBackground(application)
            }
        }

        func applicationWillEnterForeground(_ application: UIApplication) {

            if isUnityRunning {
                currentUnityController.applicationWillEnterForeground(application)
            }
        }

        func applicationDidBecomeActive(_ application: UIApplication) {

            if isUnityRunning {
                currentUnityController.applicationDidBecomeActive(application)
            }
        }

        func applicationWillTerminate(_ application: UIApplication) {
            currentUnityController.applicationWillTerminate(application)
        }

        func startUnity() {
            if !isUnityRunning
            {
                isUnityRunning = true
                currentUnityController.applicationDidBecomeActive(application!)
            }
        }

        func stopUnity() {
            if isUnityRunning {
                currentUnityController.applicationWillResignActive(application!)
                isUnityRunning = false
            }
        }
}
3.4 修改UnityAppController.mm文件
UnityAppController.mm 在startUnity方法结尾添加
[[NSNotificationCenter defaultCenter] postNotificationName: @"UnityReady" object:self];
3.5 修改ViewController.swift文件
import UIKit

class ViewController: UIViewController {


    override func viewDidLoad() {
        super.viewDidLoad()
        if let appDelegate = UIApplication.shared.delegate as? AppDelegate
        {
          appDelegate.startUnity()
          NotificationCenter.default.addObserver(self, selector: #selector(handleUnityReady), name: NSNotification.Name("UnityReady"), object: nil)
        }

        // Do any additional setup after loading the view.
    }

     @objc func handleUnityReady(){


          showUnitySubView()

    }


    func showUnitySubView() {
           if let unityView = UnityGetGLView() {
               view.addSubview(unityView)
           }
    }


}
4.大功告成
至此unity界面就展示出来了。
