spring-cloud Hoxton.SR2版 服务注册与发现--zookeeper搭建以及远程调用(openfeign)使用
spring-cloud Hoxton.SR2版 服务注册与发现–zookeeper搭建以及远程调用(openfeign)使用
文章目录
- spring-cloud Hoxton.SR2版 服务注册与发现--zookeeper搭建以及远程调用(openfeign)使用
- 1、zookeeper的搭建
- 1.1、linux环境下搭建
- 1.2、docker搭建
- 2、项目搭建--服务的提供者badger-spring-cloud-zk-api
- 2.1、maven的pom文件如下:主要spring-cloud-starter-zookeeper-discovery这个包
- 2.2、springboot主类如下
- 2.3、controller业务类
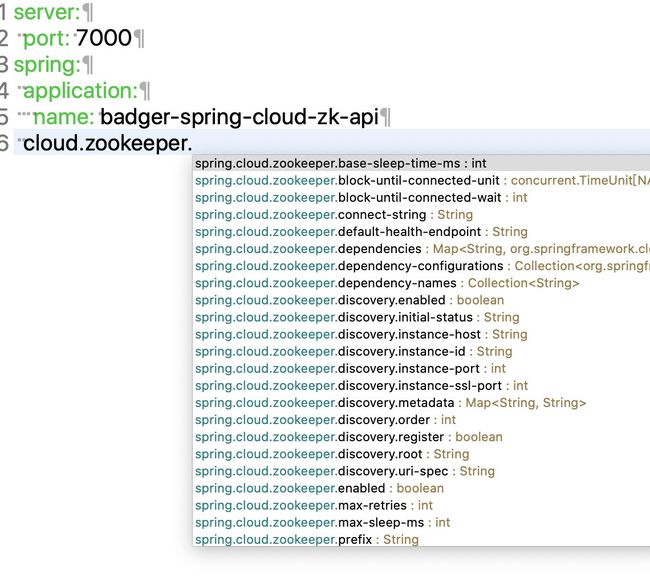
- 2.4、application.yml配置文件如下
- 3、项目搭建--服务的调用者badger-spring-cloud-zk-openfeign
- 3.1、maven的pom文件如下:同样需要spring-cloud-starter-zookeeper-discovery这个包
- 3.2、springboot主类如下
- 3.3、openFeign远程调用的接口
- 3.4、controller业务类
- 3.5、application.yml配置文件如下
- 4、测试
- 1、启动应用`服务的提供者badger-spring-cloud-zk-api`端口为7000;
- 2、启动应用`服务的调用者badger-spring-cloud-zk-openfeign`端口为8000;
本地项目的基础环境
| 环境 | 版本 |
|---|---|
| jdk | 1.8.0_201 |
| maven | 3.6.0 |
| Spring-boot | 2.2.4.RELEASE |
| Spring-cloud | Hoxton.SR2 |
| zookeeper | 3.5 |
1、zookeeper的搭建
1.1、linux环境下搭建
详细搭建,可以参考
《linux下安装zookeeper》
《zookeeper在linux下的集群搭建》
1.2、docker搭建
为了简单方便的快速搭建,本次使用的zookeeper,将使用docker搭建;
spring-cloud 版本使用的Hoxton.SR2;对应的zookeeper版本jar包为zookeeper-3.5.3-beta.jar;docker下载的版本为3.5;
如果在搭建过程中,出现一些报错信息,也可以检查下zookeeper的jar包以及对应的版本的问题;
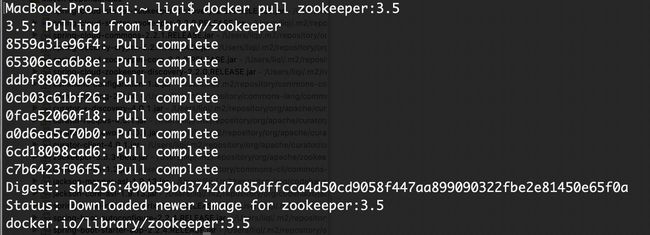
1、下载docker的zookeeper镜像对应的版本;
docker pull zookeeper:3.5
2、创建一个zookeeper镜像的容器,并启动
docker run --name zookeeper_01 -p 2181:2181 --restart always -d zookeeper:3.5
3、查看zookeeper容器启动情况
docker ps
具体的可以参考《docker-hub》;上面也有具体的docker-compose脚本,启动集群的方式等;
2、项目搭建–服务的提供者badger-spring-cloud-zk-api
2.1、maven的pom文件如下:主要spring-cloud-starter-zookeeper-discovery这个包
<project xmlns="http://maven.apache.org/POM/4.0.0" xmlns:xsi="http://www.w3.org/2001/XMLSchema-instance"
    xsi:schemaLocation="http://maven.apache.org/POM/4.0.0 https://maven.apache.org/xsd/maven-4.0.0.xsd">
    <modelVersion>4.0.0modelVersion>
    <parent>
        <groupId>org.springframework.bootgroupId>
        <artifactId>spring-boot-starter-parentartifactId>
        <version>2.2.4.RELEASEversion>
        <relativePath />
    parent>
    <groupId>com.badgergroupId>
    <artifactId>badger-spring-cloud-zk-apiartifactId>
    <version>0.0.1-SNAPSHOTversion>
    <name>badger-spring-cloud-zk-apiname>
    <description>Demo project for Spring Bootdescription>

    <properties>
        <java.version>1.8java.version>
        <maven-jar-plugin.version>3.1.1maven-jar-plugin.version>
        <spring-cloud.version>Hoxton.SR2spring-cloud.version>
    properties>

    <dependencies>
        <dependency>
            <groupId>org.springframework.cloudgroupId>
            <artifactId>spring-cloud-starter-zookeeper-discoveryartifactId>
        dependency>
        <dependency>
            <groupId>org.springframework.bootgroupId>
            <artifactId>spring-boot-starter-webartifactId>
        dependency>
        <dependency>
            <groupId>org.springframework.bootgroupId>
            <artifactId>spring-boot-starter-testartifactId>
            <scope>testscope>
        dependency>
    dependencies>

    <dependencyManagement>
        <dependencies>
            <dependency>
                <groupId>org.springframework.cloudgroupId>
                <artifactId>spring-cloud-dependenciesartifactId>
                <version>${spring-cloud.version}version>
                <type>pomtype>
                <scope>importscope>
            dependency>
        dependencies>
    dependencyManagement>

    <build>
        <plugins>
            <plugin>
                <groupId>org.springframework.bootgroupId>
                <artifactId>spring-boot-maven-pluginartifactId>
            plugin>
        plugins>
    build>
project>
2.2、springboot主类如下
@SpringBootApplication
@EnableDiscoveryClient
public class ZookeeperApiApplication {

    public static void main(String[] args) throws Exception {
        SpringApplication.run(ZookeeperApiApplication.class, args);
    }
}
@EnableDiscoveryClient注解:是开启自动注册;
2.3、controller业务类
@RestController
public class DemoController {

    @Value("${server.port}")
    String port;

    @Value("${spring.cloud.client.ip-address}")
    String address;

    @GetMapping("/zk/demo")
    public String demo() {
        return "我的地址是-->" + address + ":" + port;
    }
}
2.4、application.yml配置文件如下
server:
  port: 7000
spring:
  application:
    name: badger-spring-cloud-zk-api
  cloud:
    zookeeper:
      discovery:
        uri-spec: 127.0.0.1:2181

更详细的配置内容可以参考org.springframework.cloud.zookeeper.discovery.ZookeeperDiscoveryProperties.class配置类;
集群配置,url-spec对应的IP和端口,用,分隔;
3、项目搭建–服务的调用者badger-spring-cloud-zk-openfeign
3.1、maven的pom文件如下:同样需要spring-cloud-starter-zookeeper-discovery这个包
当前案例,主要演示使用openfeign作为远程调用;单独使用ribbon调用就不再单独演示了;
<project xmlns="http://maven.apache.org/POM/4.0.0" xmlns:xsi="http://www.w3.org/2001/XMLSchema-instance"
    xsi:schemaLocation="http://maven.apache.org/POM/4.0.0 https://maven.apache.org/xsd/maven-4.0.0.xsd">
    <modelVersion>4.0.0modelVersion>
    <parent>
        <groupId>org.springframework.bootgroupId>
        <artifactId>spring-boot-starter-parentartifactId>
        <version>2.2.4.RELEASEversion>
        <relativePath />
    parent>
    <groupId>com.badgergroupId>
    <artifactId>badger-spring-cloud-zk-openfeignartifactId>
    <version>0.0.1-SNAPSHOTversion>
    <name>badger-spring-cloud-zk-openfeignname>
    <description>Demo project for Spring Bootdescription>

    <properties>
        <java.version>1.8java.version>
        <maven-jar-plugin.version>3.1.1maven-jar-plugin.version>
        <spring-cloud.version>Hoxton.SR2spring-cloud.version>
    properties>

    <dependencies>
        <dependency>
            <groupId>org.springframework.cloudgroupId>
            <artifactId>spring-cloud-starter-openfeignartifactId>
        dependency>
        <dependency>
            <groupId>org.springframework.cloudgroupId>
            <artifactId>spring-cloud-starter-zookeeper-discoveryartifactId>
        dependency>
        <dependency>
            <groupId>org.springframework.bootgroupId>
            <artifactId>spring-boot-starter-webartifactId>
        dependency>
        <dependency>
            <groupId>org.springframework.bootgroupId>
            <artifactId>spring-boot-starter-testartifactId>
            <scope>testscope>
            <exclusions>
                <exclusion>
                    <groupId>org.junit.vintagegroupId>
                    <artifactId>junit-vintage-engineartifactId>
                exclusion>
            exclusions>
        dependency>
    dependencies>

    <dependencyManagement>
        <dependencies>
            <dependency>
                <groupId>org.springframework.cloudgroupId>
                <artifactId>spring-cloud-dependenciesartifactId>
                <version>${spring-cloud.version}version>
                <type>pomtype>
                <scope>importscope>
            dependency>
        dependencies>
    dependencyManagement>

    <build>
        <plugins>
            <plugin>
                <groupId>org.springframework.bootgroupId>
                <artifactId>spring-boot-maven-pluginartifactId>
            plugin>
        plugins>
    build>
project>
3.2、springboot主类如下
@SpringBootApplication
@EnableFeignClients
@EnableDiscoveryClient
public class ZookeeperOpenfeignApplication {

    public static void main(String[] args) throws Exception {
        SpringApplication.run(ZookeeperOpenfeignApplication.class, args);
    }

}
3.3、openFeign远程调用的接口
/**
 * feign接口 指定调用哪个接口
 * 注解:@FeignClient 标注为feign接口 value 指向调用的模块名
 * spring boot 2.0 只有一个服务端(value = "同一个名字"),只能写一个注解,
 * 可以使用contextId 作为区分,而写多个@FeignClient
 * @author liqi ,
 */
@FeignClient(value = "badger-spring-cloud-zk-api")
public interface DemoFeignApi {

    @GetMapping("/zk/demo")
    String demo();
}
注意:@FeignClient(value = "badger-spring-cloud-zk-api");value属性badger-spring-cloud-zk-api
使用Eureka作为注册中心,在注册中,显示的是大写,然后配置的时候,需要大写;
使用zookeeper作为注册中心,在注册中,显示的是小写,那么在配置的时候,也需要小写
3.4、controller业务类
@RestController
public class DemoController {
    @Autowired(required = false)
    DemoFeignApi api;

    @GetMapping("/zk/feign/demo")
    public String demo() {
        return api.demo();
    }
}
3.5、application.yml配置文件如下
server:
  port: 8000
spring:
  application:
    name: badger-spring-cloud-zk-openfeign
  cloud:
    loadbalancer:
      ribbon:
        enabled: true
    zookeeper:
      discovery:
        uri-spec: 127.0.0.1:2181
4、测试
1、启动应用服务的提供者badger-spring-cloud-zk-api端口为7000;
http://localhost:7000/zk/demo
访问结果:我的地址是-->172.16.2.54:7000
2、启动应用服务的调用者badger-spring-cloud-zk-openfeign端口为8000;
http://localhost:8000/zk/feign/demo
访问结果:我的地址是-->172.16.2.54:7000
如果需要负载均衡测试,那么服务提供者,使用不用的端口,多启动几个服务就可以了;
具体代码信息,可以查看《码云》

