阿里云函数计算配合SpringBoot项目
阿里云函数计算结合springboot 过程都差不多
云社区都是有的
下面是链接:https://yq.aliyun.com/articles/706331?spm=a2c4e.11163080.searchblog.9.a7022ec1IJPjhS
作者:DecentAnt
首先要弄清楚,阿里云的函数计算项目和SpringBoot项目是两个完全独立的项目体系,阿里云函数计算项目的打包后的大小不能超过50M,而SpringBoot的项目大小无所谓。
- SpringBoot项目
首先是SpringBoot项目,这个项目和一般的SpringBoot项目一样,但是数据库必须是阿里云可以连接到的数据库,可以是阿里云内网数据库(我没试过),也可以是公网能够访问的数据库(我用的就是这种),项目配置和普通的SpringBoot项目一模一样,不用什么修改。
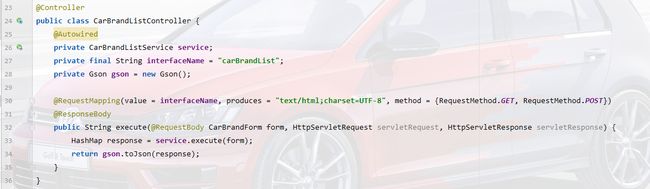
为了测试方便,我只用了一个汽车品牌表来做了这个实验,项目内容非常简单,其中有两个接口,一个是CarBrandAdd另一个是CarBrandList,请求方式是POST+Body(raw application/json),也就是直接用Body中的json字符串进行请求。
两个Controller如下: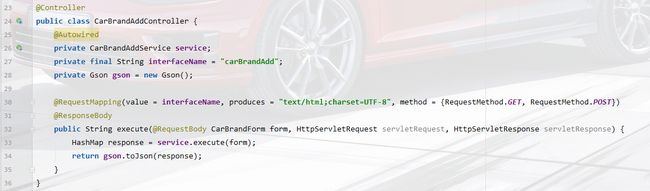
其中Service中的业务逻辑我就不贴出来了,就是最最简单的添加和列表操作
application.properties中数据库配置如下:
也就是最一般的数据库配置罢了
之后就是用Maven打包了,我这里使用了idea的Maven打包方式,注意要打成war包:
war
我这里采用了阿里云文档中推荐的打包插件:(经过测试发现不用这种也是可以的,只是这样打包包的体积比较小罢了)
        maven-assembly-plugin
        3.1.0


                jar-with-dependencies

            false


                make-assembly
                package

                    single


        org.apache.maven.plugins
        maven-compiler-plugin

            1.8
            1.8
然后就可以打包了,点击IDEA的Maven打包,或者输入: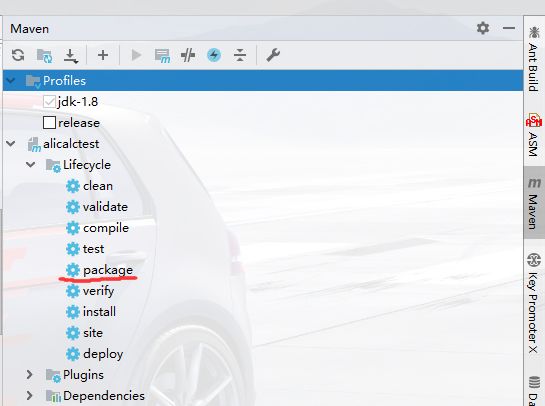
mvn package![]()
最后将这个war包上传到阿里云的OSS上去
- 阿里云函数计算项目
这个项目是用来调用SpringBoot项目用的,其实相当于客户端的作用
创建一个Maven项目,注意依赖关系:
    com.aliyun.fc.runtime
    fc-java-core
    1.3.0


    com.aliyun.fc.runtime
    fc-java-common
    1.0.0
然后创建HelloWeb类,实现FunctionInitializer, HttpRequestHandler接口,我这里使用OSS的方式调用SpringBoot的war包,这里只要填写正确就行。
其中最让我纠结的就是userContextPath这个参数,结果发现这个参数填什么都没问题……根本不用管它。
public class HelloWeb implements FunctionInitializer, HttpRequestHandler {
private FcAppLoader fcAppLoader = new FcAppLoader();
private String ossEndPoint = "${YourEndPoint}";
private String bucket = "${YourBucket}";
private String key = "alifc.war";

//    private String userContextPath = "/2016-08-15/proxy/{YourServideName}/{YourFunctionName}";
private String userContextPath = "/2016-08-15/proxy/helloweb.LATEST/testweb3/carBrandList";

@Override
public void initialize(Context context) throws IOException {
    FunctionComputeLogger fcLogger = context.getLogger();
    fcAppLoader.setFCContext(context);
    fcLogger.info("Begin load code: "+key);
    // Load code from OSS
    fcAppLoader.loadCodeFromOSS(ossEndPoint, bucket, key);
    fcLogger.info("End load code");
    // Init webapp from code
    long timeBegin = System.currentTimeMillis();
    fcLogger.info("Begin load webapp");
    fcAppLoader.initApp(userContextPath, HelloWeb.class.getClassLoader());
    fcLogger.info("End load webapp, elapsed: " + (System.currentTimeMillis() - timeBegin) + "ms");
}

@Override
public void handleRequest(HttpServletRequest request, HttpServletResponse response, Context context)
        throws IOException, ServletException {
    try {
        fcAppLoader.forward(request, response);
        String requestPath = (String) request.getAttribute("FC_REQUEST_PATH");
        String requestURI = (String) request.getAttribute("FC_REQUEST_URI");
        String requestClientIP = (String) request.getAttribute("FC_REQUEST_CLIENT_IP");

        FunctionComputeLogger logger = context.getLogger();
        logger.info("requestPath is "+requestPath);
        logger.info("requestURI is "+requestURI);
        logger.info("requestClientIP is "+requestClientIP);

        String body = String.format("Path: %s\n Uri: %s\n IP: %s\n", requestPath, requestURI, requestClientIP);
        OutputStream out = response.getOutputStream();
        out.write((body).getBytes());
        out.flush();
        out.close();

    } catch (Exception e) {
        e.printStackTrace();
    }
}
}
这个项目已经建立完成了。
然后同样的使用Maven进行打包,打包插件使用和SpringBoot一样的打包插件即可![]()
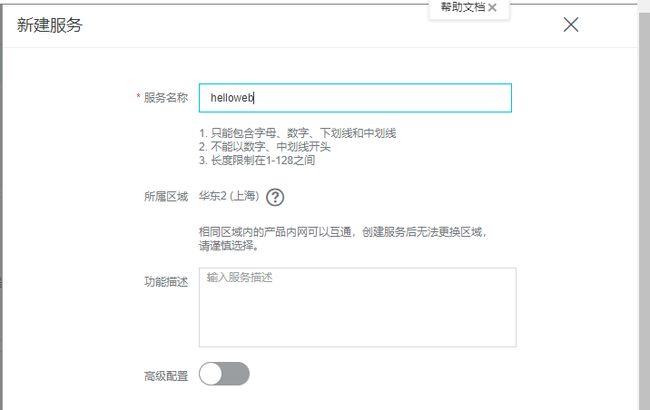
- 阿里云增加函数计算
新建一个函数计算服务:
创建完成服务后,创建一个函数
选择java8,使用空白函数
触发器配置中选择HTTP触发器,注意:HTTP触发器只能在创建函数时创建!创建完成函数后无法再创建了!!
我这里使用POST请求
基础管理配置中上传函数计算打完了war包(不是SpringBoot的war包!!)
最关键的是环境配置,注意:一定要打开“是否配置函数初始化入口”
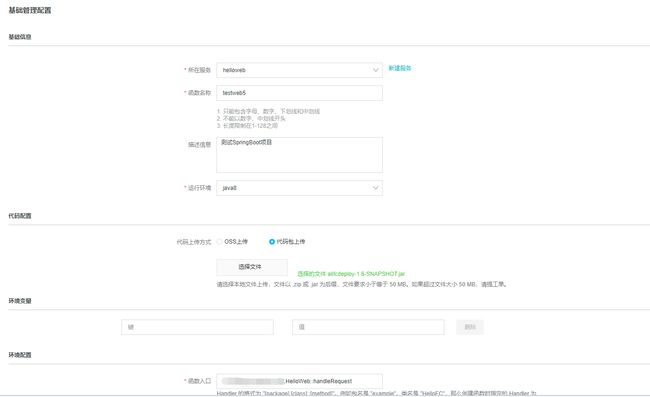

(其中马赛克掉的是包名)
权限配置可以跳过,最后创建即可。
- 执行函数计算
填入相关请求路径信息,然后点击执行即可,注意类型不要选错了
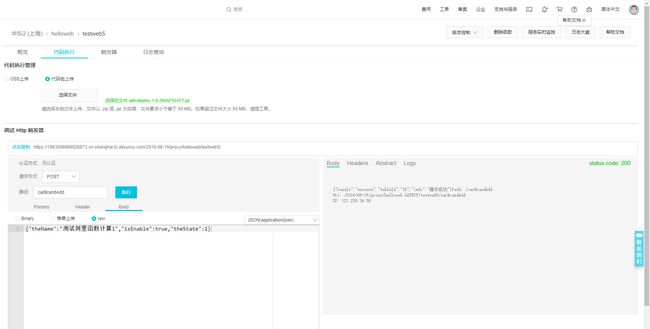
查看数据库是否添加成功:![]()
测试列表接口: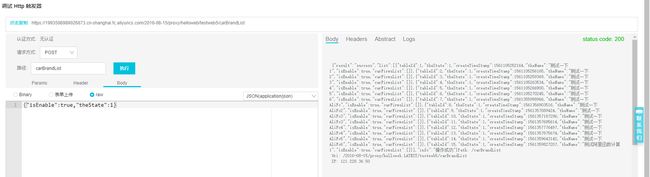
注意:如果要换函数计算的war的话,需要选择文件后,点击保存才行,否则无法生效