Sping+SpringMvc+Mybatis+OAuth2.0服务器与客户端实现(第三方登录)(二)
接续上一部分,过了个年,忘得差不多了,正好记录整理一下。
简要说明下。oauth的原理不做详细介绍,可自行百度。
简单步骤总结。
客户端部分:
1、客户端向服务端请求Code,请求中携带着部分必须信息。
2、客户端的回调中接收服务端产生的Code,继续向服务端请求资源授权AccessToken。
3、客户端得到资源授权后,再去请求对应的资源。
代码如下
            package com.yzz.oauthclient.controller;

import javax.servlet.http.HttpServletRequest;
import javax.servlet.http.HttpServletResponse;

import org.apache.oltu.oauth2.client.OAuthClient;
import org.apache.oltu.oauth2.client.URLConnectionClient;
import org.apache.oltu.oauth2.client.request.OAuthBearerClientRequest;
import org.apache.oltu.oauth2.client.request.OAuthClientRequest;
import org.apache.oltu.oauth2.client.response.OAuthAccessTokenResponse;
import org.apache.oltu.oauth2.client.response.OAuthResourceResponse;
import org.apache.oltu.oauth2.common.OAuth;
import org.apache.oltu.oauth2.common.exception.OAuthProblemException;
import org.apache.oltu.oauth2.common.exception.OAuthSystemException;
import org.apache.oltu.oauth2.common.message.types.GrantType;
import org.springframework.stereotype.Controller;
import org.springframework.web.bind.annotation.RequestMapping;
import org.springframework.web.servlet.ModelAndView;
@RequestMapping("/client")
@Controller
public class ClientController {
	String clientId = null;
	String clientSecret = null;
	String accessTokenUrl = null;
	String userInfoUrl = null;
	String redirectUrl = null;
	String response_type = null;
	String code= null;
	@RequestMapping("")
        public String index(){
            return "index";
        }
	//1、客户端向服务端请求Code。参数必须带有在服务数据库中有记录的clientId,回调路径redirectUrl,以及其他参数。
	@RequestMapping("/getCode")
	public String getCode(HttpServletRequest request, HttpServletResponse response){
		clientId = "test_id1";
		clientSecret = "test_secret1";
		//服务器部分controller的名称
                accessTokenUrl = "checkClientId";
		//服务器回调客户端的路径
		redirectUrl = "http://localhost:8088/OauthClient/client/getAccessToken";
		response_type = "code";
		OAuthClient oAuthClient =new OAuthClient(new URLConnectionClient());
		String requestUrl = null;

	    try {

	    	//构建oauthd的请求。设置请求服务地址(accessTokenUrl)、clientId、response_type、redirectUrl
	    	OAuthClientRequest accessTokenRequest = OAuthClientRequest.authorizationLocation(accessTokenUrl)
	    			.setResponseType(response_type)
	    			.setClientId(clientId)
	    			.setRedirectURI(redirectUrl)
	    			.buildQueryMessage();
	    	requestUrl = accessTokenRequest.getLocationUri();

	    	System.out.println("发送给OAuth服务器部分路径:"+requestUrl);

	    } catch (Exception e) {
	    	e.printStackTrace();
	    }
	    //向服务器进行请求
	    return "redirect:http://localhost:8088/OauthServer/simpleDemo/"+requestUrl ;

	 }
	@RequestMapping("/error")
	public String error(){

		return "error";
	}
	//2、客户端的回调中接收服务端产生的Code,继续向服务端请求资源授权AccessToken。
	@RequestMapping("/getAccessToken")
	public String getAccessToken(HttpServletRequest request){
		clientId = "test_id1";
		clientSecret = "test_secret1";
		accessTokenUrl="http://localhost:8088/OauthServer/simpleDemo/createAccessToken";

		redirectUrl = "http://localhost:8088/OauthClient/client/getResouce";
		HttpServletRequest httpRequest = (HttpServletRequest)request;
		code = httpRequest.getParameter("code");
		System.out.println("收到服务器传递过来的code:"+code);
		OAuthClient oAuthClient =new OAuthClient(new URLConnectionClient());
		try {
			OAuthClientRequest accessTokenRequest = OAuthClientRequest
				.tokenLocation(accessTokenUrl)
				.setGrantType(GrantType.AUTHORIZATION_CODE)
				.setClientId(clientId)
				.setClientSecret(clientSecret)
				.setCode(code)
				.setRedirectURI(redirectUrl)
				.buildQueryMessage();
			//去服务端请求access token,并返回响应
			System.out.println("访问服务器路径:"+accessTokenRequest.getLocationUri());
			OAuthAccessTokenResponse oAuthResponse =oAuthClient.accessToken(accessTokenRequest, OAuth.HttpMethod.POST);
			System.out.println(oAuthResponse);
			//获取服务端返回过来的access token
			String accessToken = oAuthResponse.getAccessToken();
			//查看access token是否过期
			Long expiresIn =oAuthResponse.getExpiresIn();
			System.out.println("客户端得到服务器部分产生的token:::"+accessToken);
				return"redirect:http://localhost:8088/OauthClient/client/getResouce?accessToken="+accessToken;
		     } catch (Exception e) {

	       e.printStackTrace();

	     }

	      return null;

	}

	//3、客户端得到资源授权后,再去请求对应的资源。
	@RequestMapping("/getResouce")
	public ModelAndView getResouce(String accessToken){
		System.out.println("客户端收到的访问令牌:"+accessToken);
		//查询服务器用户信息的controller

		userInfoUrl = "http://localhost:8088/OauthServer/simpleDemo/userInfo";
		//构建oauth
		OAuthClient oAuthClient =new OAuthClient(new URLConnectionClient());
		OAuthClientRequest userInfoRequest;
		try {
			userInfoRequest = new OAuthBearerClientRequest(userInfoUrl)
					.setAccessToken(accessToken).buildQueryMessage();
			OAuthResourceResponse resourceResponse =oAuthClient
					.resource(userInfoRequest, OAuth.HttpMethod.GET, OAuthResourceResponse.class);

	        String username = resourceResponse.getBody();
	        System.out.println("获取的用户信息:"+username);
	        ModelAndView modelAndView =new ModelAndView("userInfoPage");

	        modelAndView.addObject("userName",username);
	        modelAndView.setViewName("index");
	        return modelAndView;
		} catch (OAuthSystemException e) {
			// TODO Auto-generated catch block
			e.printStackTrace();
		} catch (OAuthProblemException e) {
			// TODO Auto-generated catch block
			e.printStackTrace();
		}

		return null;
	}
}
index.jsp
<%@ page language="java" contentType="text/html; charset=utf-8"
pageEncoding="utf-8"%>
<%@ taglib prefix="c" uri="http://java.sun.com/jsp/jstl/core"%>
OAUTH CLIENT
this is index jsp page
userName is:
${userName}
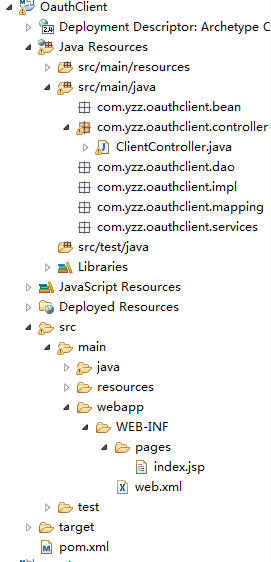
客户端比较简陋,有需要的话可以继续扩展,只有一个Controller和一个index.jsp,结构图如下:
服务端部分:1、接收客户端的请求,对部分参数进行验证,验证通过后产生Code,回调客户端请求中的回调路径。
2、接收客户端的请求,创建资源请求许可。
3、资源管理部分对客户端的请求进行许可验证,通过后才返回对应的资源信息。
package com.yzz.oauthserver.controller;

import javax.annotation.Resource;
import javax.servlet.http.HttpServletRequest;
import javax.servlet.http.HttpServletResponse;

import org.apache.oltu.oauth2.as.issuer.MD5Generator;
import org.apache.oltu.oauth2.as.issuer.OAuthIssuer;
import org.apache.oltu.oauth2.as.issuer.OAuthIssuerImpl;
import org.apache.oltu.oauth2.as.request.OAuthAuthzRequest;
import org.apache.oltu.oauth2.as.request.OAuthTokenRequest;
import org.apache.oltu.oauth2.as.response.OAuthASResponse;
import org.apache.oltu.oauth2.common.error.OAuthError;
import org.apache.oltu.oauth2.common.exception.OAuthProblemException;
import org.apache.oltu.oauth2.common.exception.OAuthSystemException;
import org.apache.oltu.oauth2.common.message.OAuthResponse;
import org.apache.oltu.oauth2.common.message.types.GrantType;
import org.apache.oltu.oauth2.common.message.types.ParameterStyle;
import org.apache.oltu.oauth2.common.message.types.ResponseType;
import org.apache.oltu.oauth2.rs.request.OAuthAccessResourceRequest;
import org.apache.oltu.oauth2.rs.response.OAuthRSResponse;
import org.springframework.http.HttpEntity;
import org.springframework.http.HttpHeaders;
import org.springframework.http.HttpStatus;
import org.springframework.http.ResponseEntity;
import org.springframework.stereotype.Controller;
import org.springframework.web.bind.annotation.RequestMapping;
import org.springframework.web.servlet.ModelAndView;

import com.yzz.oauthserver.bean.User;
import com.yzz.oauthserver.services.Cache;
import com.yzz.oauthserver.services.ClientService;
import com.yzz.oauthserver.services.UserService;
import com.yzz.oauthserver.tool.Constants;

@RequestMapping({"/simpleDemo"})
@Controller
public class SimpleDemo
{
 @Resource
  private ClientService client;
  @Resource
  private UserService userService;

  @Resource
  private Cache cache = null;


//1、接收客户端的请求,对部分参数进行验证,验证通过后产生Code,回调客户端请求中的回调路径
  @RequestMapping("/checkClientId")
	public ModelAndView checkClientId(HttpServletRequest request){
	  ModelAndView m=new ModelAndView();
		OAuthAuthzRequest oauthRequest;
		String responseType=null,redirectUri=null,clientId=null;
		try {
			oauthRequest = new OAuthAuthzRequest(request);

			responseType=oauthRequest.getResponseType();
			redirectUri=oauthRequest.getRedirectURI();
			clientId=oauthRequest.getClientId();


			//数据库查询client_id判断。
			if (client.checkClient(clientId)<1) {

	            OAuthResponse response =OAuthASResponse.errorResponse(HttpServletResponse.SC_BAD_REQUEST)
	                            .setError(OAuthError.TokenResponse.INVALID_CLIENT)
	                            .setErrorDescription(Constants.INVALID_CLIENT_DESCRIPTION)
	                            .buildJSONMessage();
	            //定向到客户端的错误页面,待补充
	            return new ModelAndView("http://localhost:8088/OauthClient/client/error","massage","错误页面,待补充");
			}

		} catch (OAuthSystemException e) {
			// TODO Auto-generated catch block
			e.printStackTrace();
		} catch (OAuthProblemException e) {
			// TODO Auto-generated catch block
			e.printStackTrace();
		}
		//跳转到用户登录页面
		return new ModelAndView("login","url","createCode?response_type="+responseType+"&redirect_uri="+redirectUri+"&client_id="+clientId);

	}
  @RequestMapping(value="/createCode",produces = "text/html;charset=UTF-8")
  public String createCode(HttpServletRequest request) {

    try
    {
    	String userName=request.getParameter("userName");
    	String userPassword=request.getParameter("userPassword");

    	User user=userService.Login(userName, userPassword);
    	if(user!=null){
    		//登录成功
    		OAuthAuthzRequest oauthRequest = new OAuthAuthzRequest(request);

        	String authorizationCode = null;
        	String responseType = oauthRequest.getParam("response_type");
            if (responseType.equals(ResponseType.CODE.toString())){
            	OAuthIssuerImpl oauthIssuerImpl = new OAuthIssuerImpl(new MD5Generator());
            	authorizationCode = oauthIssuerImpl.authorizationCode();
            	System.out.println("生成的code是:" + authorizationCode);

              //将用户信息缓存到code中
              this.cache.setUser(authorizationCode, user);
            }else{
            	System.out.println(user.getUserName());
            	//类型错误
            	return "error";
            }

            OAuthASResponse.OAuthAuthorizationResponseBuilder builder = OAuthASResponse.authorizationResponse(request, 302);

            builder.setCode(authorizationCode);

            String redirectURI = oauthRequest.getParam("redirect_uri");
            System.out.println("构建响应,回调地址是:"+redirectURI);

            OAuthResponse response = builder.location(redirectURI).buildQueryMessage();

            String responseUri = response.getLocationUri();
            System.out.println("服务端重定向到客户端的路径:" + responseUri);
            return "redirect:" + responseUri;
    	}else{
    		System.out.println("账号密码错误");
    		request.setAttribute("msg", "账号密码错误");
    		//账号密码错误
    		return "error";
    	}

    }
    catch (OAuthSystemException e) {
      e.printStackTrace();
    }
    catch (OAuthProblemException e) {
      e.printStackTrace();
    }
    return null;
  }

//2、接收客户端的请求,创建资源请求许可
  @RequestMapping({"/createAccessToken"})
  public HttpEntity createAccessToken(HttpServletRequest request)
  {
    System.out.println("进入创建createAccessToken部分");
    try
    {
      OAuthTokenRequest oauthRequest = new OAuthTokenRequest(request);
      OAuthResponse response;

      if (client.check(oauthRequest.getClientId(),oauthRequest.getClientSecret())<1) {
        System.out.println("clientId或ClientSecret不对,挂了");
        response =
          OAuthASResponse.errorResponse(401)
          .setError("unauthorized_client")
          .setErrorDescription("客户端验证失败,如错误的client_id/client_secret。")
          .buildJSONMessage();
        return new ResponseEntity(response.getBody(), HttpStatus.valueOf(response.getResponseStatus()));
      }

      String authCode = oauthRequest.getParam("code");

      System.out.println("参数输出开始==========");
      System.out.println("客户端传递过来的authCode:" + authCode);
      System.out.println("传递过来 的  AUTHORIZATION_CODE:" + oauthRequest.getParam("grant_type"));
      System.out.println("GrantType 的 AUTHORIZATION_CODE:" + GrantType.AUTHORIZATION_CODE.toString());
      System.out.println("服务器缓存中的用户信息:" + this.cache.getUser(authCode).getUserName());
      System.out.println("参数输出结束==========");

      if ((oauthRequest.getParam("grant_type").equals(GrantType.AUTHORIZATION_CODE.toString())) &&
        (this.cache.getUser(authCode) ==null)) {
    	  System.out.println("缓存为空,挂了:" + authCode);
    	  OAuthResponse response1 =OAuthASResponse.errorResponse(400)
          .setError("invalid_grant")
          .setErrorDescription("错误的授权码")
          .buildJSONMessage();
        return new ResponseEntity(response1.getBody(), HttpStatus.valueOf(response1.getResponseStatus()));
      }


      OAuthIssuer oauthIssuerImpl = new OAuthIssuerImpl(new MD5Generator());
      String accessToken = oauthIssuerImpl.accessToken();
      System.out.println("服务端生成的accessToken:" + accessToken);

      //将用户信息缓存到令牌中
      this.cache.setUser(accessToken, this.cache.getUser(authCode));


      OAuthResponse response1 =
        OAuthASResponse.tokenResponse(200)
        .setAccessToken(accessToken)
        .buildJSONMessage();

      System.out.println("返回体:" + response1.getBody());

      return new ResponseEntity(response1.getBody(), HttpStatus.valueOf(response1.getResponseStatus()));
    }
    catch (OAuthSystemException e)
    {
      e.printStackTrace();
    }
    catch (OAuthProblemException e) {
      e.printStackTrace();
    }
    return null;
  }

  //3、资源管理部分对客户端的请求进行许可验证,通过后才返回对应的资源信息
  @RequestMapping({"/userInfo"})
  public HttpEntity getUserInfo(HttpServletRequest request)
  {
    System.out.println("进入获取资源部分");
    try
    {
      OAuthAccessResourceRequest oauthRequest = new OAuthAccessResourceRequest(request, new ParameterStyle[] { ParameterStyle.QUERY });

      String accessToken = oauthRequest.getAccessToken();

      System.out.println("服务端收到客户端传递的accessToken:" + accessToken);
      System.out.println("缓存中的用户信息:" + this.cache.getUser(accessToken).getUserName());
      if (this.cache.getUser(accessToken)==null){
    	  System.out.println("accessToken缓存中不存在用户信息,挂了");
    	  OAuthResponse oauthResponse =OAuthRSResponse.errorResponse(401)
    			  .setRealm(Constants.RESOURCE_SERVER_NAME)
    			  .setError("invalid_token")
    			  .buildHeaderMessage();

        HttpHeaders headers = new HttpHeaders();
        headers.add("WWW-Authenticate", oauthResponse.getHeader("WWW-Authenticate"));
        return new ResponseEntity(headers, HttpStatus.UNAUTHORIZED);
      }

      //得到缓存在令牌中的用户信息
     String userName=this.cache.getUser(accessToken).getUserName();
      System.out.println("返回给客户端的用户名称:" + userName);
      return new ResponseEntity(userName, HttpStatus.OK);
    }
    catch (OAuthSystemException e) {
      e.printStackTrace();
    }
    catch (OAuthProblemException e) {
      e.printStackTrace();
    }

    return null;
  }
}
相比客户端,服务端结构丰富一点点,如下图。
服务端主要部分代码:
缓存实现类
package com.yzz.oauthserver.impl;

import org.apache.oltu.oauth2.as.issuer.MD5Generator;
import org.apache.oltu.oauth2.as.issuer.OAuthIssuerImpl;
import org.apache.oltu.oauth2.common.exception.OAuthSystemException;
import org.springframework.cache.annotation.Cacheable;
import org.springframework.stereotype.Service;

import com.yzz.oauthserver.bean.User;
import com.yzz.oauthserver.services.Cache;
@Service

public class CacheImpl implements Cache{

	@Cacheable(value="userCache",key="#code")
	public User setUser(String code, User user) {
		// TODO Auto-generated method stub
		return user;
	}
	@Cacheable(value="userCache",key="#code")
	public User getUser(String code){

		return null;
	}


}
其中db.properties、log4j.properties、spring-mvc.xml、spring-mybatis.xml 的配置和第一篇的项目搭建是一样自己改一下对应的配置路径就好。其余的bean、dao和对应impl都比较简单就不列了。sql部分也在第一篇中列举了,比较简单不在重复列举。
路径跳转步骤简介(发起部分为红色,跳转部分为蓝色,调用部分为青色):
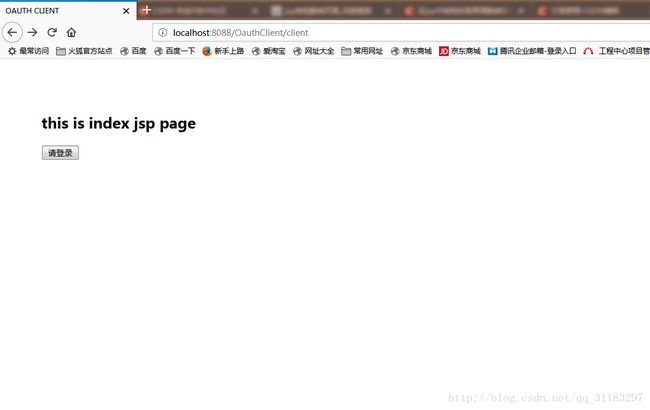
1、浏览器输入 http://localhost:8088/OauthClient/client 跳转到客户端 index.jsp页面。点击登录。
2、点击登录跳转到服务器进行clientId部分验证
发起controller:客户端 http://localhost:8088/OauthClient/client/getCode
跳转controller:服务器 http://localhost:8088/OauthServer/simpleDemo/checkClientId
3、验证正确后跳转到服务端的登录界面 (如上图)
发起controller:服务器 http://localhost:8088/OauthServer/simpleDemo/checkClientId
跳转页面:服务端 login.jsp 收集用户登录信息。
跳转controller:服务端 http://localhost:8088/OauthServer/simpleDemo/createCode
4、进行登录验证成功后创建Code,失败着跳转到错误页面
发起controller:服务端 http://localhost:8088/OauthServer/simpleDemo/createCode
失败:跳转页面 :服务器 error.jsp
成功: 跳转controller:客户端 http://localhost:8088/OauthClient/client/getAccessToken
4、客户端获取服务器的资源授权 (后台进行无法截图)
发起controller:客户端 http://localhost:8088/OauthClient/client/getAccessToken
调用controller(内部调用直接得到结果,可看成ajax或者调用内部接口,并不进行页面跳转):
服务器 http://localhost:8088/OauthServer/simpleDemo/createAccessToken
5、得到授权后定向到获取资源部分 (见最后一图)
发起controller:客户端 http://localhost:8088/OauthClient/client/getAccessToken
跳转controller:客户端 http://localhost:8088/OauthClient/client/getResouce
6、带着授权去服务器资源管理部分获取资源 (见最后一图)
发起controller:客户端 http://localhost:8088/OauthClient/client/getResouce
调用controller(同第四步):服务器 http://localhost:8088/OauthServer/simpleDemo/userInfo
7、跳到显示页面
发起controller: 客户端 http://localhost:8088/OauthClient/client/getResouce
跳转页面:客户端 index.jsp。
第7步完成之后实际显示的账户为服务器端所存储的账户信息。也就是通过服务器的账户实现客户端的登录。
正常来说我们实际开发是用不到服务端的,我们需要完善好自己的客户端,再去每一个大的社交平台,类似QQ、微信、微博、百度之类的开通第三方服务。
项目都比较简单,只列出了主要的步骤。各种验证都是简化版本的,有需要的可以自己优化。
源码下载:包含三个简单项目。一个ssm搭建、一个oauth2.0客户端、一个oauth2.0服务端。


