【frp】内网穿透相关配置
frp下载:https://github.com/fatedier/frp/releases
服务器端配置:
[common]
bind_port = 17000
vhost_http_port = 8080
#vhost_https_port = 8080


# dashboard admin
dashboard_port = 端口
dashboard_user = 账号
dashboard_pwd = 密码

privilege_token = [email protected]
#authentication_timeout = 60
privilege_allow_ports = 10000-20000

max_pool_count = 10
subdomain_host = 你的域名.com
log_file = ./frps.log
log_level = info
log_max_days = 7
服务端配置账号:
[common]
# token 和客户端配置的 accesstoken保持一致,不一致无法保持连接
token=raspberrypi*密码
# 服务截止日期
expirydate=2020-10-01
客户端配置:
[common]
server_addr = 公网ip
server_port = 17000

privilege_token = 对应服务器的token
pool_count = 2
log_file = ./frpc.log
log_level = info
log_max_days = 10

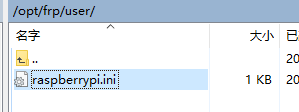
#访问用户,与服务端用户配置文件名一致
user=raspberrypi
# 与服务端用户配置文件中的token保持一致
accesstoken=raspberrypi****

# [项目名称],保持唯一,其余参考官方配置文件
# [pi]
# type = http
# local_port = 80
# 域名前缀为xx,结合服务端的域名,完整的网址为xx.***.***.com
# subdomain = pi
# use_encryption = true
# use_compression = true

[ssh]
type = tcp
local_port = 22
remote_port = 10022
use_encryption = true
use_compression = true

[web1]
type = tcp
local_port = 80
local_ip = 127.0.0.1
remote_port = 10080

[web2]
type = tcp
local_port = 8080
local_ip = 127.0.0.1
remote_port = 18080

[mysql]
type = tcp
local_port = 3306
local_ip = 127.0.0.1
remote_port = 13306

[redis]
type = tcp
local_port = 6379
local_ip = 127.0.0.1
remote_port = 16379
使用 Systemd 设置 frp 开机启动:
Systemd 配置文件在 /lib/systemd/system/ 目录下,不同类型的文件使用不同的后缀,如: .service .socket .timer 。
常用命令如下:
systemctl status frps.service       # 查看 frps 服务状态
systemctl cat frps.service          # 查看 frps 服务配置
sudo systemctl start frps.service   # 启动 frps 服务
sudo systemctl stop frps.service    # 停止 frps 服务
sudo systemctl daemon-reload        # 重新加载配置,修改 systemd 配置执行
sudo systemctl enable frps.service  # 设置开机启动,根据 install 建立软链
sudo systemctl disable frps.service # 取消开机启动,根据 install 移除软链

man systemd.directives              # 查看帮助
man systemd.service
man systemd.unit
frps Systemd 配置文件
创建 /lib/systemd/system/frpc.service 文件,配置如下:
[Unit]
Description=frps server daemon
Documentation=https://github.com/fatedier/frp
After=network-online.target

[Service]
ExecStart=/usr/local/bin/frps -c /usr/local/etc/frps.ini
Type=simple
User=nobody
Group=nogroup
WorkingDirectory=/tmp
Restart=on-failure
RestartSec=60s

[Install]
WantedBy=multi-user.target[Unit]After在网络就绪后启动服务,关于网络就绪 NetworkTarget
[Service]ExecStart启动时执行的命令Typesimple 执行 ExecStart 指定的命令,启动主进程,还有很多其他类别User执行命令的用户为 nobodyGroup执行命令的组为 nogroupWorkingDirectory命令的工作目录Restart失败后尝试重启,失败是根据退出状态码进行判断的RestartSec失败 60s 后尝试重启
[Install]WantedBy执行systemctl enable frps命令,会在/etc/systemd/system/multi-user.target.wants/frps.service目录下创建一个软链
添加或修改配置后需要执行 sudo systemctl daemon-reload 重新加载配置,执行 sudo systemctl enable frps.service 之后会开机启动。
fprc 配置文件
创建 /lib/systemd/system/frpc.service 文件,配置和 frps 类似:
[Unit]
Description=frpc server daemon
Documentation=https://github.com/fatedier/frp
After=network-online.target

[Service]
ExecStart=/usr/local/bin/frpc -c /usr/local/etc/frpc.ini
Type=simple
User=nobody
Group=nogroup
WorkingDirectory=/tmp
Restart=on-failure
RestartSec=60s

[Install]
WantedBy=multi-user.target
添加或修改配置后需要执行 sudo systemctl daemon-reload 重新加载配置,执行 sudo systemctl enable frpc.service 之后会开机启动。
frp后台运行和停止
centos
1.运行
nohup ./frps -c frps.ini >/dev/null 2>&1 &或者客户端:
nohup ./frpc -c ./frpc.ini >/dev/null 2>&1 &
2.停止
先找到这个进程
ps -aux|grep frp| grep -v grep
root      3600  0.1  0.1 110188  9484 pts/0    Sl   15:04   0:00 ./frpc -c ./frpc.ini
执行之后如果显示这样则成功了
然后kill -9 进程号
kill -9 3600转自:https://notfound.cn/posts/systemd-frp/
转自:https://segmentfault.com/a/1190000017911165
