上一章我们完成了Handler优化,统一错误处理,和加载框的实现思路。
现在我们要进行的是让之前的框架支持HTTPS安全访问,同时利用之前的对话框样式,来创建消息提示框。本章结束后,我会将这次的代码放到github上,下一章开始就用这个应用来研究反编译。
消息提示框
新建res/drawable/bg_dialog.xml
新建res/layout/dialog_message.xml
有没有发现所有textSize单位我用的都是dp?虽然官方推荐文字大小单位用sp,但是由于sp与dp的比值会随系统设置里的字体大小变化而变化,届时可能有布局上影响,因此我还是习惯性用dp表示字号。
在res/values/strings.xml中加入dialog_info_ok
我知道了
新建res/drawable/bg_dialog_message_ok_selector.xml
-
-
-
在res/values/colors.xml中加入bg_dialog_option_pressed
#d6d6d6
新建com.joyin.volleydemo.view.dialog.MessageDialog.java
package com.joyin.volleydemo.view.dialog;

import android.content.Context;
import android.view.LayoutInflater;
import android.view.View;
import android.widget.TextView;

import com.joyin.volleydemo.R;

/**
 * Created by joyin on 16-4-4.
 */
public class MessageDialog extends BaseDialog {

    private TextView mTvMessage;

    public MessageDialog(Context context) {
        super(context);
    }

    public void setMessage(String message) {
        mTvMessage.setText(message);
    }

    @Override
    protected View getDefaultView(Context context) {
        View view = LayoutInflater.from(context).inflate(R.layout.dialog_message, null);
        mTvMessage = (TextView) view.findViewById(R.id.tv_dialog_message);

        TextView tvOk = (TextView) view.findViewById(R.id.tv_dialog_ok);
        tvOk.setOnClickListener(new View.OnClickListener() {
            @Override
            public void onClick(View v) {
                dismiss();
                if (mOnClickListener != null) {
                    mOnClickListener.onClick(v);
                }
            }
        });
        return view;
    }

    private View.OnClickListener mOnClickListener;

    public void setOnClickListener(View.OnClickListener listener) {
        this.mOnClickListener = listener;
    }
}
显示消息对话框的时候,只需要创建对象,设置内容,然后show()就可以了,同时支持对点击事件自行处理。
现在我们来尝试一下,在MainActivity中网络请求返回结果错误的地方添加三行代码:
MessageDialog dialog = new MessageDialog(MainActivity.this);
dialog.setMessage("获取请求失败了");
dialog.show();
编译运行

同理,要做有标题,有内容,下方有确定和取消的对话框,也可以用一样的方法实现。
在现在的基础上做Https模块,当我们点击“我知道了”,就跳到下一个页面HttpsTestActivity。
新建布局文件res/layout/activity_test_https.xml
新建com.joyin.volleydemo.activity.HttpsTestActivity.java
package com.joyin.volleydemo.activity;

import android.os.Bundle;

import com.joyin.volleydemo.R;

/**
 * Created by joyin on 16-4-4.
 */
public class HttpsTestActivity extends BaseActivity {
    @Override
    public void onCreate(Bundle savedInstanceState) {
        super.onCreate(savedInstanceState);
        setContentView(R.layout.activity_test_https);
    }
}
记得在AndroidManifest.xml中注册
在MainActivity中设置对话框的点击事件:
MessageDialog dialog = new MessageDialog(MainActivity.this);
dialog.setMessage("获取请求失败了");
dialog.setOnClickListener(new View.OnClickListener() {
    @Override
    public void onClick(View v) {
        startActivity(new Intent(MainActivity.this, HttpsTestActivity.class));
    }
});
dialog.show();
OK,现在已经能进入下一个页面了,接下来我们来实现Https。
支持HTTPS
本文HTTPS相关技术点来自《Android 网络--我是怎么做的: Volley+OkHttp+Https》一文。
我当初是看了这篇文章后,以同样的方法实现的,非常感谢这篇文章原作者,原文以12306作为案例,为了尊重原作者,同时也因为不便于用商业项目做案例,所以我也同样用12306来演示,大部分代码来自原文。
另,我将证书转换为bks文件,用《Android 网络--我是怎么做的: Volley+OkHttp+Https》中的方法并未成功,而是参照在Android应用中使用自定义证书的HTTPS连接(下)一文,导出cer格式证书,然后转换成功。
我们直接进入《Android 网络--我是怎么做的: Volley+OkHttp+Https》文中,根据该作者的github,找到他已经存在的kyfw.bks文件。将其放入我们项目的res/raw/目录下。
在build.gradle中的dependencies块中加入:
    compile 'com.squareup.okhttp:okhttp:2.4.0'
    compile 'com.squareup.okhttp:okhttp-urlconnection:2.4.0'
新建com.joyin.volleydemo.utils.network.SelfSignSslOkHttpStack.java
package com.joyin.volleydemo.utils.network;

import com.android.volley.toolbox.HurlStack;
import com.squareup.okhttp.OkHttpClient;
import com.squareup.okhttp.OkUrlFactory;

import java.io.IOException;
import java.net.HttpURLConnection;
import java.net.URL;
import java.util.Map;

import javax.net.ssl.HttpsURLConnection;
import javax.net.ssl.SSLSocketFactory;

/**
 * Created by joyin on 16-4-5.
 */
public class SelfSignSslOkHttpStack extends HurlStack {
    private OkHttpClient okHttpClient;
    private Map socketFactoryMap;

    public SelfSignSslOkHttpStack(Map factoryMap) {
        this(new OkHttpClient(), factoryMap);
    }

    public SelfSignSslOkHttpStack(OkHttpClient okHttpClient, Map factoryMap) {
        this.okHttpClient = okHttpClient;
        this.socketFactoryMap = factoryMap;
    }

    @Override
    protected HttpURLConnection createConnection(URL url) throws IOException {
        if ("https".equals(url.getProtocol()) && socketFactoryMap.containsKey(url.getHost())) {
            HttpsURLConnection connection = (HttpsURLConnection) new OkUrlFactory(okHttpClient).open(url);
            connection.setSSLSocketFactory(socketFactoryMap.get(url.getHost()));
            return connection;
        } else {
            HttpURLConnection connection = (HttpURLConnection) url.openConnection();
            return connection;
        }
    }
}
新建com.joyin.volleydemo.utils.network.RequestManager.java
package com.joyin.volleydemo.utils.network;

import android.content.Context;
import android.text.TextUtils;

import com.android.volley.Request;
import com.android.volley.RequestQueue;
import com.android.volley.toolbox.HurlStack;
import com.android.volley.toolbox.Volley;
import com.joyin.volleydemo.R;

import java.io.IOException;
import java.io.InputStream;
import java.security.KeyManagementException;
import java.security.KeyStore;
import java.security.KeyStoreException;
import java.security.NoSuchAlgorithmException;
import java.security.SecureRandom;
import java.security.cert.CertificateException;
import java.util.Hashtable;

import javax.net.ssl.SSLContext;
import javax.net.ssl.SSLSocketFactory;
import javax.net.ssl.TrustManagerFactory;

/**
 * Created by joyin on 16-4-5.
 */
public class RequestManager {

    private RequestManager() {

    }

    private static RequestManager instance;

    public RequestQueue mRequestQueue;

    public RequestManager(Context context) {
        mRequestQueue = newRequestQueue(context);
    }

    public static RequestManager getInstance(Context context) {
        if (instance == null) {
            instance = new RequestManager(context);
        }
        return instance;
    }


    public static HurlStack getSelfSignSslOkHttpStack(Context context) {

        String[] hosts = {"kyfw.12306.cn"};
        int[] certRes = {R.raw.kyfw};
        String[] certPass = {"asdfqaz"};

        try {
            Hashtable socketFactoryMap = new Hashtable<>(hosts.length);
            for (int i = 0; i < certRes.length; i++) {
                int res = certRes[i];
                String password = certPass[i];
                SSLSocketFactory sslSocketFactory = createSSLSocketFactory(context, res, password);
                socketFactoryMap.put(hosts[i], sslSocketFactory);
            }
            HurlStack stack = new SelfSignSslOkHttpStack(socketFactoryMap);

            return stack;
        } catch (Exception e) {
            return null;
        }
    }

    private static SSLSocketFactory createSSLSocketFactory(Context context, int res, String password)
            throws CertificateException, NoSuchAlgorithmException, IOException,
            KeyStoreException, KeyManagementException {
        InputStream inputStream = context.getResources().openRawResource(res);
        KeyStore keyStore = KeyStore.getInstance("BKS");
        keyStore.load(inputStream, password.toCharArray());
        TrustManagerFactory tmf = TrustManagerFactory.getInstance(TrustManagerFactory.getDefaultAlgorithm());
        tmf.init(keyStore);
        SSLContext sslContext = SSLContext.getInstance("TLS");
        sslContext.init(null, tmf.getTrustManagers(), new SecureRandom());
        return sslContext.getSocketFactory();
    }

    private RequestQueue newRequestQueue(Context context) {
        RequestQueue requestQueue = Volley.newRequestQueue(context, getSelfSignSslOkHttpStack(context));
        return requestQueue;
    }

    public RequestQueue getRequestQueue() {
        return mRequestQueue;
    }

    public void addRequest(Request request, Object tag) {
        if (tag != null) {
            request.setTag(tag);
        } else if (!TextUtils.isEmpty(request.getUrl())) {
            request.setTag(request.getUrl());
        }
        mRequestQueue.add(request);
    }
}
因为我们这一次请求12306,返回的数据格式不是code-data的JSON字符串,所以我们修改RequestHandler的onVolleyResponse方法,将code校验加上异常保护(真实项目中理论上不需要这一步,这里是作为测试案例,因为返回格式不一样,所以临时修改)。
    private static void onVolleyResponse(String response, Handler handler, int what, Bundle bundle) {
        LogUtil.d(response);
        try {
            JSONObject json = JSON.parseObject(response);
            if (json != null && json.containsKey("code")) {
                int code = json.getIntValue("code");
                if (code != 0) {
                    // 如果code不为0,则走错误处理流程
                    Message msg = handler.obtainMessage(NetworkError.NET_ERROR_CUSTOM);
                    msg.setData(bundle);
                    handler.sendMessage(msg);
                    NetworkError.error("" + code, json, bundle);
                    return;
                }
            }
        } catch (Exception e) {

        }
        Message msg = handler.obtainMessage(what, response);
        msg.setData(bundle);
        handler.sendMessage(msg);
    }
同时在onVolleyErrorResponse方法中打印出错误信息。
LogUtil.e(volleyError.getMessage());
接下来,我们运行一遍代码,注意:目前我们还没有将默认的RequestQueue替换为支持HTTPS的,因此该请求应该失败。看下效果:
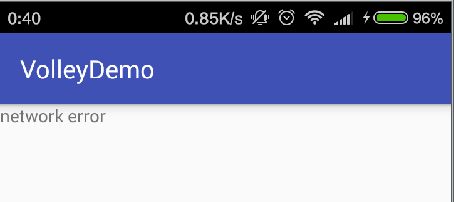
并且得到如下log:
D/demo    (28987): {"code":1,"data":"invaild ip."}
E/demo    (28987): javax.net.ssl.SSLHandshakeException: java.security.cert.CertPathValidatorException: Trust anchor for certification path not found.
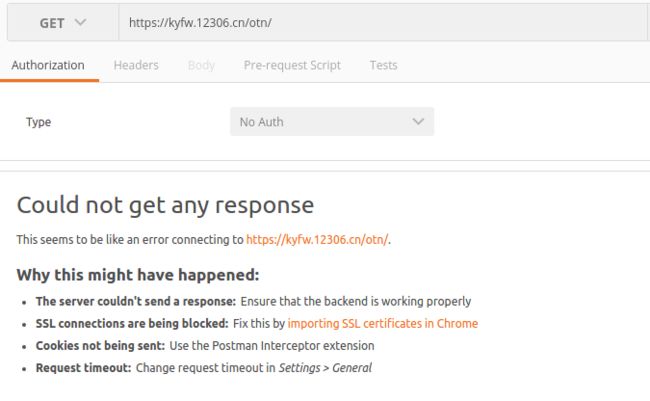
同时,在PostMan中访问该链接,也是提示失败。
接下来,替换RequestQueue,使我们的网络请求支持HTTPS安全访问。只需要将
RequestHandler类中的:
MyApplication.getRequestQueue().add(request);
替换为:
RequestManager.getInstance(MyApplication.getInstance()).getRequestQueue().add(request);
编译运行,验证一下。

成功!
OK,Volley系列到此为止,下一章开始,就用我们现在的成果来学习反编译技术。同时,这一段的代码我已经放到github上,地址:
https://github.com/joyin5344/VolleyDemo