数据库审计平台---基础环境部署
数据库审计平台 --- 介绍
数据库审计平台 --- 依赖环境部署
| 操作系统 | |
| RedHat | RedHat Enterprise Linux 7.4 |
| 软件版本 | |
| Python |
Python2.7(系统自带) |
| Mongodb |
mongodb-linux-x86_64-enterprise-rhel70-3.6.5.tgz |
| Redis | redis-3.2.3.tar.gz |
| Mysql |
mysql-5.7.21-el7-x86_64.tar.gz |
| cx_Oracle |
cx_Oracle-5.1.2-11g-py27-1.x86_64.rpm |
| oracle-instantclient12.1-basic-12.1.0.2.0-1.x86_64.rpm |
|
| oracle-instantclient12.1-devel-12.1.0.2.0-1.x86_64.rpm |
|
| virtualenv |
virtualenv-15.2.0.tar.gz (通过互联网安装‘pip2.7 install virtualenv'的版本是最新版) |
| pip | setuptools-19.6.tar.gz |
| pip-8.0.2.tar.gz |
|
| PyH |
PyH-0.1.1.tar.gz |
| Celery |
celery-4.1.1.zip |
| WTForms | WTForms-JSON-0.3.3.tar.gz |
| Themis | themis-master.zip |
| Themis | https://github.com/CreditEaseDBA/Themis |
| pyh |
https://github.com/hanxiaomax/pyh |
| Celery |
https://github.com/celery/celery/tree/v4.1.1 |
| wtforms | https://github.com/kvesteri/wtforms-json |
| WTForms |
https://pypi.org/project/WTForms-JSON/#files |
| PyH | https://code.google.com/archive/p/pyh/downloads |
操作系统环境配置
目录结构
操作系统最小化安装
配置yum源
mount /dev/cdrom /mnt
vi /etc/yum.repos.d/1.repo
[sqltuning]
name=sqltuning
baseurl=file:///mnt/
enable=1
gpgcheck=0
安装系统工具包
yum install gcc python-devel unzip
配置全局环境变量
vi /etc/profile
export MONGODB_HOME=/opt/mongodb
export ORACLE_HOME=/usr/lib/oracle/12.1/client64
export MYSQL_HOME=/opt/mysql
export LD_LIBRARY_PATH=$LD_LIBRARY_PATH:$ORACLE_HOME/lib
export TNS_ADMIN=$ORACLE_HOME/network/admin
export REDIS_HOME=/opt/redis
export PATH=$PATH:$REDIS_HOME/bin:$MONGODB_HOME/bin:$ORACLE_HOME/bin:$MYSQL_HOME/bin
配置开机启动
vi /etc/rc.d/rc.local
/opt/mongodb/bin/mongod -f /opt/mongodb/bin/mongodb.conf安装所有组件
安装mongodb
cd /opt/media
tar -zxvf mongodb-linux-x86_64-enterprise-rhel70-3.6.5.tgz
mv mongodb-linux-x86_64-enterprise-rhel70-3.6.5 /opt/mongodb
mkdir -p /opt/mongodb/db /opt/mongodb/logs
cd /opt/mongodb/bin
vi /opt/mongodb/bin/mongodb.conf
dbpath=/opt/mongodb/db
logpath=/opt/mongodb/logs/mongodb.log
port=27017
fork=true
bind_ip=10.6.0.169,127.0.0.1
启动mongodb
/opt/mongodb/bin/mongod --auth -f /opt/mongodb/bin/mongodb.conf
教程 http://www.runoob.com/mongodb/mongodb-tutorial.html
配置mongodb
>use admin
>db.createUser(
  {
    user: "dba", //用户名
    pwd: "sqltuning", //密码
    roles: [ { role: "root", db: "admin" } ] //设置权限
  }
)
#因为执行eval需要anyAction,故创建新角色
>db.createRole({
role: "sysAdmin",
privileges: [{
resource: {
anyResource: true
},
actions: ['anyAction']
}],
roles: []
})
>use sqlreview	---创建sqlreview
>db.createUser(
  {
    user: "sqlreview", //用户名
    pwd: "sqlreview", //密码
    roles: [
 { role: "dbOwner", db: "sqlreview" } ,
{role:"sysAdmin",db:"admin"}
] //设置权限
  }
)
#finish
安装redis
cd /opt/media
tar -zxvf redis-3.2.3.tar.gz
mkdir -p /opt/redis
cd /opt/media/redis-3.2.3
make PREFIX=/opt/redis install
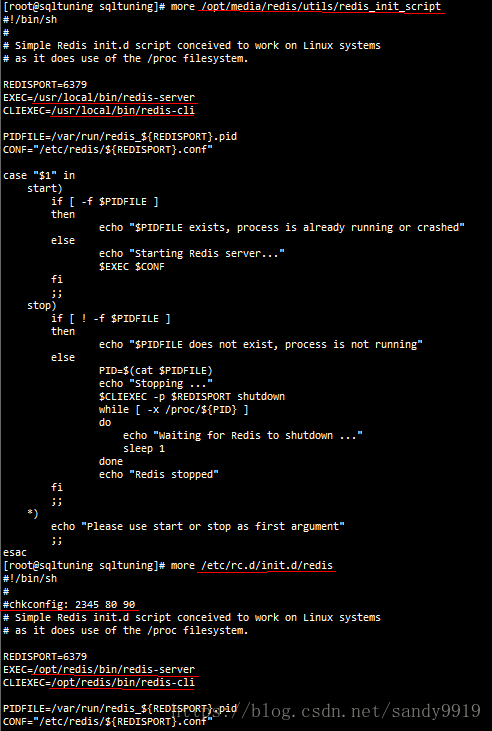
cp /opt/media/redis/utils/redis_init_script /etc/rc.d/init.d/redis
vi /etc/rc.d/init.d/redis
chkconfig -add redis
mkdir -p /etc/redis
cp /opt/media/redis/redis.conf /etc/redis/6379.conf
配置redis
vi /etc/redis/6379.conf
dir /opt/redis/db
requirepass sqltuning
启动redis
systemctl status redis.service
systemctl restart redis.service
安装mysql
groupadd mysql
useradd -g mysql mysql
passwd mysql
cd /opt/media
tar -zxvf mysql-5.7.21-el7-x86_64.tar.gz
mv mysql-5.7.21-el7 /opt/mysql
mkdir -p /opt/mysql/data /opt/mysql/log
/opt/mysql/bin/mysql_install_db --user=mysql --basedir=/opt/mysql/ --datadir=/opt/mysql/data/
/opt/mysql/bin/mysqld --user=mysql --basedir=/opt/mysql/ --datadir=/opt/mysql/data/
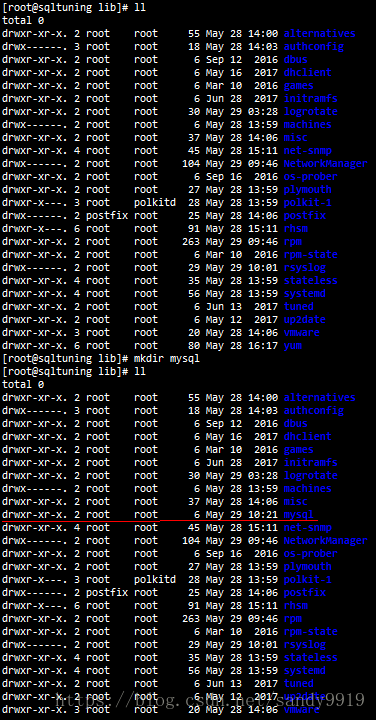
注:/var/lib/mysql这个目录是否存在,如果不存在自行创建,并授权
mkdir -p /var/lib/mysql
chown -R mysql.mysql /var/lib/mysql
/opt/mysql/bin/mysqld --user=mysql --basedir=/usr/local/mysql --datadir=/opt/mysql/data
vi /opt/mysql/support-files/mysql.server
修改basedir、datadir以及脚本中的所有目录
ln -s /opt/mysql/bin/mysql /usr/bin
vi /etc/my.cnf
#[mysqld]
#datadir=/var/lib/mysql
#socket=/var/lib/mysql/mysql.sock
## Disabling symbolic-links is recommended to prevent assorted security risks
#symbolic-links=0
## Settings user and group are ignored when systemd is used.
## If you need to run mysqld under a different user or group,
## customize your systemd unit file for mariadb according to the
## instructions in http://fedoraproject.org/wiki/Systemd

#[mysqld_safe]
#log-error=/var/log/mariadb/mariadb.log
#pid-file=/var/run/mariadb/mariadb.pid

##
## include all files from the config directory
##
#!includedir /etc/my.cnf.d


##########################################################################


[mysqld]
basedir=/opt/mysql
datadir=/opt/mysql/data
port		= 3306
socket		= /var/lib/mysql/mysql.sock
character-set-server = utf8
#skip-grant-tables

skip-name-resolve
#skip-external-locking
lower_case_table_names=1
log_bin_trust_function_creators =1
back_log = 512
#skip-networking
max_connections = 500
max_connect_errors = 100
table_open_cache = 4096
#external-locking
max_allowed_packet = 16M


max_heap_table_size = 64M
read_buffer_size = 8M
read_rnd_buffer_size = 16M
sort_buffer_size = 8M
join_buffer_size = 8M

thread_cache_size = 64
#thread_concurrency = 8
thread_stack = 192K

query_cache_size = 64M
query_cache_limit = 2M

ft_min_word_len = 4

#memlock

default-storage-engine = INNODB
transaction_isolation = REPEATABLE-READ

tmp_table_size = 64M


binlog_cache_size = 1M
log-bin=/opt/mysql/log/mysql-bin
binlog_format=mixed

slow_query_log
slow_query_log_file=/opt/mysql/log/mysql_solw.log
long_query_time = 2
log-error=/opt/mysql/log/mysql_error.log

# ***  Replication related settings
server-id = 1

#*** MyISAM Specific options
key_buffer_size = 32M
bulk_insert_buffer_size = 64M
myisam_sort_buffer_size = 128M
myisam_max_sort_file_size = 10G
myisam_repair_threads = 1

# *** INNODB Specific options ***
#skip-innodb
#innodb_additional_mem_pool_size = 16M
innodb_buffer_pool_size = 3G

innodb_data_file_path = ibdata1:10M:autoextend
#innodb_data_home_dir =
innodb_write_io_threads = 8
innodb_read_io_threads = 8
#innodb_force_recovery=1
innodb_thread_concurrency = 16
innodb_flush_log_at_trx_commit = 2
#innodb_fast_shutdown
innodb_log_buffer_size = 8M
innodb_log_file_size = 256M
innodb_log_files_in_group = 3
#innodb_log_group_home_dir
innodb_max_dirty_pages_pct = 90
#innodb_flush_method=O_DSYNC
innodb_lock_wait_timeout = 120


[mysqldump]
quick
max_allowed_packet = 16M
[mysql]
no-auto-rehash
#safe-updates
[myisamchk]
key_buffer_size = 512M
sort_buffer_size = 512M
read_buffer = 8M
write_buffer = 8M
[mysqlhotcopy]
interactive-timeout
[mysqld_safe]
open-files-limit = 8192
cp /opt/mysql/support-files/mysql.server /etc/init.d/mysqld
chmod 755 /etc/init.d/mysqld
chkconfig -add mysqld
chkconfig --level 2345 mysqld on
vi /etc/my.cnf
[mysqld]
skip-grant-tables
systemctl restart mysql.service
注:ERROR 2002 (HY000): Can't connect to local MySQL server through socket '/tmp/mysql.sock' (2)
ln -s /var/lib/mysql/mysql.sock /tmp/mysql.sock
mysql -u root -p (一路直接回车)
update mysql.user set authentication_string=password('sqltuning') where user='root';
flush privileges;
systemctl restart mysql.service
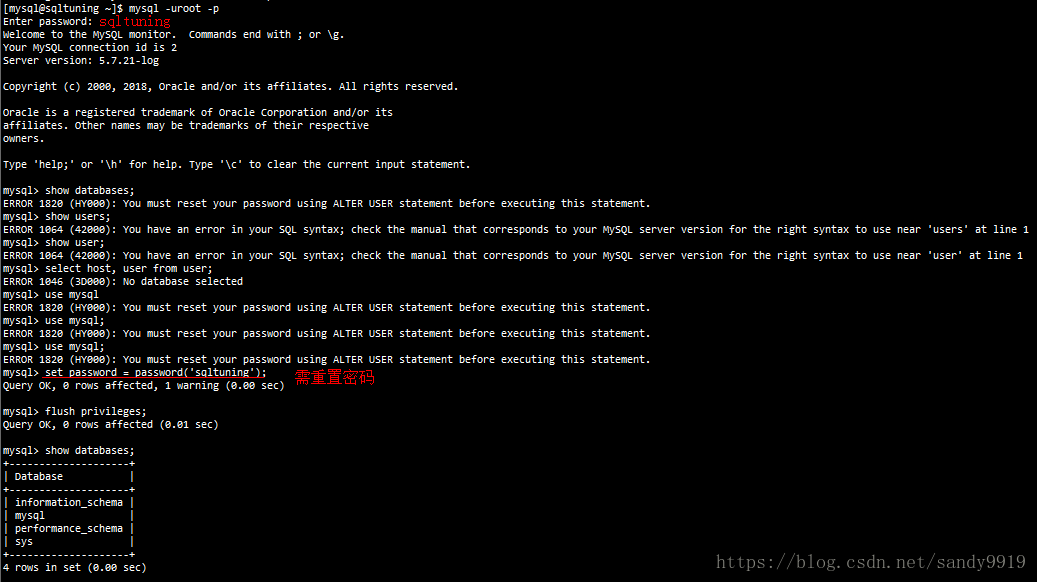
mysql -uroot -p
sqltuning
setup password = password('sqltuning');

flush privileges;
配置mysql
?????????????????


