1、pom.xml


xmlns:xsi ="http://www.w3.org/2001/XMLSchema-instance" xsi:schemaLocation="http://maven.apache.org/POM/4.0.0 http://maven.apache.org/xsd/maven-4.0.0.xsd">4.0.0 com.lynch spring-cloud-consul-config 0.0.1-SNAPSHOT org.springframework.boot spring-boot-starter-parent 2.0.3.RELEASE UTF-8 UTF-8 1.8 Finchley.RELEASE org.springframework.boot spring-boot-starter-actuator org.springframework.cloud spring-cloud-starter-consul-discovery org.springframework.cloud spring-cloud-starter-consul-config org.springframework.cloud spring-cloud-starter-feign 1.4.5.RELEASE org.springframework.boot spring-boot-starter-web org.springframework.boot spring-boot-starter-test test org.springframework.cloud spring-cloud-dependencies ${spring-cloud.version} pom import org.springframework.boot spring-boot-maven-plugin
2、添加 bootstrap.yml 配置文件
spring:
  application:
    name: myconsul
  cloud:
    consul:
      host: localhost
      port: 8500
      config:
        enabled: true #false禁用Consul配置,默认true
        format: YAML    # 表示consul上面文件的格式 有四种 YAML PROPERTIES KEY-VALUE FILES
        #data-key: configuration    #表示consul上面的KEY值(或者说文件的名字) 默认是data
        data-key: data    #表示consul上面的KEY值(或者说文件的名字) 默认是data
        #prefix设置配置值的基本文件夹
        #defaultContext设置所有应用程序使用的文件夹名称
        #profileSeparator设置用于使用配置文件在属性源中分隔配置文件名称的分隔符的值
  profiles:
    active: dev
server:
  port: 8081
3、StudentConfig——配置Java类
package com.lynch.config;

import org.springframework.boot.context.properties.ConfigurationProperties;

@ConfigurationProperties(prefix = "student")
public class StudentConfig {
    private String name;
    private int age;
    private String sex;

    public String getName() {
        return name;
    }

    public void setName(String name) {
        this.name = name;
    }

    public int getAge() {
        return age;
    }

    public void setAge(int age) {
        this.age = age;
    }

    public String getSex() {
        return sex;
    }

    public void setSex(String sex) {
        this.sex = sex;
    }

    @Override
    public String toString() {
        return "StudentConfig{" + "name='" + name + '\'' + ", age=" + age + ", sex='" + sex + '\'' + '}';
    }
}
4、StudentController——配置测试类
package com.lynch.web;

import org.springframework.beans.factory.annotation.Autowired;
import org.springframework.beans.factory.annotation.Value;
import org.springframework.web.bind.annotation.RequestMapping;
import org.springframework.web.bind.annotation.RestController;

import com.lynch.config.StudentConfig;

@RestController
@RequestMapping("/test")
public class StudentController {

    @Value("${myName}")
    private String myName;

    @Autowired
    private StudentConfig studentConfig;

    @RequestMapping("/myname")
    public String testHello() {
        System.out.println("my name is : " + myName);
        return myName;
    }

    @RequestMapping("/config")
    public String testConfig() {
        System.out.println(studentConfig.toString());
        return studentConfig.toString();
    }

}
5、程序入口类添加注解@EnableConfigurationProperties
package com.lynch;

import org.springframework.boot.SpringApplication;
import org.springframework.boot.autoconfigure.SpringBootApplication;
import org.springframework.boot.context.properties.EnableConfigurationProperties;
import org.springframework.cloud.client.discovery.EnableDiscoveryClient;

import com.lynch.config.StudentConfig;

@SpringBootApplication
@EnableDiscoveryClient
@EnableConfigurationProperties({StudentConfig.class})
public class Application {

    public static void main(String[] args) {
        SpringApplication.run(Application.class, args);
    }
}
注意:属性配置类的class需要添加到springboot的属性配置注解里面,
eg:@EnableConfigurationProperties({StudentConfig.class})
不添加的话,不能通过@Autowired注解,注入属性配置类,那么就需要在属性配置类上使用spring的bean注解,标记时一个bean到这里,代码已经完成了,启动consul服务器,下面在consul里面进行配置。
6、配置consul key/value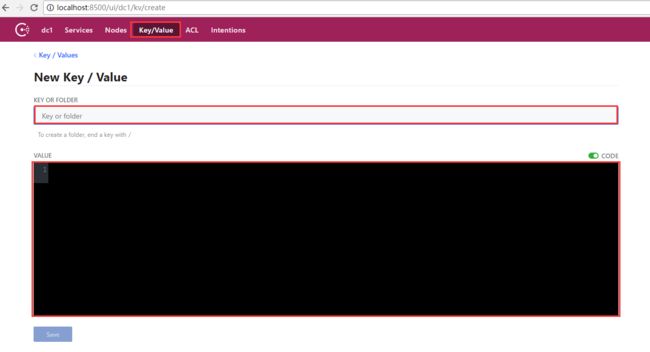
输入key和value
key:config/myconsul,dev/data
value:
myName: jack
student:
  name: jack
  age: 18
  sex: 男
注意:
a、默认情况下,consul配置默认存储在/config文件夹中
b、myconsul为spring.application.name值,dev为spring.profiles.active值,data为data-key值
c、value用的是yml格式的配置,冒号后面有一个空格。

7、运行程序测试
7.1、测试通过@Value注入
@Value("${myName}")
private String myName;
http://localhost:8081/test/myname
7.2、测试通过@ConfigurationProperties进行属性配置
测试url:http://localhost:8081/test/config
控制台打印信息:
my name is : jack
StudentConfig{name='jack', age=18, sex='男'}
8、总结
到这里consul的简单使用就完成了,consul有两个功能,一个是consul作为注册中心,另一个是consul作为配置中心。
在本文中consul作为配置中心,有一个点需要注意,通过@Value注入的属性,修改consul的配置后,属性不能立即生效,需要服务重启。而通过@ConfigurationProperties注入的属性,修改consul的配置后,属性会立即生效,所以建议如果需要动态生效的配置,最好使使用@ConfigurationProperties进行属性的注入。