Android中app进程ABI确定过程
更多干货,请关注微信公众号: tmac_lover
所谓的ABI全称是application binary interface,是一个机器语言级别的接口,描述的是二进制代码之间的兼容性,也就是说一起工作的二进制文件必须是ABI兼容的。
我们都知道Android现在支持的CPU架构大概有:ARMv5,ARMv7 (从2010年起),x86 (从2011年起),MIPS (从2012年起),ARMv8,MIPS64和x86_64这么多种,在Android系统中,上面的每一种CPU架构都关联着一个相应的ABI。如果某个app使用了.so文件,
那Android系统就必须要保证这个app进程所关联的ABI要和.so文件所依赖的ABI对应,否则这个app就可能会因为找不到需要的so文件而无法正常运行。今天这篇文章就来介绍一下Android系统是如何决定每个app进程以哪种ABI形式来启动的。
1. abi相关property
我们先来看几个和abi相关的系统property(以我自己的系统为例):
[ro.product.cpu.abilist] : [arm64-v8a, armeabi-v7a, armeabi]
[ro.product.cpu.abilist32] : [armeabi-v7a, armeabi]
[ro.product.cpu.abilist64] : [arm64-v8a]- ro.product.cpu.abilist的值表明当前系统所支持所有的ABI类型
- ro.product.cpu.abilist32和ro.product.cpu.abilist64分别表示系统所支持的32位和64位的ABI类型。
- 需要注意的是,这些property的排序代表着ABI的优先级,比如ro.product.cpu.abilist的值里arm64-v8a排在第一个,就表明如果没有指定,arm64-v8a就会成为app进程默认启动的关联ABI。
2. app进程启动流程
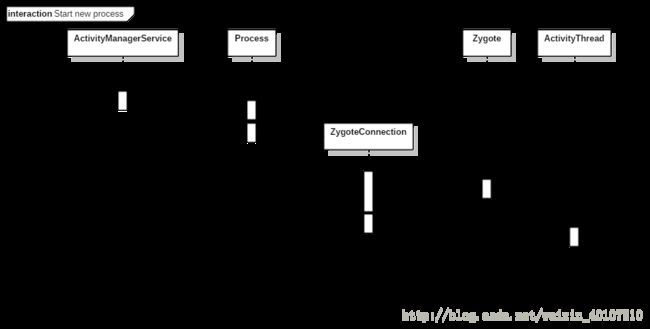
下面这张图是Android系统启动一个新进程的流程图:

可以看到,Android系统中启动新的app进程都是通过socket机制通知zygote进程,然后由zogote进程启动新的app进程。图中有几个关键的函数:
startProcessLocked(ProcessRecord app, String hostingType,
            String hostingNameStr, String abiOverride, String entryPoint, String[] entryPointArgs) {
    ... ...

    String requiredAbi = (abiOverride != null) ? abiOverride : app.info.primaryCpuAbi;
    if (requiredAbi == null) {
        // Build.SUPPORTED_ABIS[0]的值就是ro.product.cpu.abilist这个property的值的第一项
        requiredAbi = Build.SUPPORTED_ABIS[0];
    }

    app.requiredAbi = requiredAbi;

    Process.ProcessStartResult startResult = Process.start(entryPoint,
                    app.processName, uid, uid, gids, debugFlags, mountExternal,
                    app.info.targetSdkVersion, app.info.seinfo, requiredAbi, instructionSet,
                    app.info.dataDir, entryPointArgs);
}
startProcessLocked方法里确定app进程的关联abi过程如下:
- 如果abiOverride非空的话,就使用abiOverride的值,否则使用app.info.primaryCpuAbi的值
- 如果app.info.primaryCpuAbi也为空,则使用ro.product.cpu.abilist这个property的值的第一项
- 关于abiOverride的值,其实我也并不知道它是哪里来的,但是一般情况下,这个值都是空的
3. primaryCpuAbi值的确定
上面提到过app.info.primaryCpuAbi的值会对app进程最终的运行架构产生影响,那app.info.primaryCpuAbi的值又是在哪里确定的呢,答案就在PKMS(PackageManagerService)里。
在PKMS里有两处会对app.info.primaryCpuAbi的值产生影响,分别在scanPackageDirtyLI和adjustCpuAbisForSharedUserLPw两个方法里。
3.1 scanPackageDirtyLI
先看看scanPackageDirtyLI方法里和primaryCpuAbi相关的代码:
scanPackageDirtyLI() {
    ... ...

    // 这个方法里会通过apk包里包含的so库的架构来决定app的primaryCpuAbi的值
    derivePackageAbi(pkg, scanFile, cpuAbiOverride, true /* extract libs */);

    if (isSystemApp(pkg) && !pkg.isUpdatedSystemApp() &&
            pkg.applicationInfo.primaryCpuAbi == null) {
        // 如果是system app,并且这个app没有通过上面的函数找到primaryCpuAbi的值
        setBundledAppAbisAndRoots(pkg, pkgSetting);
        // setNativeLibraryPaths方法会根据CpuAbi的值确定apk使用的so库的安装路径
        setNativeLibraryPaths(pkg);
    }

    ... ...

    // 当前解析的apk是framework-res.apk, 对这个特殊的apk, 让它的ABI值的系统相同
    // 在我这里,它就是arm64-v8a
    if (mPlatformPackage == pkg) {
        pkg.applicationInfo.primaryCpuAbi = VMRuntime.getRuntime().is64Bit() ?
                Build.SUPPORTED_64_BIT_ABIS[0] : Build.SUPPORTED_32_BIT_ABIS[0];
    }
}
从上面的这段代码可以看到:
- 对所有的app,会先通过derivePackageAbi()方法尝试确定app的primaryCpuAbi的值
- 如果是system app, 并且通过derivePackageAbi()方法没有确定primaryCpuAbi的值,会再尝试通过setBundledAppAbisAndRoots()方法来确定
- 需要注意的是,无论是第三方app还是系统app, 运行完这段代码之后,仍然存在primaryCpuAbi值为空的情况,这是正常现象
接着先来看下derivePackageAbi()方法是如何确定primaryCpuAbi的值的:
public void derivePackageAbi(PackageParser.Package pkg, File scanFile,
                                 String cpuAbiOverride, boolean extractLibs) {
    // 这里会先设置一个默认的so库安装路径
    setNativeLibraryPaths(pkg);

    if (isMultiArch(pkg.applicationInfo)) {
        // 这里处理的是支持两种abi的apk, 这种apk的AndroidManifest.xml里会设置android:multiarch为true
        ... ...
    } else {
        String[] abiList = (cpuAbiOverride != null) ?
                new String[] { cpuAbiOverride } : Build.SUPPORTED_ABIS;


        final int copyRet;
        // 这是一个JNI函数,作用就是根据apk包里的lib/目录下的.so的ABI确定返回值
        copyRet = NativeLibraryHelper.copyNativeBinariesForSupportedAbi(handle,
                nativeLibraryRoot, abiList, useIsaSpecificSubdirs);

        // 根据copyRet的值,确定当前app的primaryCpuAbi值
        if (copyRet >= 0) {
            pkg.applicationInfo.primaryCpuAbi = abiList[copyRet];
        } else if (copyRet == PackageManager.NO_NATIVE_LIBRARIES && cpuAbiOverride != null) {
            pkg.applicationInfo.primaryCpuAbi = cpuAbiOverride;
        } else if (needsRenderScriptOverride) {
            pkg.applicationInfo.primaryCpuAbi = abiList[0];
        }

    }
    // 到这里有一些app已经确定了primaryCpuAbi的值,所以再调一次这个函数,更新它使用的.so库的安装位置
    setNativeLibraryPaths(pkg);
}
通过这段代码会可以看出:
- 一些apk包里lib目录下有.so文件的,可以通过.so文件的ABI来确定app的primaryCpuAbi的值
- 对于那些lib下没有.so文件的apk, 比如不使用so库的或者是系统app,运行完这个方法之后,primaryCpuAbi的值仍然是空
接下来看下系统app是如何通过setBundledAppAbisAndRoots()方法来确定primaryCpuAbi的值的:
private void setBundledAppAbisAndRoots(PackageParser.Package pkg,
                                    PackageSetting pkgSetting) {
    final String apkName = deriveCodePathName(pkg.applicationInfo.getCodePath());

    final String apkRoot = calculateBundledApkRoot(pkg.applicationInfo.sourceDir);
    // 使用setBundledAppAbi()方法确定primaryCpuAbi值
    setBundledAppAbi(pkg, apkRoot, apkName);

    if (pkgSetting != null) {
        pkgSetting.primaryCpuAbiString = pkg.applicationInfo.primaryCpuAbi;
        pkgSetting.secondaryCpuAbiString = pkg.applicationInfo.secondaryCpuAbi;
    }
}

 private static void setBundledAppAbi(PackageParser.Package pkg, String apkRoot, String apkName) {
    final File codeFile = new File(pkg.codePath);

    final boolean has64BitLibs;
    final boolean has32BitLibs;
    if (isApkFile(codeFile)) {
        // 只有framework-res.apk这个包会进这个if分支,has64BitLibs和has32BitLibs的值都是false
        // 在前面scanPackageDirtyLI里有说过,这个app的primaryCpuAbi的值是arm64-v8a
        has64BitLibs = (new File(apkRoot, new File(LIB64_DIR_NAME, apkName).getPath())).exists();
        has32BitLibs = (new File(apkRoot, new File(LIB_DIR_NAME, apkName).getPath())).exists();
    } else {
        // 对于其它的app, codeFile是apk所在的路径
        final File rootDir = new File(codeFile, LIB_DIR_NAME);

        final String isa = VMRuntime.getInstructionSet(Build.SUPPORTED_64_BIT_ABIS[0]);
        // 通过判断/system/app/${APP_NAME}/lib64这个文件夹是否存在决定has64BitLibs的值
        has64BitLibs = (new File(rootDir, isa)).exists();

        final String isa = VMRuntime.getInstructionSet(Build.SUPPORTED_32_BIT_ABIS[0]);
        // 通过判断/system/app/${APP_NAME}/lib这个文件夹是否存在决定has32BitLibs的值
        has32BitLibs = (new File(rootDir, isa)).exists();

    }

    // 下面这一段会根据has64BitLibs和has32BitLibs的值来确定app的primaryCpuAbi的值
    if (has64BitLibs && !has32BitLibs) {
        pkg.applicationInfo.primaryCpuAbi = Build.SUPPORTED_64_BIT_ABIS[0];
        pkg.applicationInfo.secondaryCpuAbi = null;
    } else if (has32BitLibs && !has64BitLibs) {
        pkg.applicationInfo.primaryCpuAbi = Build.SUPPORTED_32_BIT_ABIS[0];
        pkg.applicationInfo.secondaryCpuAbi = null;
    } else if (has32BitLibs && has64BitLibs) {
        if (VMRuntime.is64BitInstructionSet(getPreferredInstructionSet())) {
            pkg.applicationInfo.primaryCpuAbi = Build.SUPPORTED_64_BIT_ABIS[0];
            pkg.applicationInfo.secondaryCpuAbi = Build.SUPPORTED_32_BIT_ABIS[0];
        } else {
            pkg.applicationInfo.primaryCpuAbi = Build.SUPPORTED_32_BIT_ABIS[0];
            pkg.applicationInfo.secondaryCpuAbi = Build.SUPPORTED_64_BIT_ABIS[0];
        }
    } else {
        pkg.applicationInfo.primaryCpuAbi = null;
        pkg.applicationInfo.secondaryCpuAbi = null;
    }
}
根据上面的代码,可以知道:
- 对系统app而言,根据/system/app/${APP_NAME}/lib和/system/app/${APP_NAME}/lib64这两个文件夹是否存在,来确定它的primaryCpuAbi的值
- 当然,如果系统app不存在上述两个文件夹,那它的primaryCpuAbi的值仍然为空
所以在经过scanPackageDirtyLI()方法之后,会存在以下四种情况:
- 无论是系统app还是第三方app, 如果apk包里lib目录存在.so文件,会根据.so文件来确定primaryCpuAbi的值
- 如果是系统app, apk包里又不存在.so文件,就会进一步根据/system/app/${APP_NAME}/lib和/system/app/${APP_NAME}/lib64这两个文件夹是否存在,来确定它的primaryCpuAbi的值
- 对于framework-res.apk为个特殊的apk文件,它的primaryCpuAbi的值由虚拟机是什么架构来决定,在我这里,它是arm64-v8a
- 对于其余的apk, 它们的primaryCpuAbi的值仍然为空
3.2 adjustCpuAbisForSharedUserLPw
先来看下adjustCpuAbisForSharedUserLPw的调用位置,在PKMS的构造函数里:
public PackageManagerService(Context context, Installer installer,
            boolean factoryTest, boolean onlyCore) {
    ... ...
    // 逐个解析系统里的所有apk文件,上一节中的内容,都在这里完成
    scanDirLI();

    ... ...
    // 当所有的apk文件解析完之后,对使用了相同UID的apk, 调用adjustCpuAbisForSharedUserLPw
    for (SharedUserSetting setting : mSettings.getAllSharedUsersLPw()) {
        // setting.packages是所有使用相同UID的apk的集合
        adjustCpuAbisForSharedUserLPw(setting.packages, null /* scanned package */,
                false /* force dexopt */, false /* defer dexopt */);
    }

    ... ...
}

private void adjustCpuAbisForSharedUserLPw(Set packagesForUser,
        PackageParser.Package scannedPackage, boolean forceDexOpt, boolean deferDexOpt) {
    String requiredInstructionSet = null;
    ... ...

    PackageSetting requirer = null;
    for (PackageSetting ps : packagesForUser) {
        if (scannedPackage == null || !scannedPackage.packageName.equals(ps.name)) {
            if (ps.primaryCpuAbiString == null) {
                continue;
            }
            // 这个for循环的作用就是遍历所有使用相同UID的package,把遍历过程中遇到的第一个确定primaryCpuAbi
            // 的那个package取出来,保存到requirer中
            final String instructionSet = VMRuntime.getInstructionSet(ps.primaryCpuAbiString);
            if (requiredInstructionSet == null) {
                // 只取第一个被遍历到的
                requiredInstructionSet = instructionSet;
                requirer = ps;
            }
        }
    }

    if (requiredInstructionSet != null) {
        String adjustedAbi;
        if (requirer != null) {
            // 证明在这个集合中找到了已经确定primaryCpuAbi的那个package
            adjustedAbi = requirer.primaryCpuAbiString;
        } else {
            // scannedPackage == null时,这种情况不存在,所以不考虑这里
        }

        for (PackageSetting ps : packagesForUser) {
            if (scannedPackage == null || !scannedPackage.packageName.equals(ps.name)) {
                if (ps.primaryCpuAbiString != null) {
                    continue;
                }
                // 将adjustedAbi的值给那些使用同一个UID并且primaryCpuAbi是空的package
                ps.primaryCpuAbiString = adjustedAbi;
                if (ps.pkg != null && ps.pkg.applicationInfo != null) {
                    ps.pkg.applicationInfo.primaryCpuAbi = adjustedAbi;

                    ... ...
                }
            }
        }
    }
}
这段代码的作用就是调整使用相同UID的package的primaryCpuAbi的值,将那些还没有确定primaryCpuAbi的package用已经确定了的Abi的值代替。这里将是那些没有确定primaryCpuAbi的apk
再次确定abi值的最后一次机会,如果在这里还无法确定,那就在启动进程时,使用系统默认值。
4. 总结
最后来总结一下Android系统确定app进程关联哪种ABI的流程:
- 如果apk包中lib文件夹下有.so库,就根据这个.so库的架构模式,确定app的primaryCpuAbi的值
- 对于system app, 如果没法通过第一步确定primaryCpuAbi的值,PKMS会根据/system/app/${APP_NAME}/lib和/system/app/${APP_NAME}/lib64这两个文件夹是否存在,来确定它的primaryCpuAbi的值
- 对于还没有确定的app, 在最后还会将自己的primaryCpuAbi值与和他使用相同UID的package的值设成一样
- 对于到这里还没有确认primaryCpuAbi的app,就会在启动进程时使用ro.product.cpu.abilist这个property的值的第一项作为它关联的ABI