前端使用Nginx进行跨域
谨此记录使用Nginx踩坑之旅。
参考链接:https://segmentfault.com/a/1190000019227927?utm_source=tag-newest。
1.下载Nginx;
访问:http://nginx.org/en/download.html
选择一个版本下载,推荐稳定版本。
下载解压之后会有一个nginx文件夹。
在nginx目录下输入nginx -v,若出现版本号,则安装成功。
。
2.准备前端代码。(这里使用jquery的ajax发送请求)
index
3.准备后台代码。
利用node的express框架开启服务,并根据url返回json格式的数据,
设置这么多接口的目的是为了后面匹配nginx的location配置的。
安装node,找个文件夹安装express框架,运行命令npm install express -s。
新建个index.js,把下面代码copy进去即可。
const express = require('express')

var app = express()

var router = express.Router()
router.get('/ok', function (req, res) {
    res.json({
        code: 200,
        msg: "isOK"
    })
})

router.get('/ok/son', function (req, res) {
    res.json({
        code: 200,
        msg: "isOKSon"
    })
})

router.get('/ok2', function (req, res) {
    res.json({
        code: 200,
        msg: "isOK2"
    })
})

router.get('/no', function (req, res) {
    res.json({
        code: 200,
        msg: "isNO"
    })
})

router.get('/no/son', function (req, res) {
    res.json({
        code: 200,
        msg: "isNOSON"
    })
})

router.get('/no/son2', function (req, res) {
    res.json({
        code: 200,
        msg: "isNOSON2"
    })
})

app.use(router)
app.listen(3500, function () {
    console.log('listen in 3500')
})
然后开启node服务:node index.js
现在服务已开启,从浏览器查看:
此时页面访问接口会出现跨域:
接下来对nginx进行配置,来解决跨域问题。
4.nginx配置。
打开nginx目录下的conf目录里面nginx.conf,修改http里面的server如下:
server {
        #listen会对端口进行监听。
        #注意会占用这个端口,如果这个端口被别的程序占用。
        #要不杀死这个程序解放端口,要不换个端口(推荐...捂脸表情)。
        listen       8087;
        server_name  localhost;

        #charset koi8-r;

        #access_log  logs/host.access.log  main;

        location / {
            root   /Users/admin/Desktop/szh/node/; #直接指向跨域的目录
            index  index.html index.htm; #默认的页面
        }

        location /api/ {
            proxy_pass http://localhost:3500/; # 将要跨域的网址代理到api上
        }

        #error_page  404              /404.html;

        # redirect server error pages to the static page /50x.html
        #
        error_page   500 502 503 504  /50x.html;
        location = /50x.html {
            root   html;
        }

        # proxy the PHP scripts to Apache listening on 127.0.0.1:80
        #
        #location ~ \.php$ {
        #    proxy_pass   http://127.0.0.1;
        #}

        # pass the PHP scripts to FastCGI server listening on 127.0.0.1:9000
        #
        #location ~ \.php$ {
        #    root           html;
        #    fastcgi_pass   127.0.0.1:9000;
        #    fastcgi_index  index.php;
        #    fastcgi_param  SCRIPT_FILENAME  /scripts$fastcgi_script_name;
        #    include        fastcgi_params;
        #}

        # deny access to .htaccess files, if Apache's document root
        # concurs with nginx's one
        #
        #location ~ /\.ht {
        #    deny  all;
        #}
    }
root 可以指定项目目录,这样就不用把项目放入nginx里。
例如:我项目路径为 C:\Users\admin\Desktop\szh\node。
root 里应写 /Users/admin/Desktop/szh/node/;(注意应用分号;结尾)
5.运行nginx。
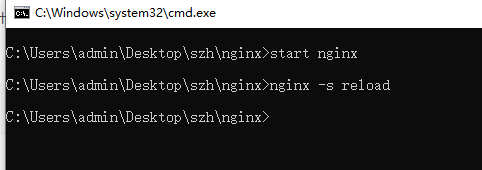
在nginx目录下输入start nginx。
每次修改配置都需要执行nginx -s reload命令才能生效。
此时nginx已成功运行,打开网址:http://localhost:8087/,8087端口已映射成你的项目内容。
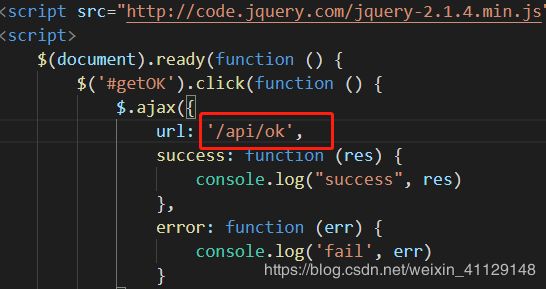
然后我们修改页面里的地址,把界面接口改成/api/:
改完刷新页面,请求接口,大功告成:
项目下载地址:https://github.com/song776158074/nginx-demo
PS:node里面别忘npm install 安装依赖。nginx的conf/nginx.conf里的root也需换对应的项目路径。


