中软国际实训全记录——第五天
中软国际实训第五天——实现分页式管理及
- 实现对用户列表的分页式管理
- 实现角色管理的数据库以及初步操作
- 个人总结
实现对用户列表的分页式管理
在昨天我们实现了对数据库中的增添查改,因此在此处我们不再赘述如何实现,今天我们就主要来实现分页式的管理以及对增添查改进行微调。
我们是使用MyBatis的插件PageHelper来实现分页的,使用PageHelp需要我们在dependency中添加依赖字段。
<dependency>
     <groupId>com.github.pagehelpergroupId>
     <artifactId>pagehelperartifactId>
     <version>5.1.2version>
dependency>
之后等待项目自己下载所需要的jar包,在下载完成之后我们需要在ApplicationContext中配置PageHelper。
<property name="plugins">
    <array>
        <bean class="com.github.pagehelper.PageInterceptor">
            <property name="properties">
                <props>
                    <prop key="helperDialect">mysqlprop>
                    <prop key="reasonable">trueprop>
                props>
            property>
        bean>
    array>
property>
我们需要将findAll函数中加上两个int参数pages与size,用来标志是第几页与每页最大的长度。还需要在UserInfoServiceImpl中添加PageHelper.startPage(pages, size);用来设定初始的值。
@Override
public List<UserInfo> findAll(int pages, int size){
    PageHelper.startPage(pages, size);
    return iUserInfoDao.findAll(pages, size);
}
在UserInfoController中我们要建立一个PageInfo的对象,将获取到的用户List储存到其中。在pages与size前面添加一个@RequestParam用来设定一个初始值。
@RequestMapping("findAll.do")
public ModelAndView findAll(@RequestParam(defaultValue = "1") int pages, @RequestParam(defaultValue = "5") int size){
    ModelAndView modelAndView = new ModelAndView();
    List<UserInfo> userInfos = iUserInfoService.findAll(pages, size);
    PageInfo users = new PageInfo(userInfos);
    modelAndView.addObject("users",users);
    modelAndView.setViewName("user-list");
    return modelAndView;
}
接下来就需要修改user-list.jsp文件,使用刚刚创建的PageInfo对象来传递数据。users.list来获取userinfo信息。
<tbody>
<c:forEach var="user" items="${users.list}">
		<tr>
			<td><input name="ids" type="checkbox">td>
			<td>${user.id}td>
			<td>${user.username}td>
			<td>${user.password}td>
			<td class="text-center">
				<a href="${pageContext.request.contextPath}/user/toUpdate.do?id=${user.id}" class="btn bg-olive btn-xs">更新a>
				<a href="${pageContext.request.contextPath}/user/delete.do?id=${user.id}" class="btn bg-olive btn-xs">删除a>
				<a href="#" class="btn bg-olive btn-xs">添加角色a>
			td>
		tr>
	c:forEach>
tbody>
在分页中我们需要使用使用users这一对象中的pageNumber与pages对象,来确定需要分页的位置。pageNumber在一个循环中显示可以储存下需要多少数据的页面,pages中总共有多少页面。
div>

	<div class="box-tools pull-right">
		<ul class="pagination">
			<li><a href="${pageContext.request.contextPath}/user/findAll.do?pages=1&size=5" aria-label="Previous">首页a>li>
			<li><a href="${pageContext.request.contextPath}/user/findAll.do?pages=${users.pageNum-1}&size=5">上一页a>li>
			<c:forEach begin="1" end="${users.pages}" var="pageNumber">
				<li><a href="${pageContext.request.contextPath}/user/findAll.do?pages=${pageNumber}&size=5">${pageNumber}a>li>
			c:forEach>
			<li><a href="${pageContext.request.contextPath}/user/findAll.do?pages=${users.pageNum+1}&size=5">下一页a>li>
			<li><a href="${pageContext.request.contextPath}/user/findAll.do?pages=${users.pages}&size=5" aria-label="Next">尾页a>li>
		ul>
	div>
div>
实现角色管理的数据库以及初步操作
要对角色管理,我们就需要在数据库中创建两张表role与user_role。

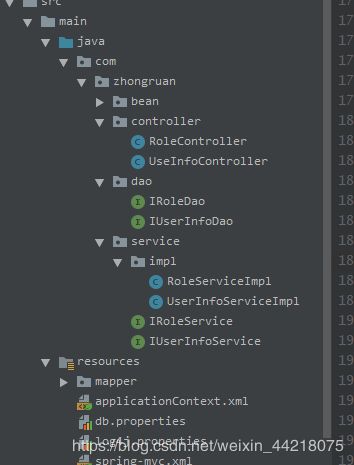
在项目的对应文件夹下建立接口与实现的类。
个人总结
今天我们主要就是实现了查询的分页,首先就是需要在dependency中添加PageHelp的依赖,之后需要在ApplicationContext中配置PageHelp。在使用的时候我们需要pages与size来确定是哪一个页面与数据的数量。在jsp文件中使用封装好的PageInfo来传递数据供页面使用。