基于opencv和mask-rcnn的视频目标检测和实例分割
@mask-rcnn实现视频实时检测OC
基于opencv和mask-rcnn的目标检测和实例分割
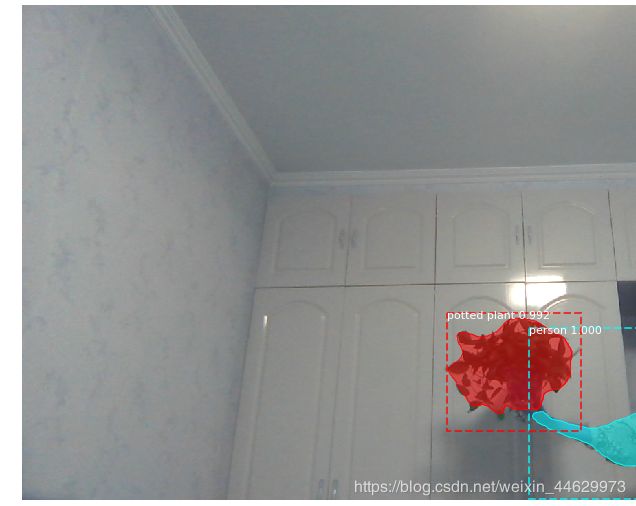
mask-rcnn是一个two-stage的目标检测和实例分割的框架,但官方的github代码只给出了照片的检测,本文主要利用opencv调用mask-rcnn实现视频检测。本文在jupyter notebook中实现。
原来的demo.ipynb
#import各种包,将文件夹的各种路径添加进来
import os
import sys
import random
import math
import numpy as np
import skimage.io
import matplotlib
import matplotlib.pyplot as plt

# Root directory of the project
ROOT_DIR = os.path.abspath("../")

# Import Mask RCNN
sys.path.append(ROOT_DIR)  # To find local version of the library
from mrcnn import utils
import mrcnn.model as modellib
from mrcnn import visualize
# Import COCO config
sys.path.append(os.path.join(ROOT_DIR, "samples/coco/"))  # To find local version
import coco

%matplotlib inline

# Directory to save logs and trained model
MODEL_DIR = os.path.join(ROOT_DIR, "logs")

# Local path to trained weights file
COCO_MODEL_PATH = os.path.join(ROOT_DIR, "mask_rcnn_coco.h5")
# Download COCO trained weights from Releases if needed
if not os.path.exists(COCO_MODEL_PATH):
    utils.download_trained_weights(COCO_MODEL_PATH)

# Directory of images to run detection on
IMAGE_DIR = os.path.join(ROOT_DIR, "images")
#显示框架参数
class InferenceConfig(coco.CocoConfig):
    # Set batch size to 1 since we'll be running inference on
    # one image at a time. Batch size = GPU_COUNT * IMAGES_PER_GPU
    GPU_COUNT = 1
    IMAGES_PER_GPU = 1

config = InferenceConfig()
config.display()
加载权重文件
# Create model object in inference mode.
model = modellib.MaskRCNN(mode="inference", model_dir=MODEL_DIR, config=config)

# Load weights trained on MS-COCO
model.load_weights(COCO_MODEL_PATH, by_name=True)
# COCO Class names
# Index of the class in the list is its ID. For example, to get ID of
# the teddy bear class, use: class_names.index('teddy bear')
class_names = ['BG', 'person', 'bicycle', 'car', 'motorcycle', 'airplane',
               'bus', 'train', 'truck', 'boat', 'traffic light',
               'fire hydrant', 'stop sign', 'parking meter', 'bench', 'bird',
               'cat', 'dog', 'horse', 'sheep', 'cow', 'elephant', 'bear',
               'zebra', 'giraffe', 'backpack', 'umbrella', 'handbag', 'tie',
               'suitcase', 'frisbee', 'skis', 'snowboard', 'sports ball',
               'kite', 'baseball bat', 'baseball glove', 'skateboard',
               'surfboard', 'tennis racket', 'bottle', 'wine glass', 'cup',
               'fork', 'knife', 'spoon', 'bowl', 'banana', 'apple',
               'sandwich', 'orange', 'broccoli', 'carrot', 'hot dog', 'pizza',
               'donut', 'cake', 'chair', 'couch', 'potted plant', 'bed',
               'dining table', 'toilet', 'tv', 'laptop', 'mouse', 'remote',
               'keyboard', 'cell phone', 'microwave', 'oven', 'toaster',
               'sink', 'refrigerator', 'book', 'clock', 'vase', 'scissors',
               'teddy bear', 'hair drier', 'toothbrush']
重点
接下来的代码将原来检测照片改为检测视频
'''
# Load a random image from the images folder
file_names = next(os.walk(IMAGE_DIR))[2]
#image = skimage.io.imread(os.path.join(IMAGE_DIR, '2.jpg'))

image = skimage.io.imread(os.path.join(IMAGE_DIR, random.choice(file_names)))

# Run detection
results = model.detect([image], verbose=1)

# Visualize results
r = results[0]

visualize.display_instances(image, r['rois'],r['masks'], r['class_ids'],
                            class_names, r['scores'],title='test')
'''
import cv2
capture = cv2.VideoCapture(0)
capture.set(cv2.CAP_PROP_FRAME_WIDTH,1920)
capture.set(cv2.CAP_PROP_FRAME_HEIGHT,1080)
while True:
    ret,frame = capture.read()
    results = model.detect([frame],verbose=1)
    r = results[0]
    frame = visualize.display_instances(frame, r['rois'],r['masks'], r['class_ids'],
                            class_names, r['scores'])
    #cv2.imshow('frame',frame)
    if cv2.waitKey(1)&0xFF==ord('q'):
        break
capture.release()
cv2.destroyAllWindows()

