芯之联 XR872 快速入门
官网的地址
https://xradiotech-developer-guide.readthedocs.io/zh/latest/zh_CN/get-started/
Windows平台搭建
1. 安装Cygwin工具
- 从Cygwin官方网站下载Cygwin终端setup-x86.exe
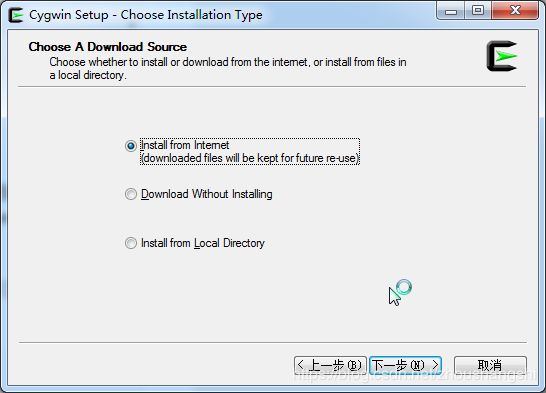
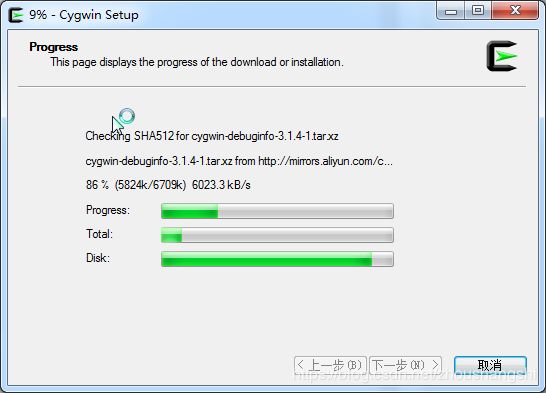
- 运行setup-x86.exe安装Cygwin工具包(注意:安装路径不要包含中文路径或者空格)
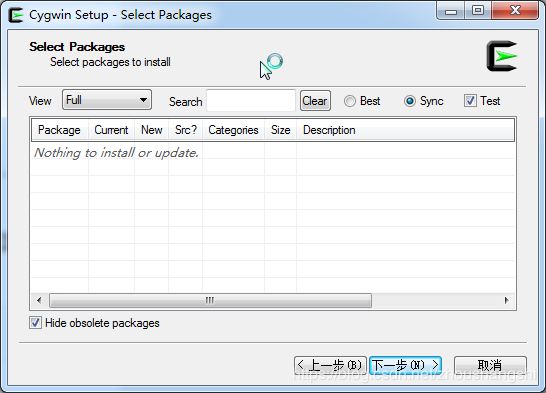
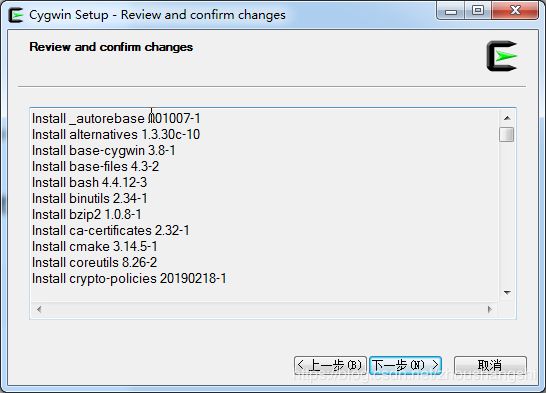
- 在安装包选项选择想要安装的工具包(cmake, git, wget, binutils, python, python-pip, zip, unzip, vim等)
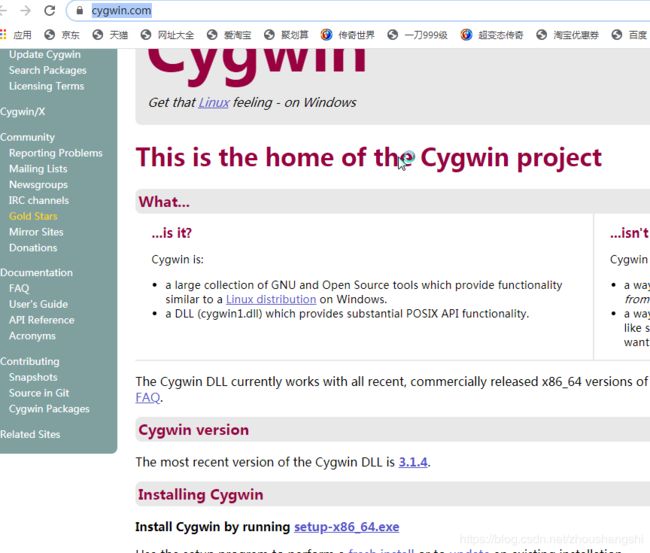
Cygwin官方网站:
https://www.cygwin.com/
下载 setup-x86_64.exe
重新安装
再三安装
安装教程请参考
https://blog.csdn.net/chunleixiahe/article/details/55666792
下载 Toolchain: gcc-arm-none-eabi-4_9-2015q2
Windows 版本
https://launchpad.net/gcc-arm-embedded/4.9/4.9-2015-q2-update/+download/gcc-arm-none-eabi-4_9-2015q2-2
0150609-win32.zip
将 “ gcc-arm-none-eabi-4_9-2015q2-20150609-win32.zip ” 解 压 至 Cygwin 的
“~/tools/gcc-arm-none-eabi-4_9-2015q2” 目录(若“tools” 目录不存在, 则需先创建)。
我存放的地址是
C:\cygwin64\home\xradiotech\tools\gcc-arm-none-eabi-4_9-2015q2
以上操作完成 Windows 环境下 Toolchain 的安装, 且 Toolchain 安装目录与“[sdk]/gcc.mk” 中的“CC_DIR”
变量一致([sdk]表示 SDK 根目录)。
CC_DIR = ~/tools/gcc-arm-none-eabi-4_9-2015q2/bin
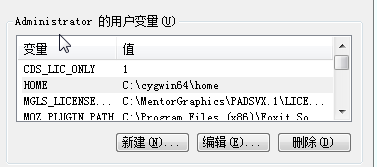
鉴于自己的安装目录,需要设置的环境变量如下图所示:
下载SDK
git clone https://github.com/XradioTech/xradio-skylark-sdk.git
我存放的地址是
C:\cygwin64\home\xradiotech\xradio-skylark-sdk
打开Cygwin64 Terminal
进入~/xradiotech/xradio-skylark-sdk/project/foo/gcc
输入 make config
进行芯片选择和晶振配置
| make config | 1) 执行 SDK 基础配置(根据提示, 进行芯片型号、 高频晶振等配置选择), 该 配置对所有工程生效。 如果需要更改 SDK 基础配置, 可再次执行此命令。 2) 正确执行该命令后, 将在 SDK 根目录下生成“.config” 文件。 3) 必须执行该命令后才可以执行其他编译命令。 |
编译和镜像创建的命令是:
make build
编译出错如下:
c:/cygwin64/home/tools/gcc-arm-none-eabi-4_9-2015q2/bin/../lib/gcc/arm-none-eabi/4.9.3/../../../../arm-none-eabi/lib/armv7e-m/softfp\libc_nano.a(lib_a-abort.o): In function `abort':
abort.c:(.text.abort+0xa): undefined reference to `_exit'
c:/cygwin64/home/tools/gcc-arm-none-eabi-4_9-2015q2/bin/../lib/gcc/arm-none-eabi/4.9.3/../../../../arm-none-eabi/lib/armv7e-m/softfp\libc_nano.a(lib_a-signalr.o): In function `_kill_r':
signalr.c:(.text._kill_r+0xe): undefined reference to `_kill'
c:/cygwin64/home/tools/gcc-arm-none-eabi-4_9-2015q2/bin/../lib/gcc/arm-none-eabi/4.9.3/../../../../arm-none-eabi/lib/armv7e-m/softfp\libc_nano.a(lib_a-signalr.o): In function `_getpid_r':
signalr.c:(.text._getpid_r+0x0): undefined reference to `_getpid'
collect2.exe: error: ld returned 1 exit status
make: *** [../../../project/project.mk:293:foo.axf] 错误 1
没有找到相关的函数,自己写一个头文件syscalls.h放到工程目录下(和main.c在同一个路径下)
#ifndef SYSCALLS_H
#define SYSCALLS_H
/****************************************************************************
Copyright (c) 2009-2012 by Michael Fischer. All rights reserved.
Redistribution and use in source and binary forms, with or without
modification, are permitted provided that the following conditions
are met:
Redistributions of source code must retain the above copyright
notice, this list of conditions and the following disclaimer.
Redistributions in binary form must reproduce the above copyright
notice, this list of conditions and the following disclaimer in the
documentation and/or other materials provided with the distribution.
Neither the name of the author nor the names of its contributors may
be used to endorse or promote products derived from this software
without specific prior written permission.
THIS SOFTWARE IS PROVIDED BY THE COPYRIGHT HOLDERS AND CONTRIBUTORS
"AS IS" AND ANY EXPRESS OR IMPLIED WARRANTIES, INCLUDING, BUT NOT
LIMITED TO, THE IMPLIED WARRANTIES OF MERCHANTABILITY AND FITNESS
FOR A PARTICULAR PURPOSE ARE DISCLAIMED. IN NO EVENT SHALL
THE COPYRIGHT OWNER OR CONTRIBUTORS BE LIABLE FOR ANY DIRECT, INDIRECT,
INCIDENTAL, SPECIAL, EXEMPLARY, OR CONSEQUENTIAL DAMAGES (INCLUDING,
BUT NOT LIMITED TO, PROCUREMENT OF SUBSTITUTE GOODS OR SERVICES; LOSS
OF USE, DATA, OR PROFITS; OR BUSINESS INTERRUPTION) HOWEVER CAUSED
AND ON ANY THEORY OF LIABILITY, WHETHER IN CONTRACT, STRICT LIABILITY,
OR TORT (INCLUDING NEGLIGENCE OR OTHERWISE) ARISING IN ANY WAY OUT OF
THE USE OF THIS SOFTWARE, EVEN IF ADVISED OF THE POSSIBILITY OF
SUCH DAMAGE.
History:
28.03.2009 mifi First Version, based on the original syscall.c from
newlib version 1.17.0
03.06.2012 mifi Changed _write_r and _sbrk_r. Added __putchar and use
__HeapLimit to check end of heap.
02.02.2013 nifi Added _exit, _kill and _getpid.
****************************************************************************/
#include
#include
#include
#include
#include
extern void __putchar (char ch);
/***************************************************************************/
/*int _read_r (struct _reent *r, int file, char * ptr, int len)
{
r = r;
file = file;
ptr = ptr;
len = len;
errno = EINVAL;
return -1;
}
*/
/*************************************************************************/
int _lseek_r (struct _reent *r, int file, int ptr, int dir)
{
r = r;
file = file;
ptr = ptr;
dir = dir;
return 0;
}
/*************************************************************************/
int _write_r (struct _reent *r, int file, char * ptr, int len)
{
r = r;
file = file;
ptr = ptr;
#if 0
int index;
/* For example, output string by UART */
for(index=0; index
if (ptr[index] == '\n')
{
__putchar('\r');
}
__putchar(ptr[index]);
}
#endif
return len;
}
/**************************************************************************/
int _close_r (struct _reent *r, int file)
{
return 0;
}
/***************************************************************************/
/***************************************************************************/
int _fstat_r (struct _reent *r, int file, struct stat * st)
{
r = r;
file = file;
memset (st, 0, sizeof (* st));
st->st_mode = S_IFCHR;
return 0;
}
/***************************************************************************/
int _isatty_r (struct _reent *r, int fd)
{
r = r;
fd = fd;
return 1;
}
/***************************************************************************/
void _exit (int a)
{
a = a;
while(1) {};
}
/***************************************************************************/
int _kill (int a, int b)
{
a = a;
b = b;
return 0;
}
/***************************************************************************/
int _getpid(int a)
{
a = a;
return 0;
}
/*** EOF ***/
#endif /* SYSCALLS_H */
需要在main.c里调用此头文件,最后编译通过!如下所示:
c:/cygwin64/home/tools/gcc-arm-none-eabi-4_9-2015q2/bin/../lib/gcc/arm-none-eabi/4.9.3/../../../../arm-none-eabi/bin/ld.exe: warning: ../../../lib\libchip.a(hal_board.o) uses 32-bit enums yet the output is to use variable-size enums; use of enum values across objects may fail
c:/cygwin64/home/tools/gcc-arm-none-eabi-4_9-2015q2/bin/../lib/gcc/arm-none-eabi/4.9.3/../../../../arm-none-eabi/bin/ld.exe: warning: ../../../lib\libchip.a(hal_ccm.o) uses 32-bit enums yet the output is to use variable-size enums; use of enum values across objects may fail
~/tools/gcc-arm-none-eabi-4_9-2015q2/bin/arm-none-eabi-objcopy -O binary -R .xip foo.axf foo.bin
~/tools/gcc-arm-none-eabi-4_9-2015q2/bin/arm-none-eabi-objcopy -O binary -j .xip foo.axf foo_xip.bin
~/tools/gcc-arm-none-eabi-4_9-2015q2/bin/arm-none-eabi-size foo.axf
text data bss dec hex filename
468924 2464 62716 534104 82658 foo.axf
cp foo.bin ../image/xr872/app.bin
cp foo_xip.bin ../image/xr872/app_xip.bin
cp -t ../image/xr872 ../../../bin/xradio_v2/boot/xr872/boot_40M.bin ../../../bin/xradio_v2/wlan_bl.bin ../../../bin/xradio_v2/wlan_fw.bin ../../../bin/xradio_v2/wlan_sdd_40M.bin
cd ../image/xr872 && \
chmod a+r *.bin && \
~/tools/gcc-arm-none-eabi-4_9-2015q2/bin/arm-none-eabi-gcc -E -P -CC -D__CONFIG_CHIP_XR872 -D__CONFIG_CHIP_ARCH_VER=2 -D__CONFIG_ARCH_APP_CORE -D__CONFIG_CPU_CM4F -D__CONFIG_HOSC_TYPE=40 -D__CONFIG_LIBC_REDEFINE_GCC_INT32_TYPE -D__CONFIG_LIBC_PRINTF_FLOAT -D__CONFIG_LIBC_SCANF_FLOAT -D__CONFIG_LIBC_WRAP_STDIO -D__CONFIG_MALLOC_USE_STDLIB -D__CONFIG_OS_FREERTOS -D__CONFIG_LWIP_V1 -D__CONFIG_MBEDTLS_VER=0x02100000 -D__CONFIG_MBUF_IMPL_MODE=0 -D__CONFIG_WLAN -D__CONFIG_WLAN_STA -D__CONFIG_WLAN_AP -D__CONFIG_WLAN_MONITOR -D__CONFIG_WIFI_CERTIFIED -D__CONFIG_XIP -D__CONFIG_SECTION_ATTRIBUTE_XIP -D__CONFIG_SECTION_ATTRIBUTE_NONXIP -D__CONFIG_SECTION_ATTRIBUTE_SRAM -D__CONFIG_ROM -D__CONFIG_ROM_FREERTOS -D__CONFIG_ROM_XZ -D__CONFIG_PM -D__CONFIG_OTA -D__CONFIG_OTA_POLICY=0x00 -D__CONFIG_CACHE_POLICY=0x02 -D__CONFIG_MBUF_HEAP_MODE=0 -D__CONFIG_MBEDTLS_HEAP_MODE=0 -D__CONFIG_HTTPC_HEAP_MODE=0 -D__CONFIG_MQTT_HEAP_MODE=0 -D__CONFIG_NOPOLL_HEAP_MODE=0 -D__CONFIG_WPA_HEAP_MODE=0 -D__CONFIG_UMAC_HEAP_MODE=0 -D__CONFIG_LMAC_HEAP_MODE=0 -D__CONFIG_CEDARX_HEAP_MODE=0 -D__CONFIG_AUDIO_HEAP_MODE=0 -D__CONFIG_CODEC_HEAP_MODE=0 -o .image.cfg - < ./image.cfg && \
true && \
../../../../tools/mkimage.exe -O -c .image.cfg -o xr_system.img
cfg string:
{
"magic" : "AWIH",
"version" : "0.4",
"OTA" : {"addr": "1024K", "size": "4K"},
"image" : {"max_size": "1020K"},
"count" : 6,
"section" :
[
{"id": "0xa5ff5a00", "bin": "boot_40M.bin", "cert": "null", "flash_offs": "0K", "sram_offs": "0x00268000", "ep": "0x00268101", "attr": "0x1"},
{"id": "0xa5fe5a01", "bin": "app.bin", "cert": "null", "flash_offs": "32K", "sram_offs": "0x00201000", "ep": "0x00201101", "attr": "0x1"},
{"id": "0xa5fd5a02", "bin": "app_xip.bin", "cert": "null", "flash_offs": "80K", "sram_offs": "0xffffffff", "ep": "0xffffffff", "attr": "0x2"},
{"id": "0xa5fa5a05", "bin": "wlan_bl.bin", "cert": "null", "flash_offs": "980K", "sram_offs": "0xffffffff", "ep": "0xffffffff", "attr": "0x1"},
{"id": "0xa5f95a06", "bin": "wlan_fw.bin", "cert": "null", "flash_offs": "990K", "sram_offs": "0xffffffff", "ep": "0xffffffff", "attr": "0x1"},
{"id": "0xa5f85a07", "bin": "wlan_sdd_40M.bin", "cert": "null", "flash_offs": "1016K", "sram_offs": "0xffffffff", "ep": "0xffffffff", "attr": "0x1"},
{}
]
}
generate image: xr_system.img
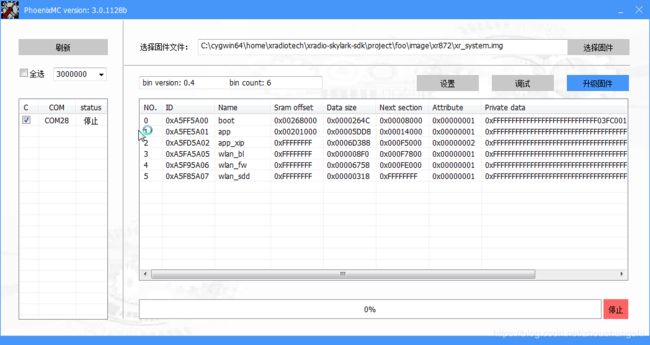
生成镜像文件后就可以进行烧写了,烧写工具phoenixMC.exe在
C:\cygwin64\home\xradiotech\xradio-skylark-sdk\tools
按着BOOT按键上电就进入了升级模式里。

