Spring Boot2.0系列教程之Redis 实现数据缓存和 Session 共享(八)
在实际工作中 Redis 最常用的两个使用场景是什么?一个是数据缓存,另一个就是 Session 共享。Spring Boot 针对这两个场景都做了一些优化,让我们在实际项目中使用非常的方便。
数据缓存
使用 Redis 做为数据缓存是最常用的场景了。我们知道绝大多数的网站/系统,最先遇到的一个性能瓶颈就是数据库,使用 Redis 做数据库的前置缓存,可以非常有效的降低数据库的压力,从而提升整个系统的响应效率和并发量。Spring Boot 也提供了非常简单的解决方案,这里给大家演示最核心的三个注解:@Cacheable、@CacheEvict、@CachePut 。
一、为什么使用
- 解决应用服务器的cpu和内存压力
- 减少io的读操作,减轻io的压力
- 关系型数据库的扩展性不强,难以改变表结构
二、优点:
- nosql数据库没有关联关系,数据结构简单,拓展表比较容易
- nosql读取速度快,对较大数据处理快
三、适用场景:
- 数据高并发的读写
- 海量数据的读写
- 对扩展性要求高的数据
四、不适场景:
- 需要事务支持(非关系型数据库)
- 基于sql结构化查询储存,关系复杂
五、Redis结构:
Redis是一个开源的key—value型数据库,支持string、list、set、zset和hash类型数据。对这些数据的操作都是原子性的,redus为了保证效率会定期持久化数据。
六、使用场景:
- 配合关系型数据库做高速缓存
- 缓存高频次访问的数据,降低数据库io
- 分布式架构,做session共享
- 可以持久化特定数据。
- 利用zset类型可以存储排行榜
- 利用list的自然时间排序存储最新n个数据
注:第一部分为代码,第二部分为增删改查操作的截图,完整代码可在github下载。
github地址:https://github.com/zjh746140129/Spring-Boot2.0
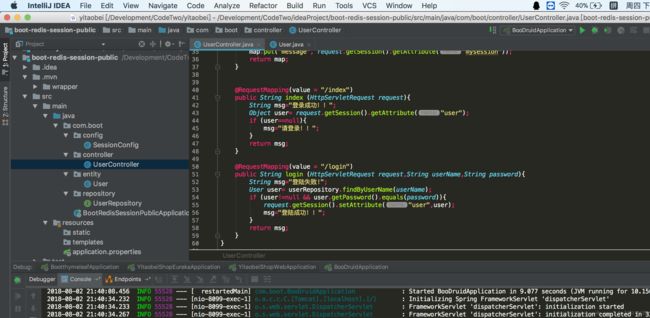
项目结构截图:
一、代码片段
1、编写用户类
package com.boot.entity;

import javax.persistence.Column;
import javax.persistence.Entity;
import javax.persistence.GeneratedValue;
import javax.persistence.Id;
import java.io.Serializable;

import org.apache.commons.lang3.builder.ToStringBuilder;


/**
 * 用户类
 * Created by zhoujh on 2018/7/19.
 */
@Entity
public class User implements Serializable {

    private static final long serialVersionUID = 1L;
    @Id
    @GeneratedValue
    private Long id;
    @Column(nullable = false, unique = true)
    private String userName;
    @Column(nullable = false)
    private String password;
    @Column(nullable = false, unique = true)
    private String email;
    @Column(nullable = false)
    private String nickname;
    @Column(nullable = false)
    private String regTime;

    public User() {
        super();
    }
    public User(String email, String nickname, String password, String userName, String regTime) {
        super();
        this.email = email;
        this.nickname = nickname;
        this.password = password;
        this.userName = userName;
        this.regTime = regTime;
    }
    public Long getId() {
        return id;
    }
    public void setId(Long id) {
        this.id = id;
    }
    public String getUserName() {
        return userName;
    }
    public void setUserName(String userName) {
        this.userName = userName;
    }

    public String getPassword() {
        return password;
    }

    public void setPassword(String password) {
        this.password = password;
    }

    public String getEmail() {
        return email;
    }
    public void setEmail(String email) {
        this.email = email;
    }

    public String getNickname() {
        return nickname;
    }

    public void setNickname(String nickname) {
        this.nickname = nickname;
    }

    public String getRegTime() {
        return regTime;
    }
    public void setRegTime(String regTime) {
        this.regTime = regTime;
    }

    @Override
    public String toString() {
        return ToStringBuilder.reflectionToString(this);
    }
}
2、编写接口
package com.boot.repository;

import com.boot.entity.User;
import org.springframework.data.jpa.repository.JpaRepository;

import java.util.List;

/**
 * 用户接口
 * Created by zhoujh on 2018/7/19.
 */
public interface UserRepository extends JpaRepository {
    User findByUserName(String userName);
}
3、编写controller
package com.boot.controller;

import com.boot.entity.User;
import com.boot.repository.UserRepository;
import org.springframework.beans.factory.annotation.Autowired;
import org.springframework.web.bind.annotation.RequestMapping;
import org.springframework.web.bind.annotation.RestController;

import javax.servlet.http.HttpServletRequest;
import java.util.HashMap;
import java.util.Map;

/**
 * 用户controller
 * Created by zhoujh on 2018/7/19.
 */
@RestController
public class UserController {

    @Autowired
    private UserRepository userRepository;

    @RequestMapping(value = "/setSession")
    public Map setSession (HttpServletRequest request){
        Map map = new HashMap<>();
        request.getSession().setAttribute("mysession", request.getRequestURL());
        map.put("request Url", request.getRequestURL());
        return map;
    }

    @RequestMapping(value = "/getSession")
    public Object getSession (HttpServletRequest request){
        Map map = new HashMap<>();
        map.put("sessionId", request.getSession().getId());
        map.put("message", request.getSession().getAttribute("mysession"));
        return map;
    }


    @RequestMapping(value = "/index")
    public String index (HttpServletRequest request){
        String msg="登录成功!!";
        Object user= request.getSession().getAttribute("user");
        if (user==null){
            msg="请登录!!";
        }
        return msg;
    }

    @RequestMapping(value = "/login")
    public String login (HttpServletRequest request,String userName,String password){
        String msg="登陆失败!";
        User user= userRepository.findByUserName(userName);
        if (user!=null && user.getPassword().equals(password)){
            request.getSession().setAttribute("user",user);
            msg="登陆成功!!";
        }
        return msg;
    }
}
4、编写sessionconfig
package com.boot.config;

import org.springframework.context.annotation.Configuration;
import org.springframework.session.data.redis.config.annotation.web.http.EnableRedisHttpSession;

@Configuration
@EnableRedisHttpSession(maxInactiveIntervalInSeconds = 86400*30)
public class SessionConfig {
}
5、启动类
package com.boot;

import org.springframework.boot.SpringApplication;
import org.springframework.boot.autoconfigure.SpringBootApplication;

@SpringBootApplication
public class BootRedisSessionPublicApplication {

	public static void main(String[] args) {
		SpringApplication.run(BootRedisSessionPublicApplication.class, args);
	}
}
6、配置文件
spring.datasource.url=jdbc:mysql://localhost:3306/school_score
spring.datasource.username=root
spring.datasource.password=root
spring.datasource.driver-class-name=com.mysql.jdbc.Driver

spring.jpa.properties.hibernate.hbm2ddl.auto=update
spring.jpa.properties.hibernate.dialect=org.hibernate.dialect.MySQL5InnoDBDialect
spring.jpa.show-sql= true
server.port=8099

# REDIS
# Redis数据库索引(默认为0)
spring.redis.database=0
# Redis服务器地址
spring.redis.host=localhost
# Redis服务器连接端口
spring.redis.port=6379
# Redis服务器连接密码(默认为空)
spring.redis.password=
# 连接池最大连接数(使用负值表示没有限制)
spring.redis.pool.max-active=8
# 连接池最大阻塞等待时间(使用负值表示没有限制)
spring.redis.pool.max-wait=-1
# 连接池中的最大空闲连接
spring.redis.pool.max-idle=8
# 连接池中的最小空闲连接
spring.redis.pool.min-idle=0
# 连接超时时间(毫秒)
spring.redis.timeout=10000
7、完整pom.xml
	4.0.0

	com.boot
	boot-redis-session-public
	0.0.1-SNAPSHOT
	jar

	boot-redis-session-public
	Demo project for Spring Boot


		org.springframework.boot
		spring-boot-starter-parent
		2.0.3.RELEASE


		UTF-8
		UTF-8
		1.8


			org.springframework.boot
			spring-boot-starter-cache


			org.springframework.boot
			spring-boot-starter-data-jpa


			org.springframework.boot
			spring-boot-starter-data-redis


			org.springframework.boot
			spring-boot-starter-web


			org.springframework.session
			spring-session-data-redis


			mysql
			mysql-connector-java
			runtime


			org.apache.commons
			commons-lang3
			3.6


			org.springframework.boot
			spring-boot-starter-test
			test


				org.springframework.boot
				spring-boot-maven-plugin
二、演示
1、在测试前需要将项目设置为可以启动多个,然后启动第一个,启动第二个多时候端口改为8089。
如何使一个Spring Boot项目启动多个实例
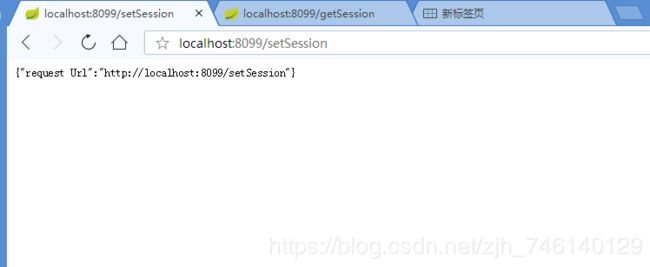
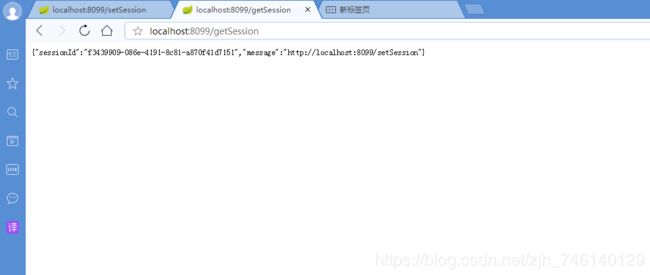
首先访问 8099端口的服务,浏览器输入http://localhost:8099/setSession,返回:{"request Url":"http://localhost:8099/setSession"};浏览器栏输入:http://localhost:8099/getSession,返回信息如下:
说明 url 地址信息已经存入到 Session 中。
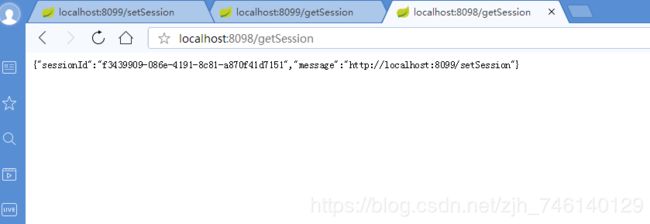
访问 8098 端口的服务,浏览器栏输入:http://localhost:9098/getSession,返回信息如下:
通过对比发现,8099 和8098服务返回的 Session 信息完全一致,说明已经实现了 Session 共享。
2、模拟登录
在实际中作中常常使用共享 Session 的方式去保存用户的登录状态,避免用户在不同的页面来回登录。来简单模拟一下这个场景,假设有一个 index 页面,必须是登录的用户才可以访问,如果用户没有登录给出提示请登录。首先在一台实例上登录后,再次访问另外一台的 index 看它是否需要登录,来验证统一登录是否成功。
添加登录方法,登录成功后将用户信息存放到 Session 中。
和上面一样我们需要在测试前需要将项目设置为可以启动多个,然后启动第一个,启动第二个多时候端口改为8089。
如何使一个Spring Boot项目启动多个实例
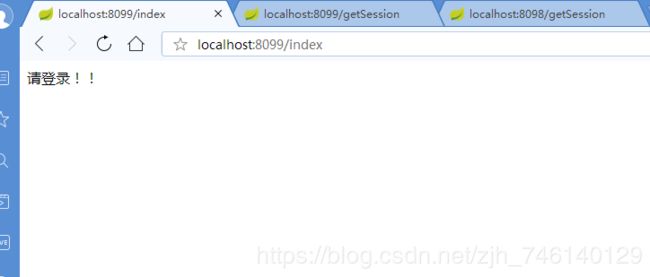
首先测试 8099 端口的服务,直接访问:http://localhost:8099/index,返回:请登录!提示请先登录。在数据库中修改一个用户信息,将用户名改为 admin,密码改为 admin,然后访问地址:hhttp://localhost:8099/login?userName=admin&password=admin,返回:登陆成功!,提示登录成功。再次访问地址:http://localhost:8099/index,返回:需要登陆 说明已经可以查看到受限的资源了。
再来测试 8098 端口的服务,直接访问:http://localhost:8098/index,直接返回:登陆成功并没有提示我先进行登录,这表明 8098 服务已经同步了用户的登录状态,达到了统一登录的目的。
