如何自行编译HPL-GPU 来测试Benchmark
环境部署信息
Linpack部署的版本信息
| 软件名称 | 版本 |
|---|---|
| Mpich | v3.2.1 |
| OpenMPI | v1.10.3 |
| Intel MKL | l_mkl_2019.0.117 |
| Linpack | hpl-2.0_FERMI_v15 |
实验环境
测试系统采用Ubuntu 16.04.6 Server,测试环境为实体机器:
| 操作系统 | CPU | 内存 | GPU |
|---|---|---|---|
| Ubuntu | 8核心 | 16G | GTX 1060 6G |
注意:
- 测试Linkpack之前,需要确保以下条件达成:确认环境是否安装以下
NVIDIA driver、CUDA、Intel MKL、Openmpi 、mpich2,并设定好环境变数。
安装NVIDIA驱动与CUDA
 wget http://developer.download.nvidia.com/compute/cuda/repos/ubuntu1604/x86_64/cuda-repo-ubuntu1604_9.1.85-1_amd64.deb
 sudo dpkg -i cuda-repo-ubuntu1604_9.1.85-1_amd64.deb
 sudo apt-key adv --fetch-keys http://developer.download.nvidia.com/compute/cuda/repos/ubuntu1604/x86_64/7fa2af80.pub
安装完成之后,需要测试NVIDIA驱动与CUDA是否安装完成
$  lsmod | grep nvidia
nvidia_uvm            790528  0
nvidia_drm             40960  2
nvidia_modeset       1089536  3 nvidia_drm
drm_kms_helper        167936  1 nvidia_drm
drm                   360448  5 nvidia_drm,drm_kms_helper
nvidia              14032896  96 nvidia_modeset,nvidia_uvm
ipmi_msghandler        45056  2 nvidia,ipmi_devintf

$ cat /usr/local/cuda/version.txt
CUDA Version 9.2.148

$ nvidia-smi
Tue Oct  2 18:15:47 2018
+-----------------------------------------------------------------------------+
| NVIDIA-SMI 396.44                 Driver Version: 396.44                    |
|-------------------------------+----------------------+----------------------+
| GPU  Name        Persistence-M| Bus-Id        Disp.A | Volatile Uncorr. ECC |
| Fan  Temp  Perf  Pwr:Usage/Cap|         Memory-Usage | GPU-Util  Compute M. |
|===============================+======================+======================|
|   0  GeForce GTX 106...  Off  | 00000000:03:00.0  On |                  N/A |
| 39%   31C    P8     7W / 120W |     52MiB /  6077MiB |      0%      Default |
+-------------------------------+----------------------+----------------------+

+-----------------------------------------------------------------------------+
| Processes:                                                       GPU Memory |
|  GPU       PID   Type   Process name                             Usage      |
|=============================================================================|
|    0      1603      G   /usr/lib/xorg/Xorg                            49MiB |
+-----------------------------------------------------------------------------+
准备Linpack
- Link : https://developer.nvidia.com/rdp/assets/cuda-accelerated-linpack-linux64从上面的链接,登入CUDA注册开发者会员,下载linpack for Linux64版本,这里下载到的版本为hpl-2.0_FERMI_v15.tgz。
安装INTEL MKL
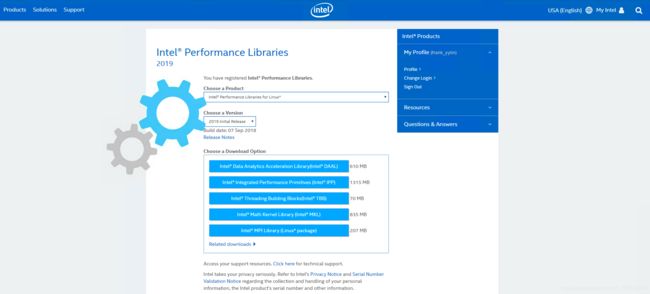
- 通过链接https://software.intel.com/en-us/qualify-for-free-software
需要注册账号

- 注册后,它会向您发送序列号于邮箱,以便进行安装准备。
- 这边是下载最新l_mkl_2019.0.117.tgz版本
- 下载取得l_mkl_2019.0.117.tgz后,即可透过install.sh运行安装。
$ tar zxvf l_mkl_2019.0.117.tgz
$ cd l_mkl_2019.0.117
- Intel mkl的安装很简单的,每一步也都有说明,按Enter继续下一步预设设定安装即可,安装到某一步会要求输入序列号,申请30天试用版所给的那个序列号。
$ sh ./install.sh

--------------------------------------------------------------------------------
Initializing, please wait...
--------------------------------------------------------------------------------
Welcome
--------------------------------------------------------------------------------
Welcome to the Intel(R) Math Kernel Library 2019 for Linux*
--------------------------------------------------------------------------------


You will complete the following steps:
   1.  Welcome
   2.  License Agreement
   3.  Options
   4.  Installation
   5.  Complete

--------------------------------------------------------------------------------

--------------------------------------------------------------------------------
Press "Enter" key to continue or "q" to quit:
License Agreement
--------------------------------------------------------------------------------
- 确认后会安装一些套件,这里就可以看到MKL预设情况下,会安装在/opt/intel下面。
------------------------
Options > Pre-install Summary
--------------------------------------------------------------------------------
Install location:
    /opt/intel

Component(s) selected:
    Intel Math Kernel Library 2019 for C/C++                               2.6GB
        Intel MKL core libraries for C/C++
        Intel TBB threading support
        GNU* C/C++ compiler support

    Intel Math Kernel Library 2019 for Fortran                             2.6GB
        Intel MKL core libraries for Fortran
        GNU* Fortran compiler support
        Fortran 95 interfaces for BLAS and LAPACK

   Install space required:  2.8GB
- 编译完成后,即会显示安装信息。
------------------------
Complete
--------------------------------------------------------------------------------
Thank you for installing Intel(R) Math Kernel Library 2019 for Linux*.

If you have not done so already, please register your product with Intel
Registration Center to create your support account and take full advantage of
your product purchase.

Your support account gives you access to free product updates and upgrades
as well as Priority Customer support at the Online Service Center
https://supporttickets.intel.com.
安装mpich2
$ wget http://www.mpich.org/static/downloads/3.2.1/mpich-3.2.1.tar.gz
tar zxvf mpich-3.2.1.tar.gz
$ cd mpich-3.2.1
./configure -prefix=/home/username/mpich
$ make
$ make install
- 配置环境
- 打开/etc/environment
$ vim /etc/environment
- 将自己的路径添加到PATH最后,注意别忘了冒号“:”,添加后的PATH如下
PATH="/usr/local/sbin:/usr/local/bin:/usr/sbin:/usr/bin:/sbin:/bin:/usr/games:/usr/local/games:/usr/local/cuda-9.2/bin:/home/username/mpich/bin"
- 保存退出,在終端輸入
source /etc/environment - 再輸入
echo $PATH測試發現已經更新,環境變量配置成功。
安裝openmpi
$ wget -c https://www.open-mpi.org/software/ompi/v1.10/downloads/openmpi-1.10.3.tar.gz
$ tar zxvf openmpi-1.10.3.tar.gz
$ cd openmpi-1.10.3
$ ./configure --prefix=/opt/openmpi
$ make
$ sudo make install
- 安装
make和make instal需要一段时间,等待完成即可,openmpi环境配置会在后面统一设定。
配置环境变量
- 首先更改环境变量PATH:
sudo vim /etc/environment
- 在PATH变量加上/usr/local/cuda-9.2/bin,前面要有分号,后面没有,修改后例如下面这样:
PATH="/usr/local/sbin:/usr/local/bin:/usr/sbin:/usr/bin:/sbin:/bin:/usr/games:/usr/local/games:/usr/local/cuda-9.2/bin:/home/username/mpich/bin"
-
保存文件,然后再执行:
source /etc/environment完成后,可以执行echo $PATH查看是否修改成功。 -
接着还需更改ldconfig
cd /etc/ld.so.conf.d/
sudo vim hpl.conf
- 输入如下内容:
/usr/local/cuda-9.2/lib64
/lib
/opt/intel/mkl/lib/intel64
/opt/intel/lib/intel64
/home/ubuntu/hpl/src/cuda
- 最后一行
/home/使用者/hpl/src/cuda是编译HPL时才需要改的,在这里一并修改。这个目录就是编译hpl时,hpl的路径。
添加上述美瞳。保存后执行:
sudu ldconfig
- 可以输入下面命令进行检验,有输出内容就对了
sudo ldconfig -v | grep cuda
- 接着还要执行Intel MKL的环境变量设置脚本
export LD_LIBRARY_PATH=/opt/intel/mkl/lib/intel64:/opt/intel/compilers_and_libraries/linux/lib/intel64:/home/ubuntu/hpl/src/cuda:/opt/openmpi/lib
export PATH=/opt/openmpi/bin:$PATH

source /opt/intel/compilers_and_libraries_2019.0.117/linux/mkl/bin/mklvars.sh intel64
- 请确认以上路径与当前环境上所有套件的路径是否对应存在,再执行
source ~/.bashrc
这样,环境变量就设置好了。最好 echo $PATH 查看下是否多了一行intel的信息,如果没有配置成功的话,在编译HPL时会提示/usr/bin/ld: cannot find -liomp5的错误。
开始编译Linpack benchmark for CUDA
- 这边将
hpl-2.0_FERMI_v15.tgz解压缩放置主目录下hpl文件夹,可以依照自己设定的路径对应编译。
$ tar -xvf hpl-2.0_FERMI_v15.tgz –C ~/hpl
$ cd ~/hpl

$ ls
bin  BUGS  COPYRIGHT  CUDA_LINPACK_README.txt  HISTORY  include  INSTALL  lib  Make.CUDA  Makefile  makes  Make.top  man  README  setup  src  testing  TODO  TUNING  www
编译Make.CUDA编辑配置
- 这时还需要编辑Make.CUDA测试环境参考连结,需更改Make.CUDA中的TOPdir为hpl的目录。
103  TOPdir = /home/ubuntu/hpl

132 LAdir        = /opt/intel/mkl/lib/intel64
133 LAMP5dir     = /opt/intel/compilers_and_libraries/linux/lib/intel64

134 LAinc        = -I/opt/intel/mkl/include
- 接着可以开始编译了
cd ~/hpl
make arch=CUDA
如果没有提示错误,就是编译成功了。
- 编译完成后,还需要修改
~/hpl/bin/CUDA/run_linpack中的HPL_DIR为你hpl的路径
HPL_DIR=/home/ubuntu/hpl
修改完成后就可以开始测试了。
测试
- 测试之前建议把HPL.dat的参数改小一点,N改成8000,这样所需的测试时间少。也先把P,Q,PxQ都改成1,保证可以执行测试:
$ mpirun -n 1 ./run_linpack
- 输出结果
$ mpirun -n 1 ./run_linpack
================================================================================
HPLinpack 2.0  --  High-Performance Linpack benchmark  --   September 10, 2008
Written by A. Petitet and R. Clint Whaley,  Innovative Computing Laboratory, UTK
Modified by Piotr Luszczek, Innovative Computing Laboratory, UTK
Modified by Julien Langou, University of Colorado Denver
================================================================================

An explanation of the input/output parameters follows:
T/V    : Wall time / encoded variant.
N      : The order of the coefficient matrix A.
NB     : The partitioning blocking factor.
P      : The number of process rows.
Q      : The number of process columns.
Time   : Time in seconds to solve the linear system.
Gflops : Rate of execution for solving the linear system.

The following parameter values will be used:

N      :   25000    30000
NB     :     768     1024     1280     1536
PMAP   : Row-major process mapping
P      :       1
Q      :       1
PFACT  :    Left
NBMIN  :       2
NDIV   :       2
RFACT  :    Left
BCAST  :   1ring
DEPTH  :       1
SWAP   : Spread-roll (long)
L1     : no-transposed form
U      : no-transposed form
EQUIL  : yes
ALIGN  : 8 double precision words

--------------------------------------------------------------------------------

- The matrix A is randomly generated for each test.
- The following scaled residual check will be computed:
      ||Ax-b||_oo / ( eps * ( || x ||_oo * || A ||_oo + || b ||_oo ) * N )
- The relative machine precision (eps) is taken to be               1.110223e-16
- Computational tests pass if scaled residuals are less than                16.0

================================================================================
T/V                N    NB     P     Q               Time                 Gflops
--------------------------------------------------------------------------------
WR10L2L2       25000   768     1     1              43.07              2.419e+02
--------------------------------------------------------------------------------
||Ax-b||_oo/(eps*(||A||_oo*||x||_oo+||b||_oo)*N)=        0.0040802 ...... PASSED
================================================================================
- 补充-直接使用Docker测试HPL GPU: 参考链接