linux下安装Apache网络服务器安装步骤详解
一. Apache的安装步骤
1. 点击进入官网下载
2. 确定要下载的版本,我下载的如下图:
![]()
3. $ tar -zxvf httpd-2.4.33.tar.gz(解压文件)
4. # cd httpd-2.4.33/
5. # ./configure(运行这个的时候出现如下错误)
解决办法:(1)# yum install apr
(2)# yum install -y apr-util-devel apr apr-util-mysql apr-docs apr-devel apr-util apr-util-docs
(3)# yum install -y pcre
(4)# yum -y install pcre-devel
6. make(在编译的时候出现以下错误)
![]()
解决办法(是缺少apr,虽然前面用yum安装了apr和pcre,应该是我的系统这两个包版本太低不支持的缘故):
(1)进官网下载下面两个包:
(2)把下载好的包都移到”cd /usr/local/src/“下
(3)# cd apr-1.6.3/(先解压编译apr)
(4)# ./configure --prefix=/usr/local/apr(给apr指定目录,将它放在 /usr/local 目录下,命名为apr)
(5)# make && make install
(6)# cd apr-util-1.6.1/
(7)# ./configure --prefix=/usr/local/apr-util
(8)# make && make install
7. # cd httpd-2.4.33/
8. # ./configure --prefix=/usr/local/apache2 --with-apr=/usr/local/apr --with-apr-util=/usr/local/apr-util(通过 ” ./configure -h“ 可以查看 ./configure 的一些参数)
9. # make && make install(编译的时候又出现错误)
解决办法(缺少 pcre这个包):
(1)点击下载 pcre
(2)# tar -zvxf pcre-8.39.tar.gz
(3)# cd pcre-8.39/
(4)# ./configure --prefix=/usr/local/pcre
(5)# make && make install
10. ./configure --prefix=/usr/local/apache2 --with-apr=/usr/local/apr --with-apr-util=/usr/local/apr-util --with-pcre=/usr/local/pcre
11. # make && make install
二. 在Apache里面添加文件
1.cd /usr/local/apache2/htdocs
2.# mv index.html ../(移除这个html文件,这样就可以在里面添加文件并进行下载了)
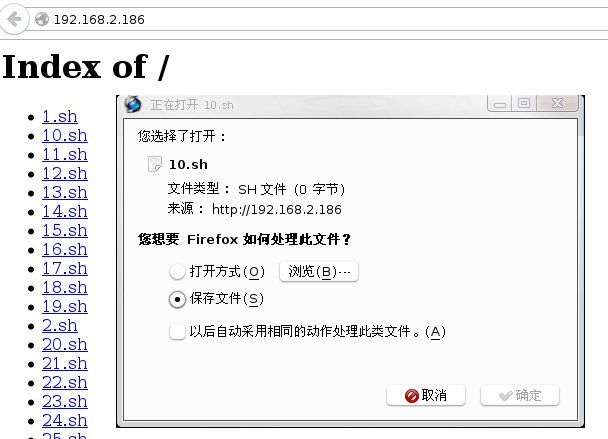
3.输入自己的IP回车,这时候你的Apache网络服务器已经成功安装了,如下图:
三. 电脑重启后,启动Apache网络服务器失败(参考网址)
解决办法(是因为Apache没有注册到Linux服务器里面):
(1)cp /usr/local/apache2/bin/apachectl /etc/rc.d/init.d/httpd(这一步是想将httpd列入系统自动启动的服务,直接将apachectl的文件拷贝到 /etc/rc.d/init.d 中,并重命名为httpd)
(2)# ln -s /etc/rc.d/init.d/httpd /etc/rc.d/rc3.d/S61httpd(链接文件的S61是启动时的序号,当init.d目录下有httpd脚本后,我们就可以通过service命令来启动关闭apache了)
(3)# vi httpd(进入httpd添加两段脚本)
# chkconfig: 35 61 61
(第一行的3个参数意义分别为:在哪些运行级别启动httpd(3,5);启动序号(S61);关闭序号(K61))
# description: Apache
(4)# chkconfig --add httpd(设置开机自动启动)
(5)# systemctl start httpd.service(启动httpd,这时候Apache就又可以成功访问了)
四. 在Apache里面限制和允许特定IP访问 ( 参考网址 )
1. vi /usr/local/apache2/conf/httpd.conf ( 修改里面的内容 )
2. 进入配置文件后输入 ":set nu" 显示行号 , 大概在218行的 "
( 1 )允许特定IP访问:
Options All
AllowOverride None
Order deny,allow
Deny From All # 禁止所有IP访问
Allow From 192.168.1.10 # 允许192.168.1.10这个IP访问
Allow From 127.0.0.1 # 允许127.0.0.1这个IP访问
( 2 )限制特定IP访问:
Options All
AllowOverride None
Order Deny,Allow
Allow From all # 允许所有IP访问
Deny From 192.168.1.10 # 限制192.168.1.10这个IP访问
Deny From 127.0.0.1 # 限制127.0.0.1这个IP访问


