.net core结合ocelot+consul+swagger实现网关跳转+负载均衡以及接口管理+过滤失效接口+发现服务
第一步:创建6个项目
前提:.net core 3.1
项目结构如下:
注意(全部是.net core api webapi项目)

第二步:实现web api的swagger管理
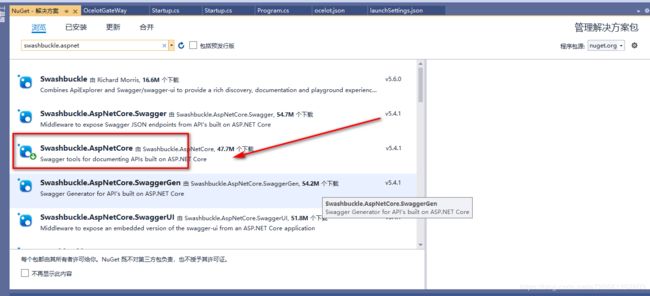
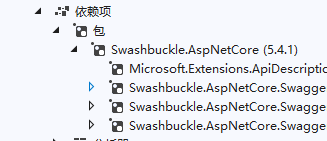
1.安装swashbuckle.aspnetcore项目(多个dll)
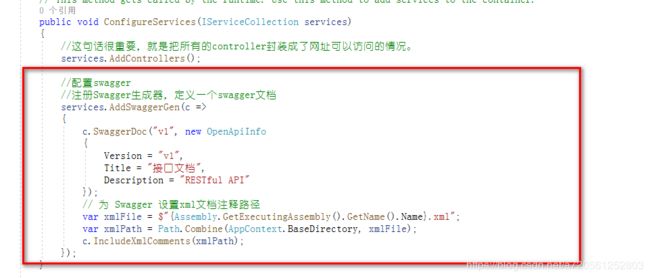
2.修改startup.cs文件
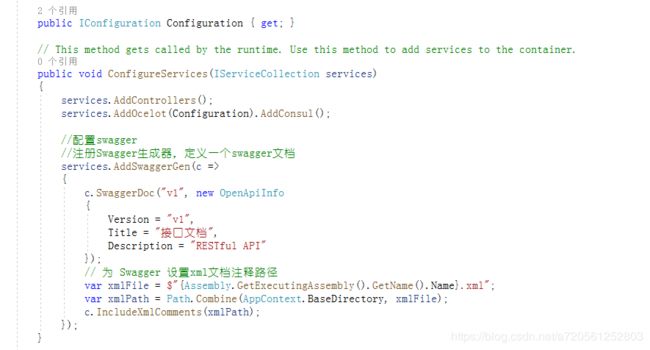
//配置swagger
            //注册Swagger生成器,定义一个swagger文档
            services.AddSwaggerGen(c =>
            {
                c.SwaggerDoc("v1", new OpenApiInfo
                {
                    Version = "v1",
                    Title = "接口文档",
                    Description = "RESTful API"
                });
                // 为 Swagger 设置xml文档注释路径
                var xmlFile = $"{Assembly.GetExecutingAssembly().GetName().Name}.xml";
                var xmlPath = Path.Combine(AppContext.BaseDirectory, xmlFile);
                c.IncludeXmlComments(xmlPath);
            });
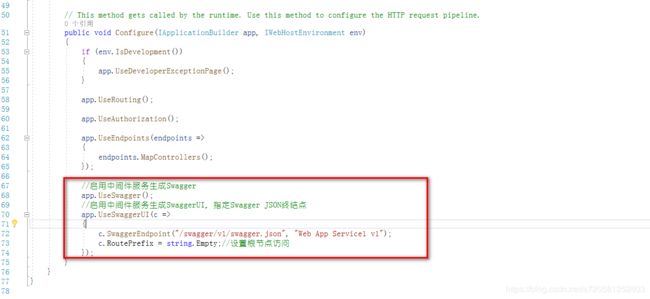
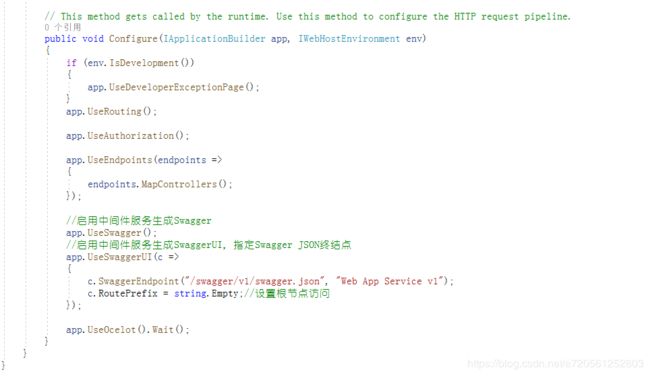
//启用中间件服务生成Swagger
            app.UseSwagger();
            //启用中间件服务生成SwaggerUI,指定Swagger JSON终结点
            app.UseSwaggerUI(c =>
            {
                c.SwaggerEndpoint("/swagger/v1/swagger.json", "Web App Service1 v1");
                c.RoutePrefix = string.Empty;//设置根节点访问
            });
3.修改项目属性

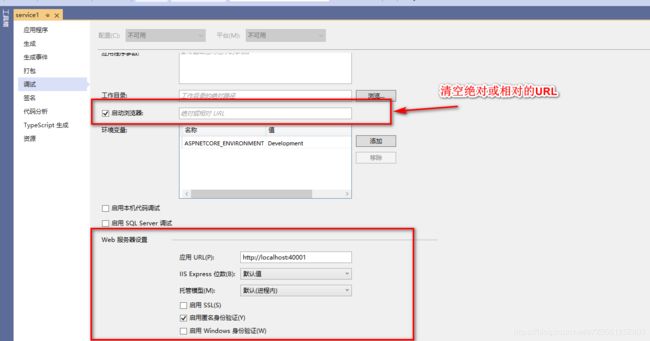
最后修改下controller的route [Route("[controller]/[action]")]
4.效果
其他的webapi全部都是一样的
第三步:ocelot项目集合下游的API项目
1.在ocelotgateway项目安装
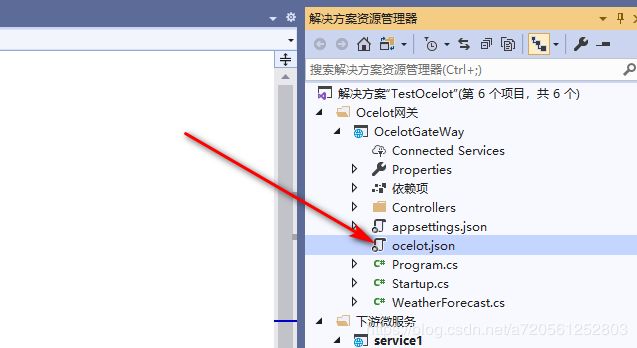
2.创建配置文件ocelot.json文件,注册服务
{
  "Routes": [
    {
      "DownstreamPathTemplate": "/{controller}/{action}",
      "DownstreamScheme": "http",
      "LoadBalancerOptions": {
        "Type": "LeastConnection"
      },
      "DownstreamHostAndPorts": [
        {
          "Host": "localhost",
          "Port": "40001"
        },


        {
          "Host": "localhost",
          "Port": "40002"
        }
      ],
      "UpstreamPathTemplate": "/s/{controller}/{action}",
      "UpstreamHttpMethod": [ "Get", "Post" ]
    },
    {
      "DownstreamPathTemplate": "/{controller}/{action}",
      "DownstreamScheme": "http",
      "LoadBalancerOptions": {
        "Type": "LeastConnection"
      },
      "DownstreamHostAndPorts": [
        {
          "Host": "localhost",
          "Port": "40003"
        }
      ],
      "UpstreamPathTemplate": "/s3/{controller}/{action}",
      "UpstreamHttpMethod": [ "Get", "Post" ]
    },
    {
      "DownstreamPathTemplate": "/{controller}/{action}",
      "DownstreamScheme": "http",
      "DownstreamHostAndPorts": [
        {
          "Host": "localhost",
          "Port": "40004"
        }
      ],
      "UpstreamPathTemplate": "/s4/{controller}/{action}",
      "UpstreamHttpMethod": [ "Get", "Post" ]
    },
    {
      "DownstreamPathTemplate": "/{controller}/{action}",
      "DownstreamScheme": "http",
      "DownstreamHostAndPorts": [
        {
          "Host": "localhost",
          "Port": "40005"
        }
      ],
      "UpstreamPathTemplate": "/s5/{controller}/{action}",
      "UpstreamHttpMethod": [ "Get", "Post" ]
    }
  ]
  }
其中把service 40001 和service 40002 配置在一个服务中是为了实现均衡负载测试
3.修改网关项目的program项目
public class Program
    {
        public static void Main(string[] args)
        {
            CreateWebHostBuilder(args).Build()
                                      .Run();
        }

        public static IWebHostBuilder CreateWebHostBuilder(string[] args) =>
           WebHost.CreateDefaultBuilder(args)
           .ConfigureAppConfiguration((host, config) =>
           {
               config.AddJsonFile("ocelot.json");
           })
        .UseStartup<Startup>();
    }
4.修改网关项目的startup文件
services.AddOcelot(Configuration);
app.UseOcelot().Wait();
5.效果
实现了暴露给客户的只有localhost:54321.


等等
第四步:下载安装consul
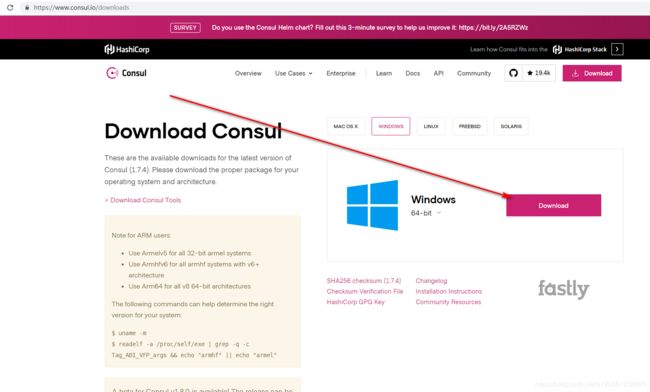
1.下载
2.安装
解压到对应的文件夹下面

注意,只有consul.exe是下载的,后面的都是我自己添加的
3.启动看效果
启动命名 consul agent -dev,如果没有配置path路径,需要到对应的文件夹去启动
官网启动命令
consul agent -dev -enable-script-checks -config-dir=./conf
正式的启动命令
consul agent -server -ui -bootstrap-expect=3 -data-dir=./data -node=consul-1 -client=0.0.0.0 -bind=0.0.0.0 -datacenter=dc1 -config-dir=./conf
还是老问题,加载不出ui
由于正式启动命令ui最近有问题,暂时用官网命名启动
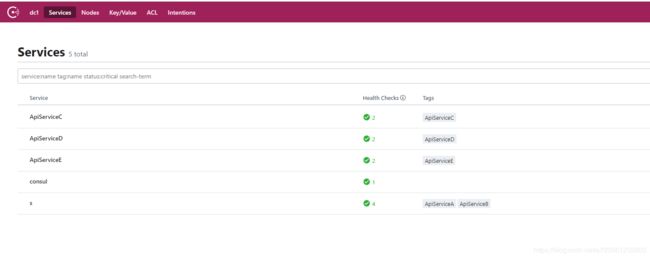
我这是添加了一些服务,最初的启动只有consul
第五步:给consul配置下游服务(注册服务)
为了方便实现服务配置
创建如下文件结构

启动,conf里面放配置文件,data是运行后的数据,startup.bat启动命名,方便启动
配置service.json,(文件名字可以随便取)
{
  "encrypt": "7TnJPB4lKtjEcCWWjN6jSA==",
  "services": [
    {
      "id": "ApiServiceA",
      "name": "s",
      "tags": [ "ApiServiceA" ],
      "address": "localhost",
      "port": 40001,
      "checks": [
        {
          "id": "ApiServiceA_Check",
          "name": "ApiServiceA_Check",
          "http": "http://localhost:40001/weatherforecast/get",
          "interval": "10s",
          "tls_skip_verify": false,
          "method": "GET",
          "timeout": "1s"
        }
      ]
    },
    {
      "id": "ApiServiceB",
      "name": "s",
      "tags": [ "ApiServiceB" ],
      "address": "localhost",
      "port": 40002,
      "checks": [
        {
          "id": "ApiServiceB_Check",
          "name": "ApiServiceB_Check",
          "http": "http://localhost:40002/weatherforecast/get",
          "interval": "10s",
          "tls_skip_verify": false,
          "method": "GET",
          "timeout": "1s"
        }
      ]
    },
    {
      "id": "ApiServiceC",
      "name": "ApiServiceC",
      "tags": [ "ApiServiceC" ],
      "address": "localhost",
      "port": 40003,
      "checks": [
        {
          "id": "ApiServiceC_Check",
          "name": "ApiServiceC_Check",
          "http": "http://localhost:40003/weatherforecast/get",
          "interval": "10s",
          "tls_skip_verify": false,
          "method": "GET",
          "timeout": "1s"
        }
      ]
    },
    {
      "id": "ApiServiceD",
      "name": "ApiServiceD",
      "tags": [ "ApiServiceD" ],
      "address": "localhost",
      "port": 40004,
      "checks": [
        {
          "id": "ApiServiceD_Check",
          "name": "ApiServiceD_Check",
          "http": "http://localhost:40004/weatherforecast/get",
          "interval": "10s",
          "tls_skip_verify": false,
          "method": "GET",
          "timeout": "1s"
        }
      ]
    },
    {
      "id": "ApiServiceE",
      "name": "ApiServiceE",
      "tags": [ "ApiServiceE" ],
      "address": "localhost",
      "port": 40005,
      "checks": [
        {
          "id": "ApiServiceE_Check",
          "name": "ApiServiceE_Check",
          "http": "http://localhost:40005/weatherforecast/get",
          "interval": "10s",
          "tls_skip_verify": false,
          "method": "GET",
          "timeout": "1s"
        }
      ]
    }
  ]
}
启动效果就是上去截取的一样,就不重复截取了。
第六步:consul+ocelot
1.安装dll
2.修改ocelot项目的ocelot文件
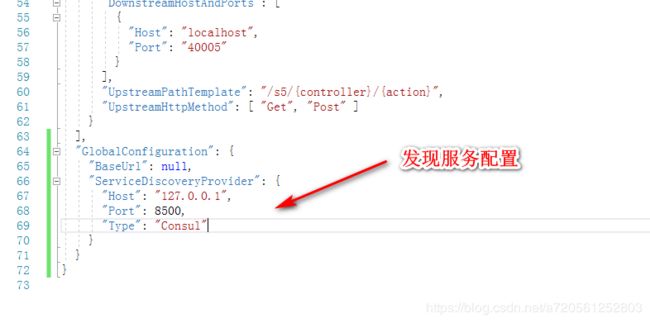
"GlobalConfiguration": {
    "BaseUrl": null,
    "ServiceDiscoveryProvider": {
      "Host": "127.0.0.1",
      "Port": 8500,
      "Type": "Consul"
    }
  }
3.修改ocelot项目的startup文件
第七步:最终效果图


后记:如果此时service2断开,那么在访问统一网关http://localhost:54321/s/WeatherForecast/get
是consul的监控将会识别到service2已断开,次数不会再有service2.直接走service1.
