Flutter PIP(画中画)效果的实现
前言
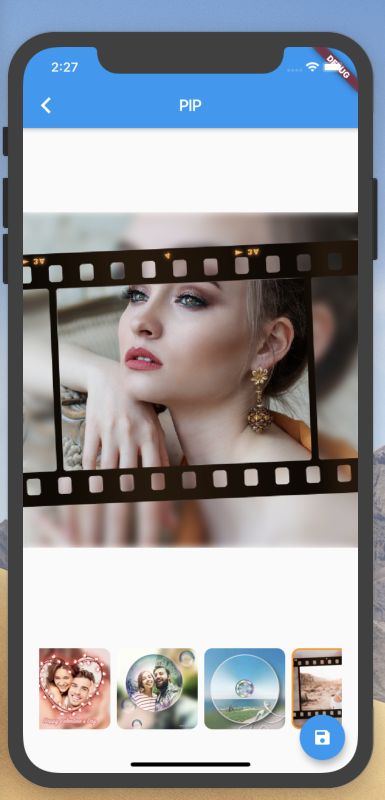
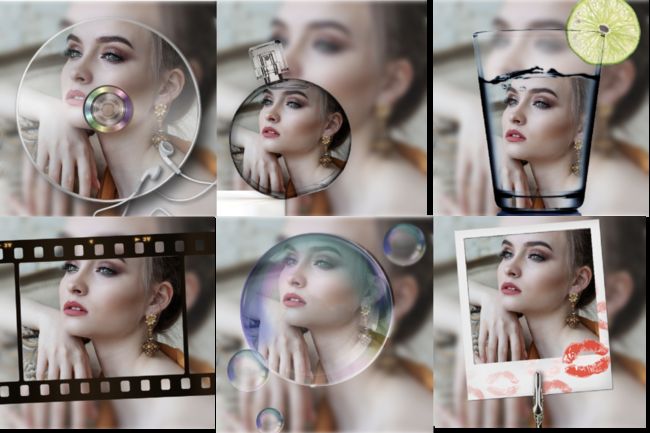
继续上一篇 Flutter侧滑栏及城市选择UI的实现,今天继续讲Flutter的实现篇,画中画效果的实现。先看一下PIP的实现效果.
更多效果请查看PIP DEMO
代码地址:FlutterPIP
为什么会有此文?
一天在浏览朋友圈时,发现了一个朋友发了一张图(当然不是女朋友,但是个女的),类似上面效果部分. 一看效果挺牛啊,这是怎么实现的呢?心想要不自己实现一下吧?于是开始准备用Android实现一下.
但最近正好学了一下Flutter,并在学习Flutter 自定义View CustomPainter时,发现了和Android上有相同的API,Canvas,Paint,Path等. 查看Canvas的绘图部分drawImage代码如下
 /// Draws the given [Image] into the canvas with its top-left corner at the
  /// given [Offset]. The image is composited into the canvas using the given [Paint].
  void drawImage(Image image, Offset p, Paint paint) {
    assert(image != null); // image is checked on the engine side
    assert(_offsetIsValid(p));
    assert(paint != null);
    _drawImage(image, p.dx, p.dy, paint._objects, paint._data);
  }
  void _drawImage(Image image,
                  double x,
                  double y,
                  List paintObjects,
                  ByteData paintData) native 'Canvas_drawImage';
可以看出drawImage 调用了内部的_drawImage,而内部的_drawImage使用的是native Flutter Engine的代码 ‘Canvas_drawImage’,交给了Flutter Native去绘制.那Canvas的绘图就可以和移动端的Native一样高效 (Flutter的绘制原理,决定了Flutter的高效性).关于Flutter的高效可以查看 Flutter 高性能原理
实现步骤
看效果从底层往上层,图片被分为3个部分,第一部分是底层的高斯模糊效果,第二层是原图被裁剪的部分,第三层是一个效果遮罩。
Flutter 高斯模糊效果的实现
Flutter提供了BackdropFilter,关于BackdropFilter的官方文档是这么说的
A widget that applies a filter to the existing painted content and then paints child.
The filter will be applied to all the area within its parent or ancestor widget’s clip. If there’s no clip, the filter will be applied to the full screen.
简单来说,他就是一个筛选器,筛选所有绘制到子内容的小控件,官方demo例子如下
Stack(
  fit: StackFit.expand,
  children: [
    Text('0' * 10000),
    Center(
      child: ClipRect(  // <-- clips to the 200x200 [Container] below
        child: BackdropFilter(
          filter: ui.ImageFilter.blur(
            sigmaX: 5.0,
            sigmaY: 5.0,
          ),
          child: Container(
            alignment: Alignment.center,
            width: 200.0,
            height: 200.0,
            child: Text('Hello World'),
          ),
        ),
      ),
    ),
  ],
)
效果就是对中间200*200大小的地方实现了模糊效果.
本文对底部图片高斯模糊效果的实现如下
Stack(
      fit: StackFit.expand,
      children: [
        Container(
            alignment: Alignment.topLeft,
            child: CustomPaint(
                painter: DrawPainter(widget._originImage),
                size: Size(_width, _width))),
        Center(
          child: ClipRect(
            child: BackdropFilter(
              filter: flutterUi.ImageFilter.blur(
                sigmaX: 5.0,
                sigmaY: 5.0,
              ),
              child: Container(
                alignment: Alignment.topLeft,
                color: Colors.white.withOpacity(0.1),
                width: _width,
                height: _width,
//                child: Text('  '),
              ),
            ),
          ),
        ),
      ],
    );
其中Container的大小和图片大小一致,并且Container需要有子控件,或者背景色. 其中子控件和背景色可以任意.
实现效果如图

Flutter 图片裁剪
图片裁剪原理
在用Android中的Canvas进行绘图时,可以通过使用PorterDuffXfermode将所绘制的图形的像素与Canvas中对应位置的像素按照一定规则进行混合,形成新的像素值,从而更新Canvas中最终的像素颜色值,这样会创建很多有趣的效果.
Flutter 中也有相同的API,通过设置画笔Paint的blendMode属性,可以达到相同的效果.混合模式具体可以Flutter查看官方文档,有示例.
此处用到的混合模式是BlendMode.dstIn,文档注释如下
/// Show the destination image, but only where the two images overlap. The
/// source image is not rendered, it is treated merely as a mask. The color
/// channels of the source are ignored, only the opacity has an effect.
/// To show the source image instead, consider [srcIn].
// To reverse the semantic of the mask (only showing the source where the
/// destination is present, rather than where it is absent), consider [dstOut].
/// This corresponds to the “Destination in Source” Porter-Duff operator.
大概说的意思就是,只在源图像和目标图像相交的地方绘制【目标图像】,绘制效果受到源图像对应地方透明度影响. 用Android里面的一个公式表示为
\(\alpha_{out} = \alpha_{src}\)

\(C_{out} = \alpha_{src} * C_{dst} + (1 - \alpha_{dst}) * C_{src}\)
实际裁剪
我们要用到一个Frame图片(frame.png),用来和原图进行混合,Frame图片如下
frame.png
实现代码
/// 通过 frameImage 和 原图,绘制出 被裁剪的图形
  static Future drawFrameImage(
      String originImageUrl, String frameImageUrl) {
    Completer completer = new Completer();
    //加载图片
    Future.wait([
      OriginImage.getInstance().loadImage(originImageUrl),
      ImageLoader.load(frameImageUrl)
    ]).then((result) {
      Paint paint = new Paint();
      PictureRecorder recorder = PictureRecorder();
      Canvas canvas = Canvas(recorder);

      int width = result[1].width;
      int height = result[1].height;

      //图片缩放至frame大小,并移动到中央
      double originWidth = 0.0;
      double originHeight = 0.0;
      if (width > height) {
        double scale = height / width.toDouble();
        originWidth = result[0].width.toDouble();
        originHeight = result[0].height.toDouble() * scale;
      } else {
        double scale = width / height.toDouble();
        originWidth = result[0].width.toDouble() * scale;
        originHeight = result[0].height.toDouble();
      }
      canvas.drawImageRect(
          result[0],
          Rect.fromLTWH(
              (result[0].width - originWidth) / 2.0,
              (result[0].height - originHeight) / 2.0,
              originWidth,
              originHeight),
          Rect.fromLTWH(0, 0, width.toDouble(), height.toDouble()),
          paint);

      //裁剪图片
      paint.blendMode = BlendMode.dstIn;
      canvas.drawImage(result[1], Offset(0, 0), paint);
      recorder.endRecording().toImage(width, height).then((image) {
        completer.complete(image);
      });
    }).catchError((e) {
      print("加载error:" + e);
    });
    return completer.future;
  }
分为三个主要步骤
- 第一个步骤,加载原图和Frame图片,使用Future.wait 等待两张图片都加载完成
- 原图进行缩放,平移处理,缩放至frame合适大小,在将图片平移至图片中央
- 设置paint的混合模式,绘制Frame图片,完成裁剪
Flutter 图片合成及保存
裁剪完的图片和效果图片(mask.png)的合成
先看一下mask图片长啥样

裁剪完的图片和mask图片的合成,不需要设置混合模式,裁剪图片在底层,合成完的图片在上层.既可实现,但需要注意的是,裁剪的图片需要画到效果区域,所以x,y需要有偏移量,实现代码如下:
  /// mask 图形 和被裁剪的图形 合并
  static Future drawMaskImage(String originImageUrl,
      String frameImageUrl, String maskImage, Offset offset) {
    Completer completer = new Completer();
    Future.wait([
      ImageLoader.load(maskImage),
      //获取裁剪图片
      drawFrameImage(originImageUrl, frameImageUrl)
    ]).then((result) {
      Paint paint = new Paint();
      PictureRecorder recorder = PictureRecorder();
      Canvas canvas = Canvas(recorder);

      int width = result[0].width;
      int height = result[0].height;

      //合成
      canvas.drawImage(result[1], offset, paint);
      canvas.drawImageRect(
          result[0],
          Rect.fromLTWH(
              0, 0, result[0].width.toDouble(), result[0].height.toDouble()),
          Rect.fromLTWH(0, 0, width.toDouble(), height.toDouble()),
          paint);

      //生成图片
      recorder.endRecording().toImage(width, height).then((image) {
        completer.complete(image);
      });
    }).catchError((e) {
      print("加载error:" + e);
    });
    return completer.future;
  }
效果实现
本文开始介绍了,图片分为三层,所以此处使用了Stack组件来包装PIP图片
 new Container(
    width: _width,
    height: _width,
    child: new Stack(
         children: [
        getBackgroundImage(),//底部高斯模糊图片
        //合成后的效果图片,使用CustomPaint 绘制出来
        CustomPaint(
            painter: DrawPainter(widget._image),
            size: Size(_width, _width)),
         ],
    )
)
class DrawPainter extends CustomPainter {
  DrawPainter(this._image);

  flutterUi.Image _image;
  Paint _paint = new Paint();

  @override
  void paint(Canvas canvas, Size size) {
    if (_image != null) {
      print("draw this Image");
      print("width =" + size.width.toString());
      print("height =" + size.height.toString());

      canvas.drawImageRect(
          _image,
          Rect.fromLTWH(
              0, 0, _image.width.toDouble(), _image.height.toDouble()),
          Rect.fromLTWH(0, 0, size.width, size.height),
          _paint);
    }
  }

  @override
  bool shouldRepaint(CustomPainter oldDelegate) {
    return true;
  }
}
图片保存
Flutter 是一个跨平台的高性能UI框架,使用到Native Service的部分,需要各自实现,此处需要把图片保存到本地,使用了一个库,用于获取各自平台的可以保存文件的文件路径.
path_provider: ^0.4.1
实现步骤,先将上面的PIP用一个RepaintBoundary 组件包裹,然后通过给RepaintBoundary设置key,再去截图保存,实现代码如下
 Widget getPIPImageWidget() {
    return RepaintBoundary(
      key: pipCaptureKey,
      child: new Center(child: new DrawPIPWidget(_originImage, _image)),
    );
  }
截屏保存
Future _captureImage() async {
    RenderRepaintBoundary boundary =
        pipCaptureKey.currentContext.findRenderObject();
    var image = await boundary.toImage();
    ByteData byteData = await image.toByteData(format: ImageByteFormat.png);
    Uint8List pngBytes = byteData.buffer.asUint8List();
    getApplicationDocumentsDirectory().then((dir) {
      String path = dir.path + "/pip.png";
      new File(path).writeAsBytesSync(pngBytes);
      _showPathDialog(path);
    });
  }
显示图片的保存路径
Future _showPathDialog(String path) async {
    return showDialog(
      context: context,
      barrierDismissible: false,
      builder: (BuildContext context) {
        return AlertDialog(
          title: Text('PIP Path'),
          content: SingleChildScrollView(
            child: ListBody(
              children: [
                Text('Image is save in $path'),
              ],
            ),
          ),
          actions: [
            FlatButton(
              child: Text('退出'),
              onPressed: () {
                Navigator.of(context).pop();
              },
            ),
          ],
        );
      },
    );
  }
手势交互实现思路
目前的实现方式是:把原图移动到中央进行裁剪,默认认为图片的重要显示区域在中央,这样就会存在一个问题,如果图片的重要显示区域没有在中央,或者画中画效果的显示区域不在中央,会存在一定的偏差.
所以需要添加手势交互,当图片重要区域不在中央,或者画中画效果不在中央,可以手动调整显示区域。
实现思路:添加手势操作,获取当前手势的offset,重新拿原图和frame区域进行裁剪,就可以正常显示.(目前暂未去实现)
文末
欢迎star Github Code
文中所有使用的资源图片,仅供学习使用,请在学习后,24小时内删除,如若有侵权,请联系作者删除。


