10分钟教你用Python爬取Baidu文库全格式内容
前言
本文的文字及图片来源于网络,仅供学习、交流使用,不具有任何商业用途,版权归原作者所有,如有问题请及时联系我们以作处理。
作者:向柯玮,周航 程序猿声
PS:如有需要Python学习资料的小伙伴可以加点击下方链接自行获取
python免费学习资料点击即可领取
考虑到现在大部分小伙伴使用Python主要因为爬虫,那么为了更好地帮助大家巩固爬虫知识,加深对爬虫的理解,我们小组选择了爬取百度文库作为我们的大作业。
TXT,DOCX爬取与保存
在爬取任何东西之前,我们都要先确认需要爬取的数据是不是异步加载的。如果是异步加载的直接爬取网页是爬不到的。
要知道是不是异步加载其实很简单,就用request对网页发起请求,看看response是什么就可以了。
url = 'https://wenku.baidu.com/view/4e29e5a730126edb6f1aff00bed5b9f3f90f72e7.html?rec_flag=default'
header = {'User-agent': 'Mozilla/5.0 (Windows NT 10.0; Win64; x64) AppleWebKit/537.36 (KHTML, like Gecko) Chrome/81.0.4044.138 Safari/537.36'}
res = requests.get(url , headers = header)
res.text

很明显,返回的东西,并不是我们所需要的内容。根据常理来说,我们就可以认为该网页是异步加载的。
但是,从常识来讲,如果网页的内容是异步加载的,那么直接通过百度搜索,是搜索不到网页内部的内容的,但是很显然,我们每次通过百度搜索都是可以直接找到文库中的文本内容的。如下:

那么这就有意思了,明明直接发起请求是获取不到网页内容的,但是为什么通过百度搜索就可以找到呢?
关键肯定在于百度搜索上面。这个时候通过查阅资料,我们了解到,最主要的问题出在我们的headers。
在爬取网页时,headers通常是作为身份证,让网页不看出我们是爬虫。如果不加headers,网页直接就会看出我们是爬虫,就会拒绝访问。
再深入了解以下headers的识别机理,我们发现了叫做Robot协议的东西。
它规定了什么样的headers可以访问网页内部内容,除了指定headers之外的headers,都是无法请求页面内容的。(更详细的Robot协议介绍以附件形式给出)
比如说百度文库的Robot协议就是下面这样的。
User-agent: Baiduspider

Disallow: /w?

Disallow: /search?

Disallow: /submit

Disallow: /upload

Disallow: /cashier/
而我们需要爬取的内容url格式为
https://wenku.baidu.com/view/?.html
这代表Baiduspider应该可以爬取文库内容。大致猜测这是因为百度搜索时需要根据文本内容匹配搜索选项,所以放行。
因此我们尝试伪装User-agent为Baiduspider。
url = 'https://wenku.baidu.com/view/4e29e5a730126edb6f1aff00bed5b9f3f90f72e7.html?rec_flag=default'
header = {'User-agent': 'Googlebot'}
res = requests.get(url , headers = header)
res.text
果然不出所料,我们成功地获取到了目标内容。
既然已经成功获取到了网页的正确源代码,那么下一步就是去解析网页获取内容。
解析网页源代码的库有很多,这里我们使用BeautifulSoup。
plist = []
soup = BeautifulSoup(r, "html.parser")
plist.append(soup.title.string)
for div in soup.find_all('div', attrs={"class": "bd doc-reader"}):
    plist.extend(div.get_text().split('\n'))
plist = [c.replace(' ', '') for c in plist]
plist = [c.replace('\x0c', '') for c in plist]
plist
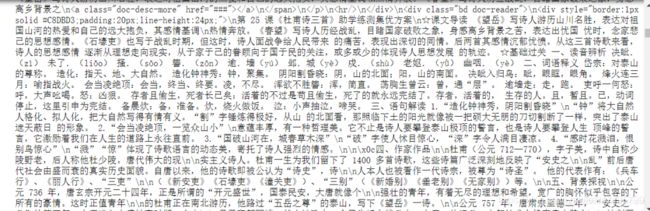
整个解析是非常容易的,都是很标准的操作。在这里就不多加叙述了。最终的效果如下。

当然爬取到东西了只是万里长征的第一步,就这样是肯定不行的,我们还需要将爬取的内容保存起来,通常是保存为txt文件。
file = open('test.txt', 'w',encoding='utf-8')
for str in plist:
    file.write(str)
    file.write('\n')
file.close()

但是为了美观起见,我们在这里选择使用python-docx库将内容保存为docx文件。
with open('test.txt', encoding='utf-8') as f:
    docu = Document()
    docu.add_paragraph(f.read())
    docu.save('test.docx')

PPT,PDF爬取与保存
有了之前的经验教训,在爬取的时候我们首先就尝试了使用爬取TXT,DOCX的方法,尝试是否可以爬到内容。
url = 'https://wenku.baidu.com/view/a4ac1b57dd88d0d232d46a0f.html?fr=search'
header = {'User-agent': 'Googlebot'}
res = requests.get(url , headers = header)
res.text
很可惜的是,我们并没有访问到。原因仔细想想也很简单,在百度搜索的时候,直接搜索是搜不到PPT或者PDF的内容的。
那么很显然,PPT和PDF是通过异步的方法进行内容加载的。
对待异步加载的数据,我们通常采取的策略有两种,第一个就是直接找到发起异步请求的接口,自己构造请求头,发起请求,第二个就是通过Selenium这样的自动化测试工具去爬取。
百度文库的接口太难找了,请求头的构造也很麻烦,找了很久也没有很满意。所以在本次爬取中,我们使用的是第二种方法,使用Selenium这样的自动化测试工具。
在这里不多加介绍WebDriver,有兴趣的小伙伴可以自己查一下,我们直接上手使用。
这里我们需要下载ChromeDriver这个插件,当然这里是默认大家使用的是Chrome浏览器,如果是其他的浏览器,firefox,safari等等,直接去网上找到相应Driver就可以了。
这里给出ChromeDriver的下载地址:
http://npm.taobao.org/mirrors/chromedriver/
大家一定要下载和自己Chrome浏览器版本一致的ChromeDriver,不然程序是运行不起来的。

我们先不急着马上开始爬取,我们先来尝试使用一下Selenium调用ChromeDriver。
import requests
from selenium import webdriver
url = 'https://wenku.baidu.com/view/5292b2bc0166f5335a8102d276a20029bd64638c.html?fr=search'
driver = webdriver.Chrome(r'F:\driver\chromedriver.exe')
driver.get(url)
怎么样,是不是浏览器自动打开了?现在我们尝试输出这个driver,就可以看见,网页的正确源代码已经在里面了。
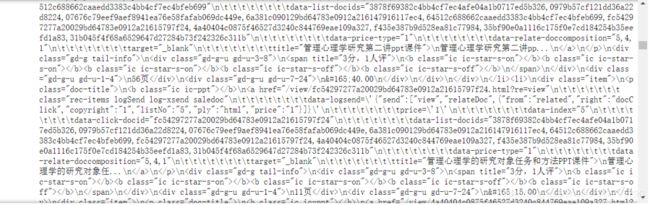
现在我们仔细研究一下源代码就可以看到,我们需要的内容在下面这个位置。

现在正确的源代码也有了,内容的位置也知道了,直接解析,爬取,完事就好了。
想得美,经过这样的爬取之后,对内容进行解析,让我们看看究竟爬到没有。
from lxml import etree
import re
html=etree.HTML(driver.page_source)
links=html.xpath("//div[@class='reader-pic-item']/@style")
part = re.compile(r'url[(](.*?)[)]')
qa="".join(links)
z=part.findall(qa)

我们可以知道,其实我们只爬到3张PDF,其他的都没有爬到。这是为什么呢?
这是百度文库为了防止大家去爬,专门设置的一个小机关。
返回百度文库,我们仔细看看源代码,其实我们可以发现,随着页面的变化,源代码是不断改变的,每次都只有3张图片的url。并且这个页码数也有一定的规律,如果在第二页,那么图片就是1,2,3,如果在第三页,图片就是2,3,4。

那么我们的疑惑一下就解决了,只需要不断地进行换页的爬取,就可以了。接下来就是如何实现换页的操作了。
这个需要两个步骤,先是点击继续阅读,然后进行页面输入实现换页。先实现点击的操作,代码如下。
button = driver.find_element_by_xpath("//*[@id='html-reader-go-more']/div[2]/div[1]/span")
button.click()
driver.execute_script("arguments[0].click();", button)
整个操作是通过JS来进行的,大家可以把这个记住,以后需要点击的时候直接用就可以。
然后就是输入页面实现换页,这个其实涉及的比较多,细分的话,步骤分为获取总页数,依次输入页面并点击。
import re
# 寻找页面
source = re.compile(r'/(.*?)')
number = int(source.findall(driver.page_source)[0])
# 输入页面并点击
driver.find_element_by_class_name("page-input").clear()
driver.find_element_by_class_name("page-input").send_keys('2')
driver.find_element_by_class_name("page-input").send_keys(Keys.ENTER)
如果小伙伴成功实现了上面的操作,其实大体的爬取工作已经差不多了,接下来就是保存我们的PPT和PDF了。
因为爬取PDF和PPT的时候,我们是爬取的图片的源地址,那么我们要获得这张图片并保存下来就必须对这个地址发起请求,然后将返回头以二进制保存下来。
for m in range(3):
    pic = requests.get(z[m]).content
    # 方法一
#     file = open(f'./照片/{m+1}.jpg','wb')
#     file.write(pic)
#     file.close()
    # 方法二
    with open(f'./照片/{m+1}.jpg','wb') as f:
        f.write(pic)
        f.close()
在这里,提醒大家一下一定要按照对图片用正确顺序进行命名,因为后面保存为PDF的时候,需要排序。
在py文件的目录下,大家就可以看见保存下来的图片了。最后一步,将图片保存为PDF。
from PIL import Image
import os
folderPath = "F:/TEST"
filename = "test"
files = os.listdir(folderPath)
jpgFiles = []
sources = []
for file in files:
    if 'jpg' in file:
        jpgFiles.append(file)
tep = []
for i in jpgFiles:
    ex = i.split('.')
    tep.append(int(ex[0]))
tep.sort()
jpgFiles=[folderPath +'/'+ str(i) + '.jpg' for i in tep]
output = Image.open(jpgFiles[0])
jpgFiles.pop(0)
for file in jpgFiles:
   img = Image.open(file)
   img = img.convert("P")
   sources.append(img)
output.save(f"./{filename}.pdf","PDF",save_all=True,append_images=sources)
最终的结果就是生成了咱们的PDF文件。

上述的操作看起来很多,很麻烦,其实并不是的。因为大部分的操作都是固定的,大家只需要记熟就可以了。
完整代码
import requests
from selenium import webdriver
from lxml import etree
import re
from selenium.webdriver.common.keys import Keys
import time
from PIL import Image
import os
from bs4 import BeautifulSoup
import bs4
from docx import Document
import sys

def getHTMLText(url):
    header = {'User-agent': 'Googlebot'}
    try:
        r = requests.get(url, headers = header, timeout = 30)
        r.raise_for_status()
        r.encoding = 'gbk'
        # r.encoding = r.apparent_encoding
        return r.text
    except:
        return ''

def parse_type(content):
    return re.findall(r"docType.*?\:.*?\'(.*?)\'\,", content)[0]

def parse_txt(html):
    plist = []
    soup = BeautifulSoup(html, "html.parser")
    plist.append(soup.title.string)
    for div in soup.find_all('div', attrs={"class": "bd doc-reader"}):
        plist.extend(div.get_text().split('\n'))
    plist = [c.replace(' ', '') for c in plist]
    plist = [c.replace('\x0c', '') for c in plist]
    return plist

def print_docx(plist, filename):
    file = open(filename + '.txt', 'w',encoding='utf-8')
    for str in plist:
        file.write(str)
        file.write('\n')
    file.close()
    with open(filename + '.txt', encoding='utf-8') as f:
        docu = Document()
        docu.add_paragraph(f.read())
        docu.save(filename + '.docx')

def parse_doc(url, folderPath):
    driver = webdriver.Chrome(r'./src/chromedriver.exe')
    driver.get(url)
    # 找到‘继续阅读’按钮  定位至还剩35页未读,继续阅读
    button = driver.find_element_by_xpath("//*[@id='html-reader-go-more']/div[2]/div[1]/span")
    # 按下按钮
    driver.execute_script("arguments[0].click();", button)
    time.sleep(1)
    source = re.compile(r'/(.*?)')
    number = int(source.findall(driver.page_source)[0])
    # 获取页码数
    # number = total[1]
    time.sleep(1)
    for i in range(2,number):
        driver.find_element_by_class_name("page-input").clear()
        driver.find_element_by_class_name("page-input").send_keys(f'{i}')
        driver.find_element_by_class_name("page-input").send_keys(Keys.ENTER)
        time.sleep(1)
        html=etree.HTML(driver.page_source)
        # 找到picture容器
        links=html.xpath("//div[@class='reader-pic-item']/@style")
        # 找到图片对应的url
        part = re.compile(r'url[(](.*?)[)]')
        qa="".join(links)
        z=part.findall(qa)
        if i == 2:
            for m in range(3):
                pic = requests.get(z[m]).content
                with open(f'./照片/{m+1}.jpg','wb') as f:
                    f.write(pic)
                    f.close()
        else:
            pic = requests.get(z[2]).content
            with open(f'./照片/{i+1}.jpg','wb') as f:
                f.write(pic)
                f.close()
        time.sleep(1)
    driver.quit()

def parse_other(url, folderPath):
    driver = webdriver.Chrome(r'./src/chromedriver.exe')
    driver.get(url)
    # 找到‘继续阅读’按钮  定位至还剩35页未读,继续阅读
    button = driver.find_element_by_xpath("//*[@id='html-reader-go-more']/div[2]/div[1]/span")
    # 按下按钮
    driver.execute_script("arguments[0].click();", button)
    time.sleep(1)
    source = re.compile(r'/(.*?)')
    number = int(source.findall(driver.page_source)[0])
    # 获取页码数
    # number = total[1]
    time.sleep(1)
    # 获取图片
    for i in range(2,number):
        driver.find_element_by_class_name("page-input").clear()
        driver.find_element_by_class_name("page-input").send_keys(f'{i}')
        driver.find_element_by_class_name("page-input").send_keys(Keys.ENTER)
        time.sleep(1)
        html=etree.HTML(driver.page_source)
        # 找到picture容器"//div[@class='reader-pic-item']/@style"
        z=html.xpath('//div[@class="ppt-image-wrap"]/img/@src')
        # print(z)
        # 保存图片
        if i == 2:
            for m in range(3):
                pic = requests.get(z[m]).content
                with open(folderPath + f'/{m + 1}.jpg','wb') as f:
                    f.write(pic)
                    f.close()
        else:
            pic = requests.get(z[i]).content
            with open(folderPath + f'/{i + 1}.jpg','wb') as f:
                f.write(pic)
                f.close()
        time.sleep(1)
    driver.quit()


def print_pdf(folderPath, filename):
    files = os.listdir(folderPath)
    jpgFiles = []
    sources = []
    for file in files:
        if 'jpg' in file:
            jpgFiles.append(file)
    tep = []
    for i in jpgFiles:
        ex = i.split('.')
        tep.append(int(ex[0]))
    tep.sort()
    jpgFiles=[folderPath +'/'+ str(i) + '.jpg' for i in tep]
    output = Image.open(jpgFiles[0])
    jpgFiles.pop(0)
    for file in jpgFiles:
        img = Image.open(file)
        img = img.convert("P")
        sources.append(img)
    output.save(f"{filename}.pdf","PDF",save_all=True,append_images=sources)

def main(url, istxt):
    try:
        ticks = time.time() # 获取时间(用于命名文件夹)
        filepath = './照片' + str(ticks) # 保存爬取的图片
        filename = './爬取结果' + str(ticks) # 爬取生成的文件名
        if not os.path.exists(filepath): # 新建文件夹
            os.mkdir(filepath)
        html = getHTMLText(url) # requests库爬取
        type = parse_type(html) # 获取文库文件类型:ppt, pdf, docx

        # 当你要爬取文档的文本时,打开下列注释
        if(istxt == "1"):
            type = 'txt'

        if type == 'txt' :
            plist = parse_txt(html)
            print_docx(plist, filename)
        elif type == 'doc' or type == 'pdf':
            parse_doc(url, filepath)
            print_pdf(filepath , filename)
        else:
            parse_other(url, filepath)
            print_pdf(filepath, filename)
        print('1')
    except:
        print('0')

if __name__ == '__main__':
    main(sys.argv[1],sys.argv[2])
    # url = 'https://wenku.baidu.com/view/5292b2bc0166f5335a8102d276a20029bd64638c.html?fr=search'
    # istxt = "0"
    # main(url,istxt)