RabbitMQ精讲7:与SpringBoot、Spring Cloud Stream整合实战
目录
与SpringBoot整合实战
1. 生产端
2. 消费端
消费端核心配置:
@RabbitListener注解使用
3. 代码示例
3.1 pom文件 和消息实体
3.2 生产者
3.3 消费者
与Spring Cloud Stream整合实战
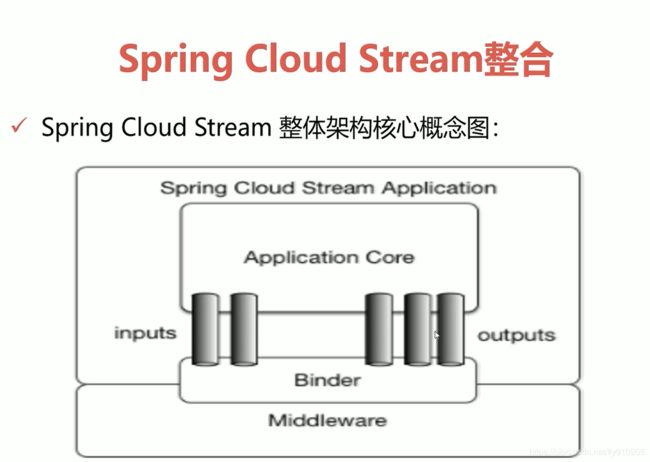
1. 架构介绍
2. 核心概念:
3. 代码示例
3.1 pom文件 和 消息实体
3.2 生产者
3.3 消费者
与SpringBoot整合实战
1. 生产端
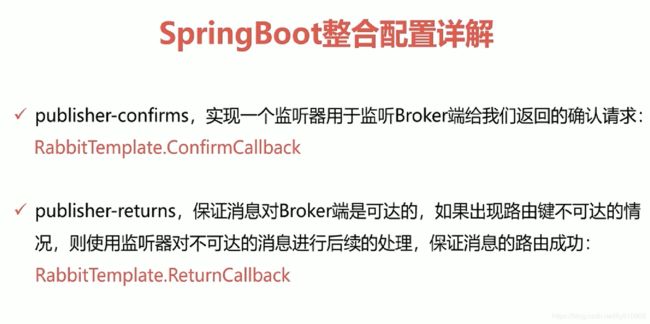
- publisher-confirms,实现一个监听器用于监听Broker端给我们返回的确认请求:RabbitTemplate.ConfirmCallback
- publisher-returns,保证消息对Broker端是可达的,如果出现路由键不可达的情况,则使用监听器对不可达的消息进行后续的处理,保证消息的路由成功:RabbitTemplate.ReturnCallback
- 注意一点,在发送消息的时候对template进行配置mandatory=true保证监听有效
- 生产端还可以配置其他属性,比如发送重试,超时时间,次数,间隔等
2. 消费端
消费端核心配置:
##签收模式-手工签收
spring.rabbitmq.listener.simple.acknowledge-mode=manual
##设置监听限制:最大10,默认5
spring.rabbitmq.listener.simple.concurrency=5
spring.rabbitmq.listener.simple.max-concurrency=10
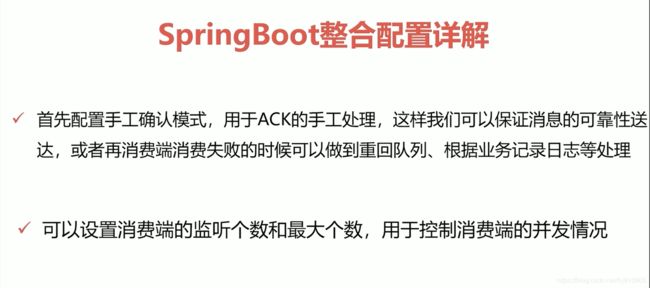
- 首先配置手工确认模式,用于ACK的手工处理,这样我们可以保证消息的可靠性送达,或者再消费端消费失败的时候可以做到重回队列(不建议)、根据业务记录日志等处理。
- 可以设置消费端的监听个数和最大个数,用于监控消费端的并发情况
@RabbitListener注解使用
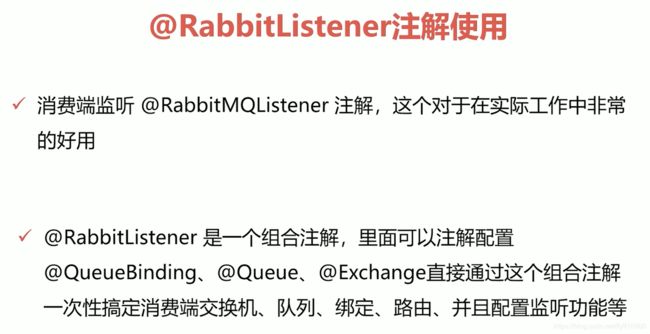
- 消费端监听@RabbitListener注解,这个对于在实际工作中非常的好用
- @RabbitListener是一个组合注解,里面可以注解配置
- @QueueBinding、@Queue、@Exchange直接通过这个组合注解一次性搞定消费端交换机、队列、绑定、路由、并且配置监听功能等。
3. 代码示例
3.1 pom文件 和消息实体
			org.springframework.boot
			spring-boot-starter


			org.springframework.boot
			spring-boot-starter-test
			test


			org.springframework.boot
			spring-boot-starter-amqp
import java.io.Serializable;

public class Order implements Serializable {

	private String id;
	private String name;

	public Order() {
	}
	public Order(String id, String name) {
		super();
		this.id = id;
		this.name = name;
	}
	public String getId() {
		return id;
	}
	public void setId(String id) {
		this.id = id;
	}
	public String getName() {
		return name;
	}
	public void setName(String name) {
		this.name = name;
	}


}
3.2 生产者
application.properties
spring.rabbitmq.addresses=192.168.11.76:5672
spring.rabbitmq.username=guest
spring.rabbitmq.password=guest
spring.rabbitmq.virtual-host=/
spring.rabbitmq.connection-timeout=15000

spring.rabbitmq.publisher-confirms=true
spring.rabbitmq.publisher-returns=true
spring.rabbitmq.template.mandatory=true
- RabbitSender
import java.util.Map;

import org.springframework.amqp.rabbit.core.RabbitTemplate;
import org.springframework.amqp.rabbit.core.RabbitTemplate.ConfirmCallback;
import org.springframework.amqp.rabbit.core.RabbitTemplate.ReturnCallback;
import org.springframework.amqp.rabbit.support.CorrelationData;
import org.springframework.beans.factory.annotation.Autowired;
import org.springframework.messaging.Message;
import org.springframework.messaging.MessageHeaders;
import org.springframework.messaging.support.MessageBuilder;
import org.springframework.stereotype.Component;

import com.bfxy.springboot.entity.Order;

@Component
public class RabbitSender {

	//自动注入RabbitTemplate模板类
	@Autowired
	private RabbitTemplate rabbitTemplate;

	//回调函数: confirm确认
	final ConfirmCallback confirmCallback = new RabbitTemplate.ConfirmCallback() {
		@Override
		public void confirm(CorrelationData correlationData, boolean ack, String cause) {
			System.err.println("correlationData: " + correlationData);
			System.err.println("ack: " + ack);
			if(!ack){
				System.err.println("异常处理....");
			}
		}
	};

	//回调函数: return返回
	final ReturnCallback returnCallback = new RabbitTemplate.ReturnCallback() {
		@Override
		public void returnedMessage(org.springframework.amqp.core.Message message, int replyCode, String replyText,
				String exchange, String routingKey) {
			System.err.println("return exchange: " + exchange + ", routingKey: "
				+ routingKey + ", replyCode: " + replyCode + ", replyText: " + replyText);
		}
	};

	//发送消息方法调用: 构建Message消息
	public void send(Object message, Map properties) throws Exception {
		MessageHeaders mhs = new MessageHeaders(properties);
		Message msg = MessageBuilder.createMessage(message, mhs);
		rabbitTemplate.setConfirmCallback(confirmCallback);
		rabbitTemplate.setReturnCallback(returnCallback);
		//id + 时间戳 全局唯一
		CorrelationData correlationData = new CorrelationData("1234567890");
		rabbitTemplate.convertAndSend("exchange-1", "springboot.abc", msg, correlationData);
	}

	//发送消息方法调用: 构建自定义对象消息
	public void sendOrder(Order order) throws Exception {
		rabbitTemplate.setConfirmCallback(confirmCallback);
		rabbitTemplate.setReturnCallback(returnCallback);
		//id + 时间戳 全局唯一
		CorrelationData correlationData = new CorrelationData("0987654321");
		rabbitTemplate.convertAndSend("exchange-2", "springboot.def", order, correlationData);
	}

}
- 测试类
import java.text.SimpleDateFormat;
import java.util.Date;
import java.util.HashMap;
import java.util.Map;

import org.junit.Test;
import org.junit.runner.RunWith;
import org.springframework.beans.factory.annotation.Autowired;
import org.springframework.boot.test.context.SpringBootTest;
import org.springframework.test.context.junit4.SpringRunner;

import com.bfxy.springboot.entity.Order;
import com.bfxy.springboot.producer.RabbitSender;

@RunWith(SpringRunner.class)
@SpringBootTest
public class ApplicationTests {

	@Test
	public void contextLoads() {
	}

	@Autowired
	private RabbitSender rabbitSender;

	private static SimpleDateFormat simpleDateFormat = new SimpleDateFormat("yyyy-MM-dd HH:mm:ss.SSS");

	@Test
	public void testSender1() throws Exception {
		 Map properties = new HashMap<>();
		 properties.put("number", "12345");
		 properties.put("send_time", simpleDateFormat.format(new Date()));
		 rabbitSender.send("Hello RabbitMQ For Spring Boot!", properties);
	}

	@Test
	public void testSender2() throws Exception {
		 Order order = new Order("001", "第一个订单");
		 rabbitSender.sendOrder(order);
	}


}
3.3 消费者
application.properties
spring.rabbitmq.addresses=192.168.11.76:5672
spring.rabbitmq.username=guest
spring.rabbitmq.password=guest
spring.rabbitmq.virtual-host=/
spring.rabbitmq.connection-timeout=15000

spring.rabbitmq.listener.simple.acknowledge-mode=manual
spring.rabbitmq.listener.simple.concurrency=5
spring.rabbitmq.listener.simple.max-concurrency=10

spring.rabbitmq.listener.order.queue.name=queue-2
spring.rabbitmq.listener.order.queue.durable=true
spring.rabbitmq.listener.order.exchange.name=exchange-2
spring.rabbitmq.listener.order.exchange.durable=true
spring.rabbitmq.listener.order.exchange.type=topic
spring.rabbitmq.listener.order.exchange.ignoreDeclarationExceptions=true
spring.rabbitmq.listener.order.key=springboot.*
- RabbitReceiver
package com.bfxy.springboot.conusmer;

import java.util.Map;

import org.springframework.amqp.rabbit.annotation.Exchange;
import org.springframework.amqp.rabbit.annotation.Queue;
import org.springframework.amqp.rabbit.annotation.QueueBinding;
import org.springframework.amqp.rabbit.annotation.RabbitHandler;
import org.springframework.amqp.rabbit.annotation.RabbitListener;
import org.springframework.amqp.support.AmqpHeaders;
import org.springframework.messaging.Message;
import org.springframework.messaging.handler.annotation.Headers;
import org.springframework.messaging.handler.annotation.Payload;
import org.springframework.stereotype.Component;

import com.rabbitmq.client.Channel;

@Component
public class RabbitReceiver {


	@RabbitListener(bindings = @QueueBinding(
			value = @Queue(value = "queue-1",
			durable="true"),
			exchange = @Exchange(value = "exchange-1",
			durable="true",
			type= "topic",
			ignoreDeclarationExceptions = "true"),
			key = "springboot.*"
			)
	)
	@RabbitHandler
	public void onMessage(Message message, Channel channel) throws Exception {
		System.err.println("--------------------------------------");
		System.err.println("消费端Payload: " + message.getPayload());
		Long deliveryTag = (Long)message.getHeaders().get(AmqpHeaders.DELIVERY_TAG);
		//手工ACK
		channel.basicAck(deliveryTag, false);
	}


	/**
	 *
	 * 	spring.rabbitmq.listener.order.queue.name=queue-2
		spring.rabbitmq.listener.order.queue.durable=true
		spring.rabbitmq.listener.order.exchange.name=exchange-1
		spring.rabbitmq.listener.order.exchange.durable=true
		spring.rabbitmq.listener.order.exchange.type=topic
		spring.rabbitmq.listener.order.exchange.ignoreDeclarationExceptions=true
		spring.rabbitmq.listener.order.key=springboot.*
	 * @param order
	 * @param channel
	 * @param headers
	 * @throws Exception
	 */
	@RabbitListener(bindings = @QueueBinding(
			value = @Queue(value = "${spring.rabbitmq.listener.order.queue.name}",
			durable="${spring.rabbitmq.listener.order.queue.durable}"),
			exchange = @Exchange(value = "${spring.rabbitmq.listener.order.exchange.name}",
			durable="${spring.rabbitmq.listener.order.exchange.durable}",
			type= "${spring.rabbitmq.listener.order.exchange.type}",
			ignoreDeclarationExceptions = "${spring.rabbitmq.listener.order.exchange.ignoreDeclarationExceptions}"),
			key = "${spring.rabbitmq.listener.order.key}"
			)
	)
	@RabbitHandler
	public void onOrderMessage(@Payload com.bfxy.springboot.entity.Order order,
			Channel channel,
			@Headers Map headers) throws Exception {
		System.err.println("--------------------------------------");
		System.err.println("消费端order: " + order.getId());
		Long deliveryTag = (Long)headers.get(AmqpHeaders.DELIVERY_TAG);
		//手工ACK
		channel.basicAck(deliveryTag, false);
	}


}
与Spring Cloud Stream整合实战
Spring Cloud,这个全家桶框架在整个中小型互联网公司异常的火爆,那么相对应的Spring Cloud Stream 就渐渐的被大家所重视起来,这一节课主要来介绍Spring Cloud Stream如何与RabbitMQ进行集成。
1. 架构介绍
- Destination Binder:包含自己的应用Application
- 左边是RabbitMQ、右边是Kafka。表示消息的生产与发送,可以是不同的消息中间件。这是Spring Cloud Stream 最上层的一个抽象。非常好的地方。
- 两个比较重要的地方:inputs(输入)消息接收端、outputs(输出)消息发送端
- 一个 Spring Cloud Stream 应用以消息中间件为核心,应用通过Spring Cloud Stream注入的输入/输出通道 channels 与外部进行通信。channels 通过特定的Binder实现与外部消息中间件进行通信。
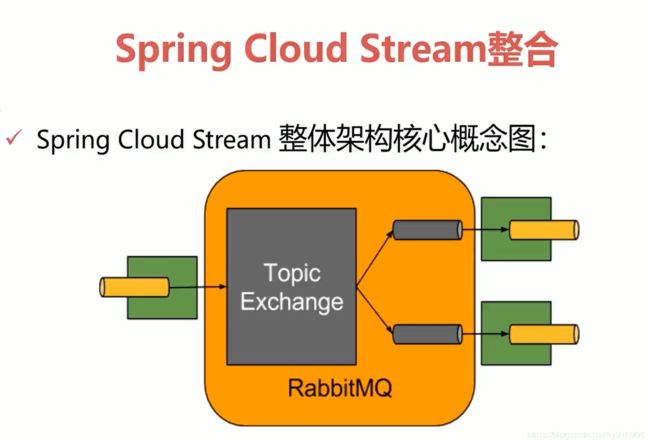
- 黄色:表示RabbitMQ
- 绿色:插件,消息的输入输出都套了一层插件,插件可以用于各种各样不同的消息,也可以用于消息中间件的替换。
2. 核心概念:
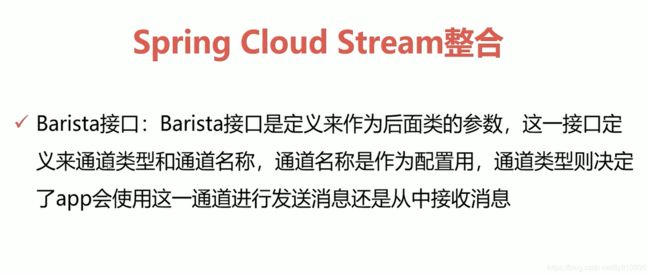
- Barista [bəˈri:stə] 接口:Barista接口是定义来作为后面类的参数,这一接口定义来通道类型和通道名称,
- 通道名称是作为配置用,
- 通道类型则决定了app会使用这一通道进行发送消息还是从中接收消息。
通道接口如何定义:
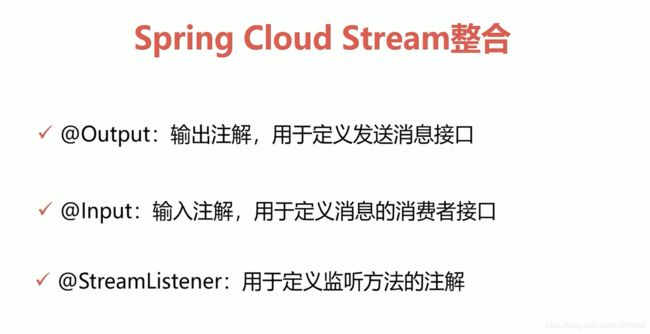
- @Output:输出注解,用于定义发送消息接口
- @Input:输入注解,用于定义消息的消费者接口
- @StreamListener:用于定义监听方法的注解
使用Spring Cloud Stream 非常简单,只需要使用好这3个注解即可,在实现高性能消息的生产和消费的场景非常合适,但是使用SpringCloudStream框架有一个非常大的问题,就是不能实现可靠性的投递,也就是没法保证消息的100%可靠性,会存在少量消息丢失的问题。
- 目前SpringCloudStream整合了RabbitMQ与Kafka,我们都知道Kafka是无法进行消息可靠性投递的,这个原因是因为SpringCloudStream框架为了和Kafka兼顾所以在实际工作中使用它的目的就是针对高性能的消息通信的!这点就是在当前版本SpringCloudStream的定位。
- 因此在实际的工作中,可以采用SpringCloudStream,如果需要保证可靠性投递,也可以单独采用RabbitMQ,也是可以的。
3. 代码示例
3.1 pom文件 和 消息实体
			org.springframework.boot
			spring-boot-starter-web


			org.springframework.boot
			spring-boot-starter


		    org.springframework.boot
		    spring-boot-autoconfigure


			org.springframework.boot
			spring-boot-starter-test
			test


		    org.springframework.cloud
		    spring-cloud-starter-stream-rabbit
		    1.3.4.RELEASE


			org.springframework.boot
			spring-boot-starter-actuator
3.2 生产者
- application.properties
server.port=8001
server.servlet.context-path=/producer

spring.application.name=producer
spring.cloud.stream.bindings.output_channel.destination=exchange-3
spring.cloud.stream.bindings.output_channel.group=queue-3
spring.cloud.stream.bindings.output_channel.binder=rabbit_cluster

spring.cloud.stream.binders.rabbit_cluster.type=rabbit
spring.cloud.stream.binders.rabbit_cluster.environment.spring.rabbitmq.addresses=192.168.11.76:5672
spring.cloud.stream.binders.rabbit_cluster.environment.spring.rabbitmq.username=guest
spring.cloud.stream.binders.rabbit_cluster.environment.spring.rabbitmq.password=guest
spring.cloud.stream.binders.rabbit_cluster.environment.spring.rabbitmq.virtual-host=/- Barista接口
package com.bfxy.rabbitmq.stream;

import org.springframework.cloud.stream.annotation.Output;
import org.springframework.messaging.MessageChannel;

/**
 * 中文类名:

 * 概要说明:

 * 这里的Barista接口是定义来作为后面类的参数,这一接口定义来通道类型和通道名称。
 * 通道名称是作为配置用,通道类型则决定了app会使用这一通道进行发送消息还是从中接收消息。
 */
public interface Barista {

    //String INPUT_CHANNEL = "input_channel";
    String OUTPUT_CHANNEL = "output_channel";

    //注解@Input声明了它是一个输入类型的通道,名字是Barista.INPUT_CHANNEL,也就是position3的input_channel。这一名字与上述配置app2的配置文件中position1应该一致,表明注入了一个名字叫做input_channel的通道,它的类型是input,订阅的主题是position2处声明的mydest这个主题
//    @Input(Barista.INPUT_CHANNEL)
//    SubscribableChannel loginput();
    //注解@Output声明了它是一个输出类型的通道,名字是output_channel。这一名字与app1中通道名一致,表明注入了一个名字为output_channel的通道,类型是output,发布的主题名为mydest。
    @Output(Barista.OUTPUT_CHANNEL)
    MessageChannel logoutput();

//	String INPUT_BASE = "queue-1";
//	String OUTPUT_BASE = "queue-1";
//	@Input(Barista.INPUT_BASE)
//	SubscribableChannel input1();
//	MessageChannel output1();

} - RabbitmqSender
package com.bfxy.rabbitmq.stream;

import java.util.Map;

import org.springframework.beans.factory.annotation.Autowired;
import org.springframework.cloud.stream.annotation.EnableBinding;
import org.springframework.messaging.Message;
import org.springframework.messaging.MessageHeaders;
import org.springframework.messaging.support.MessageBuilder;
import org.springframework.stereotype.Service;

@EnableBinding(Barista.class)
@Service
public class RabbitmqSender {

    @Autowired
    private Barista barista;

    // 发送消息
    public String sendMessage(Object message, Map properties) throws Exception {
        try{
        	MessageHeaders mhs = new MessageHeaders(properties);
        	Message msg = MessageBuilder.createMessage(message, mhs);
            boolean sendStatus = barista.logoutput().send(msg);
            System.err.println("--------------sending -------------------");
            System.out.println("发送数据:" + message + ",sendStatus: " + sendStatus);
        }catch (Exception e){
        	System.err.println("-------------error-------------");
        	e.printStackTrace();
            throw new RuntimeException(e.getMessage());

        }
        return null;
    }

} - 测试类
package com.bfxy.rabbitmq;

import java.util.Date;
import java.util.HashMap;
import java.util.Map;

import org.apache.http.client.utils.DateUtils;
import org.junit.Test;
import org.junit.runner.RunWith;
import org.springframework.beans.factory.annotation.Autowired;
import org.springframework.boot.test.context.SpringBootTest;
import org.springframework.test.context.junit4.SpringRunner;

import com.bfxy.rabbitmq.stream.RabbitmqSender;

@RunWith(SpringRunner.class)
@SpringBootTest
public class ApplicationTests {

	@Autowired
	private RabbitmqSender rabbitmqSender;


	@Test
	public void sendMessageTest1() {
       for(int i = 0; i < 1; i ++){
    	   try {
		       Map properties = new HashMap();
		       properties.put("SERIAL_NUMBER", "12345");
		       properties.put("BANK_NUMBER", "abc");
		       properties.put("PLAT_SEND_TIME", DateUtils.formatDate(new Date(), "yyyy-MM-dd HH:mm:ss.SSS"));
	    	   rabbitmqSender.sendMessage("Hello, I am amqp sender num :" + i, properties);

           } catch (Exception e) {
        	   System.out.println("--------error-------");
               e.printStackTrace();
           }
       }
       //TimeUnit.SECONDS.sleep(Integer.MAX_VALUE);
	}

}
3.3 消费者
- application.properties
server.port=8002
server.context-path=/consumer

spring.application.name=consumer
spring.cloud.stream.bindings.input_channel.destination=exchange-3
spring.cloud.stream.bindings.input_channel.group=queue-3
spring.cloud.stream.bindings.input_channel.binder=rabbit_cluster
spring.cloud.stream.bindings.input_channel.consumer.concurrency=1
spring.cloud.stream.rabbit.bindings.input_channel.consumer.requeue-rejected=false
spring.cloud.stream.rabbit.bindings.input_channel.consumer.acknowledge-mode=MANUAL
spring.cloud.stream.rabbit.bindings.input_channel.consumer.recovery-interval=3000
spring.cloud.stream.rabbit.bindings.input_channel.consumer.durable-subscription=true
spring.cloud.stream.rabbit.bindings.input_channel.consumer.max-concurrency=5

spring.cloud.stream.binders.rabbit_cluster.type=rabbit
spring.cloud.stream.binders.rabbit_cluster.environment.spring.rabbitmq.addresses=192.168.11.76:5672
spring.cloud.stream.binders.rabbit_cluster.environment.spring.rabbitmq.username=guest
spring.cloud.stream.binders.rabbit_cluster.environment.spring.rabbitmq.password=guest
spring.cloud.stream.binders.rabbit_cluster.environment.spring.rabbitmq.virtual-host=/-
Barista接口
package com.bfxy.rabbitmq.stream;

import org.springframework.cloud.stream.annotation.Input;
import org.springframework.messaging.SubscribableChannel;

/**
 * 中文类名:

 * 概要说明:

 * 这里的Barista接口是定义来作为后面类的参数,这一接口定义来通道类型和通道名称。
 * 通道名称是作为配置用,通道类型则决定了app会使用这一通道进行发送消息还是从中接收消息。
 * @author ashen(Alienware)
 * @since 2016年7月22日
 */

public interface Barista {

    String INPUT_CHANNEL = "input_channel";

    //注解@Input声明了它是一个输入类型的通道,名字是Barista.INPUT_CHANNEL,也就是position3的input_channel。这一名字与上述配置app2的配置文件中position1应该一致,表明注入了一个名字叫做input_channel的通道,它的类型是input,订阅的主题是position2处声明的mydest这个主题
    @Input(Barista.INPUT_CHANNEL)
    SubscribableChannel loginput();


} -
RabbitmqReceiver
-
package com.bfxy.rabbitmq.stream;

import org.springframework.amqp.support.AmqpHeaders;
import org.springframework.cloud.stream.annotation.EnableBinding;
import org.springframework.cloud.stream.annotation.StreamListener;
import org.springframework.messaging.Message;
import org.springframework.stereotype.Service;

import com.rabbitmq.client.Channel;


@EnableBinding(Barista.class)
@Service
public class RabbitmqReceiver {

    @StreamListener(Barista.INPUT_CHANNEL)
    public void receiver(Message message) throws Exception {
		Channel channel = (com.rabbitmq.client.Channel) message.getHeaders().get(AmqpHeaders.CHANNEL);
		Long deliveryTag = (Long) message.getHeaders().get(AmqpHeaders.DELIVERY_TAG);
    	System.out.println("Input Stream 1 接受数据:" + message);
    	System.out.println("消费完毕------------");
    	channel.basicAck(deliveryTag, false);
    }
}
