一、编译环境:
首先介绍编译中使用的工具:
虚拟机: vmare 9 下载地址: http://blog.csdn.net/hudan2714/article/details/7902654
linux平台:ubuntu 12.04 64位
jdk: sun-java6-jdk (64位)
交叉编译工具链:gcc 使用的版本是:4.6.3
想要完成最终的编译,当然首要的就是检查环境:
1、安装的ubuntu设置空间大小:至少需要30G
目前下载的包就有10G:有图有真相:
包括解压编译后大小有30G了:
所以空间一定要够了才行。
2、gcc和g++不能使用使用4.4版本了(编译android4.0系统使用的是4.4),
现在只要使用系统自带的4.6.3(ubuntu12.04) 就可以了。
3、jdk版本:sun-java6-jdk
二、编译:
编译过程不知道,可以查看官方文档了。这里做简单说明:
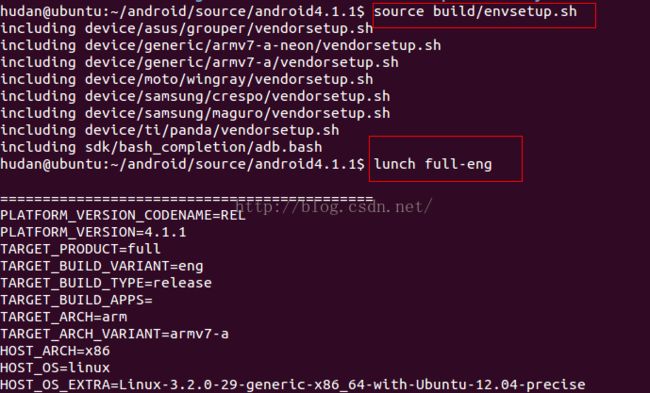
1.source build/envsetup.sh 这是向系统导入不同的厂商版本,并添加m命令。
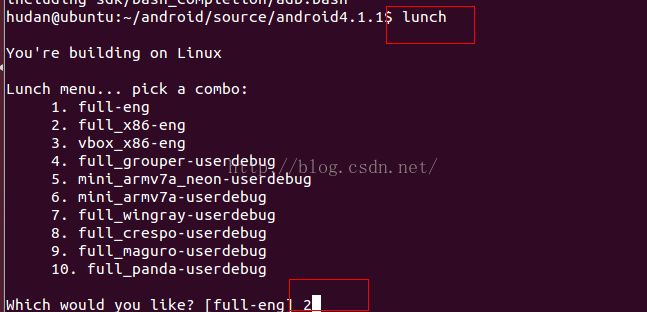
2.lunch 选择编译厂商版本。
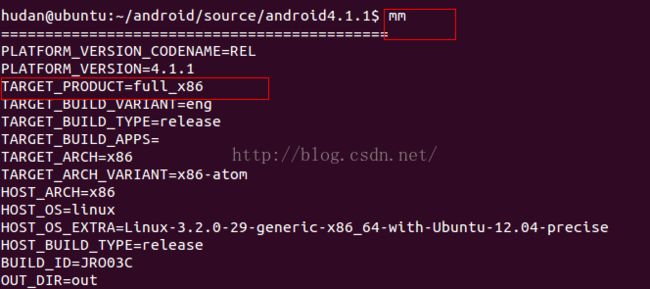
3.mm 编译版本
还是看图说话吧:
当然这里的lunch full-eng是编译所有,如果嫌慢,就单独编译某一个也可。
再mm就可以编译了(必须要source了,才有mm命令,而且只在此terminal有效)
三、编译中遇到的错误:
错误太多,做了一些总结,有点乱,如果编译过程中遇到错误,可以来查看:
/bin/bash: bison: command not found
make: *** [out/host/linux-x86/obj/EXECUTABLES/aidl_intermediates/aidl_language_y.cpp] Error 127
解决方法:sudo apt-get install bison
make: *** [out/host/linux-x86/obj/EXECUTABLES/aidl_intermediates/aidl_language_l.cpp] Error 127
解决方法: sudo apt-get install flex
make: *** [out/target/product/generic/obj/STATIC_LIBRARIES/libwebcore_intermediates/Source/WebCore/css/CSSPropertyNames.h] Error 25
解决方法:sudo apt-get install gperf
/usr/include/features.h:324:26: fatal error: bits/predefs.h: No such file or directoryIn file included from /home/hudan/android/source/android4.1.1/prebuilts/gcc/linux-x86/host/i686-linux-glibc2.7-4.6/bin/../sysroot/usr/include/sys/types.h:27:0,
from frameworks/native/include/utils/Errors.h:20,
from frameworks/native/include/utils/String8.h:20,
from cts/suite/audio_quality/lib/include/Settings.h:21,
from cts/suite/audio_quality/lib/src/Settings.cpp:17:
/usr/include/features.h:324:26: fatal error: bits/predefs.h: No such file or directoryIn file included from /usr/include/stdlib.h:25:0,
from cts/suite/audio_quality/lib/src/Adb.cpp:16:
/usr/include/features.h:324:26: fatal error: bits/predefs.h: No such file or directory
compilation terminated.
compilation terminated.
compilation terminated.
make: *** [out/host/linux-x86/obj/STATIC_LIBRARIES/libcts_audio_quality_intermediates/src/SimpleScriptExec.o] Error 1
make: *** Waiting for unfinished jobs....
make: *** [out/host/linux-x86/obj/STATIC_LIBRARIES/libcts_audio_quality_intermediates/src/Adb.o] Error 1
make: *** [out/host/linux-x86/obj/STATIC_LIBRARIES/libcts_audio_quality_intermediates/src/Settings.o] Error 1
In file included from /usr/include/semaphore.h:22:0,
from cts/suite/audio_quality/lib/include/Semaphore.h:21,
from cts/suite/audio_quality/lib/src/Semaphore.cpp:17:
/usr/include/features.h:324:26: fatal error: bits/predefs.h: No such file or directory
compilation terminated.
make: *** [out/host/linux-x86/obj/STATIC_LIBRARIES/libcts_audio_quality_intermediates/src/Semaphore.o] Error
解决方法:sudo apt-get install gcc-multilib
error libGL.so: cannot open shared object file: No such file or directory
OSError: libGL.so: cannot open shared object file: No such file or directory
may appear on Linux systems when you try to launch VNL for the first time. To solve it, create (as administrator) a new link in /usr/lib:
sudo ln -s /usr/lib/libGL.so.1.2 /usr/lib/libGL.so
If you have a 64-bit Linux, use /usr/lib64 instead.
First check that you actually have "libGL.so.1.2" in /usr/lib or /usr/lib64; it might be called "libGL.so.1" or something else instead, or located in another directory, depending on the video drivers. You can use
locate libGL
to find the correct file to link to.
而我使用的是ubuntu 12.04 bit-64位,在/usr/lib/并没有libGL.so文件。
可以使用locate libGL查找此文件。结果:
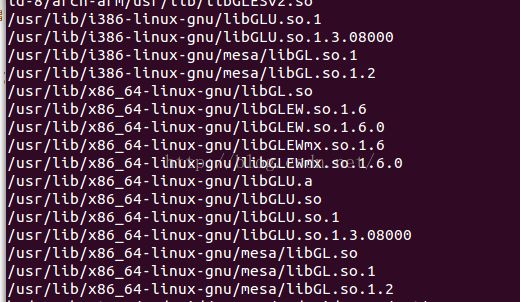
找出了这么多,当然是选择64位平台下的libGL了。


但是针对这几个,不知道要选择哪一个好,还请高手指点。
Failed to load libGL.so
error libGL.so: wrong ELF class: ELFCLASS64
linux系统是64位的,这个命令不支持64位
最佳解决方案,把oralce-lib环境变量设置为lib32即可

最后选择ln还36位
代码:hudan@ubuntu:~/android/source/android4.1.1/out$ sudo ln -s /usr/lib/i386-linux-gnu/mesa/libGL.so.1.2 /usr/lib/libGL.so
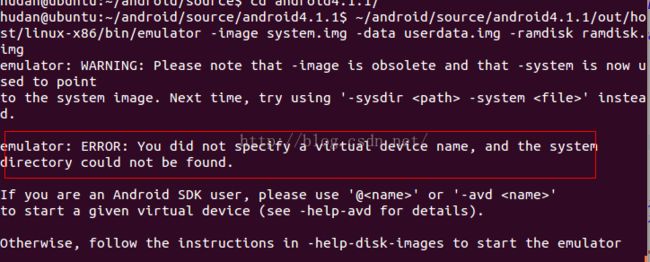
再运行编译好的system.img,出现如下的错误:

直接参数-ramdisk ramdisk.img去掉,结果模拟器跑起来了,但不能把内核启动起来。
no ABI error , when creating an Android virtual device
E: Could not get lock /var/lib/dpkg/lock - open (11: Resource temporarily unavailable)
E: Unable to lock the administration directory (/var/lib/dpkg/), is another process using it?
解决:sudo rm /var/lib/apt/lists/lock
sh: gperf: not found
target Generated: libwebcore <= external/webkit/Source/JavaScriptCore/create_regex_tables
Generating CSSPropertyNames.h <= CSSPropertyNames.in
sh: gperf: not found
calling gperf failed: 32512 at ./makeprop.pl line 140.
make: *** [out/target/product/generic/obj/STATIC_LIBRARIES/libwebcore_intermediates/Source/WebCore/css/CSSPropertyNames.h] Error 25
make: *** Deleting file `out/target/product/generic/obj/STATIC_LIBRARIES/libwebcore_intermediates/Source/WebCore/css/CSSPropertyNames.h'
解决方法:sudo apt-get install gperf
n file included from /usr/include/stdlib.h:25,
from build/tools/acp/acp.c:11:
/usr/include/features.h:323: 致命错误: bits/predefs.h:没有那个文件或目录编译中断。
make: *** [out/host/linux-x86/obj/EXECUTABLES/acp_intermediates/acp.o] 错误 1
make: *** [out/host/linux-86/obj/STATIC_LIBRARIES/libcts_audio_quality_intermediates/src/Adb.o] Error 1
安装:libc6-dev-i386
sudo apt-get install libc6-dev-i386
make: *** [out/target/product/generic/obj/SHARED_LIBRARIES/libwebcore_intermediates/LINKED/libwebcore.so] Error 1
make: *** Waiting for unfinished jobs....
make: *** [out/target/common/obj/APPS/android.core.tests.libcore.package.dalvik.no-core-tests-res_intermediates/noproguard.classes-with-local.dex] Error 130
上次make或或者mmm的时候生成一些错误的东西
可以使用:make clean 再重新make
解决:rm out/target/common/obj/APPS/ -r (如果还是有这样的错误,就只能clean了)
四、运行编译好的系统
vi /etc/profile
增加以下三句
最终运行配置,给大家截个图:
只需要这三句就OK
配置完,source /etc/profile 要是出现黑屏,建议重启一下。接下:
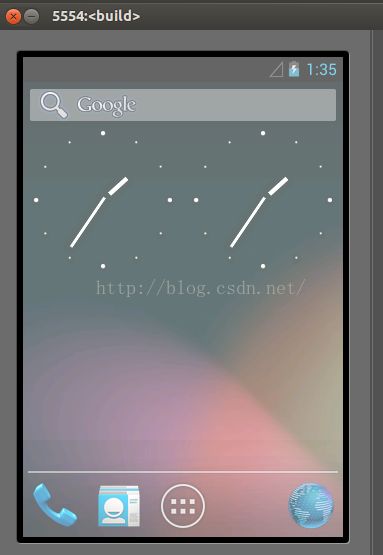
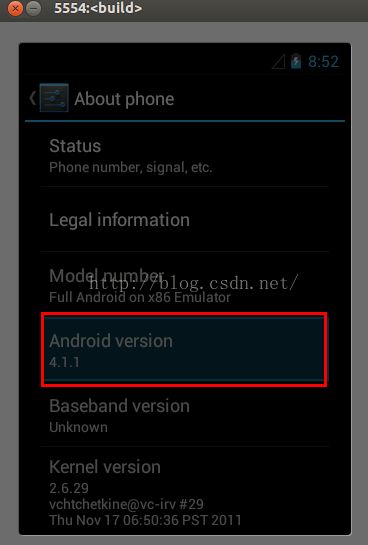
运行时只要:emulator
完美运行:
下面是遇到的问题,可以看看:
编译完系统后,用模拟器运行系统,在2.3之前只需要配置:
export ANDROID_PRODUCT_OUT=/home/hudan/android/source/android4.1.1/out/target/product/generic_x86
export PATH=$PATH:/home/hudan/android/source/android4.1.1/out/host/linux-x86/bin
但这样配置就一直出现如下的错误:
emulator: ERROR: You did not specify a virtual device name, and the system
directory could not be found.
If you are an Android SDK user, please use '@' or '-avd '
to start a given virtual device (see -help-avd for details).
Otherwise, follow the instructions in -help-disk-images to start the emulator
这就是 adnroid4.1.1下emulator不能直接运行的问题
参考: http://blog.csdn.net/dongminghao888/article/details/7860884
最后配置export ANDROID_BUILD_TOP=/home/hudan/android/source/android4.1.1
一切就都OK了。
如果是研究android源码的欢迎加群交流:android系统高级交流群:247039470
转载请附原文地址: http://blog.csdn.net/hudan2714/article/details/7926924
![]()


