pycharm+python+selenium+pytest框架及问题总结
配置:pycharm+python+selenium+pytest:
1、 安装编译器:pycharm
2、 如何配置pytest:参考连接:https://www.cnblogs.com/wuxiaoxia/p/10164913.html
3、 安装html report结果导出插件: pip install pytest-html
4、 安装失败用例重复执行插件: pip install -U pytest-rerunfailures
5、 pycharm+pytest+allure单元测试框架+生成测试报告
http://www.51ste.com/share/det-861.html
http://www.51ste.com/share/det-862.html
6、 pycharm+pytest+allure+selenium:web自动化测试框架+生成测试报告
7、 具体思路:
pageobject设计思路,多封装等:
https://www.cnblogs.com/songzhenhua/p/12317518.html
https://www.cnblogs.com/linuxchao/p/linuxchao-pytest-Actual.html
https://testerhome.com/topics/18944?locale=zh-TW
8、 添加jenkins+git自动拉取构建框架:https://www.cnblogs.com/zenghongfei/p/11752627.html
9、 已选择框架与模式:
| 接口自动化框架 |
python+unittest/pytest+Git+Jenkins+MySQL+testlink/redmine |
| UI自动化测试框架 |
python+selenium+unittest/pytest+Git+Jenkins+MySQL+testlink/redmine |
| 客户端自动化框架 |
python+uiautomator/appium+unittest/pytest+Git+Jenkins+MySQL+testlink/redmine |
框架结构
10、
Allure的几个特性:https://www.cnblogs.com/xiaogongjin/p/11705134.html
(1)
@allure.feature # 用于定义被测试的功能,被测产品的需求点,具体功能。
步骤1:import allure
步骤2:在每个测试用例(或者每个测试方法前加入特性feature )
如:
步骤3:
pycharm---terminal中运行脚本:
pytest E:\\pycharm\\run\\Netone\\testCase\\test_pcs --alluredir E:\\pycharm\\run\\Netone\\result\\pcs
cmd中运行脚本将json文件转成html文件:
allure generate E:\pycharm\run\Netone\result\pcs -o E:\pycharm\run\Netone\report\pcs –clean
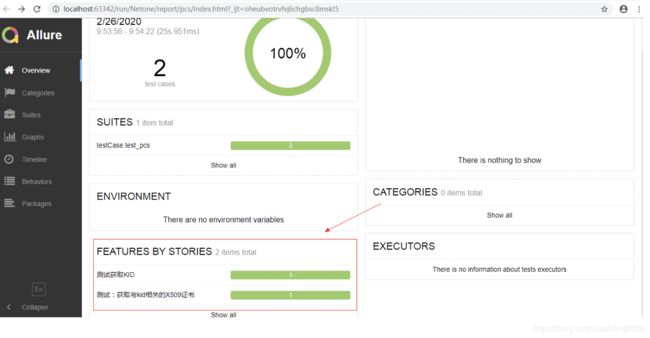
cmd中或者phcharm中打开html:
效果如:
(2)
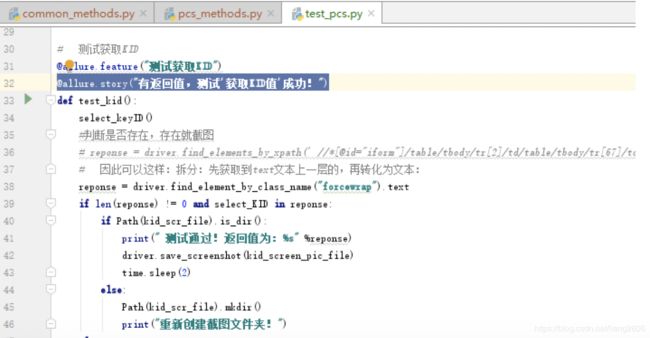
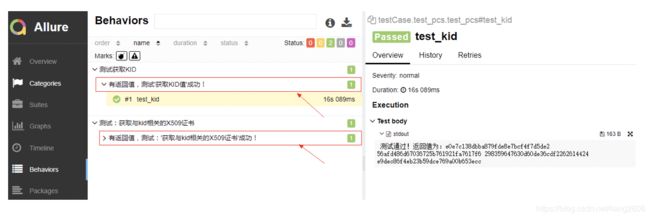
@allure.story # 用于定义被测功能的用户场景,即子功能点
在程序中添加:
测试结果如:
(3)
@allure.severity 测试用例的级别
Allure中对严重级别的定义:
blocker级别:中断缺陷(客户端程序无响应,无法执行下一步操作)
critical级别: 临界缺陷(功能点缺失)
normal级别:普通缺陷(数值计算错误)
minor级别: 次要缺陷(界面错误与UI需求不符)
trivial级别:轻微缺陷(必输项无提示, 或者提示不规范)
使用方法: @allure.severitylallure.severity_ level.CRITICAL) 或者@allure.severity('critical')
在程序中添加:
测试结果如:
(4)
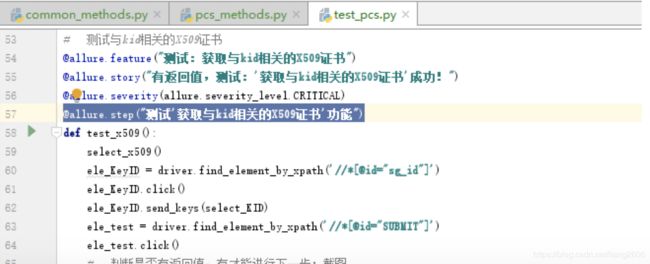
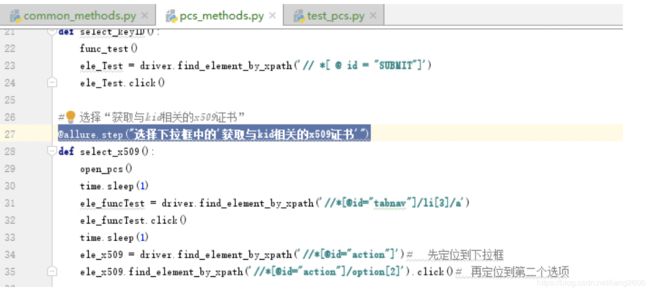
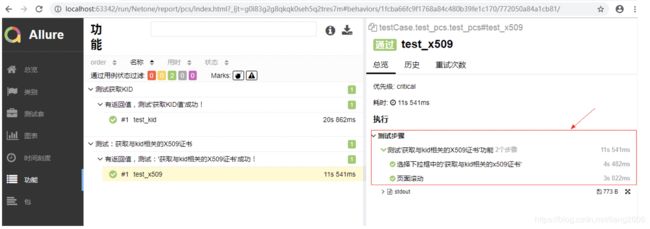
@allure.step # 用于将一个测试用例,分成几个步骤在报告中输出
在具体的方法前添加,如:
结果如:
(5)
with allure.step()可以放在具体方法里面,但是测试步骤的代码要被这个具体方法所包含。
(6)
@allure.attach # 用于向测试报告中输入一些附加的信息,通常是一些测试数据信息
(7)
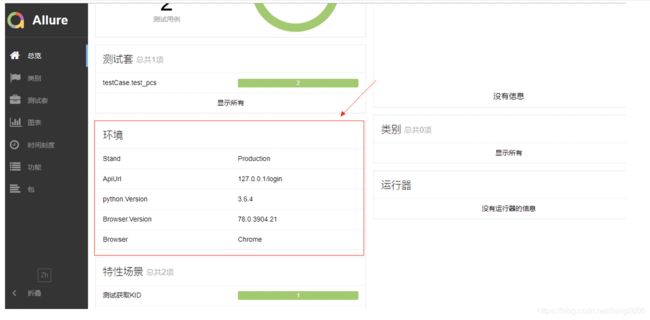
environment # 用于向报告中添加测试环境
步骤1:创建文件:environment.xml或者environment.properties,内容:
properties中:
Browser=Chrome
Browser.Version=78.0.3904.21
Stand=Production
ApiUrl=127.0.0.1/login
python.Version=3.6.4
步骤2:将文件保存到result路径目录下(生成的json测试结果的目录)
结果如:
问题汇总:
1、 配置完毕后pycharm中编写一段执行后报错:
selenium.common.exceptions.WebDriverException: Message: 'geckodriver' executable needs to be in PATH.
解决策略:
(1) https://github.com/mozilla/geckodriver/releases下载:geckodriver.exe
(2) 将geckodriver.exe移到火狐浏览器的安装目录
(3) 配置电脑的环境变量:path----火狐浏览器安装路径
(4) 重启pycharm
2、 如何编写pytest测试样例:
测试文件以test_开头(以_test结尾也可以)
测试类以Test开头,并且不能带有 init 方法
测试函数以test_开头
断言使用基本的assert即可
举例:
class TestClass:
def test_one(self):
x = "this"
assert ‘h’ in x
def test_two(self):
x = "hello"
assert hasattr(x,’check’)
3、 pytest测试框架:https://www.jianshu.com/p/932a4d9f78f8
4、 在pycharm中选择terminal控制台执行命令:pytest -s -m 'normal'
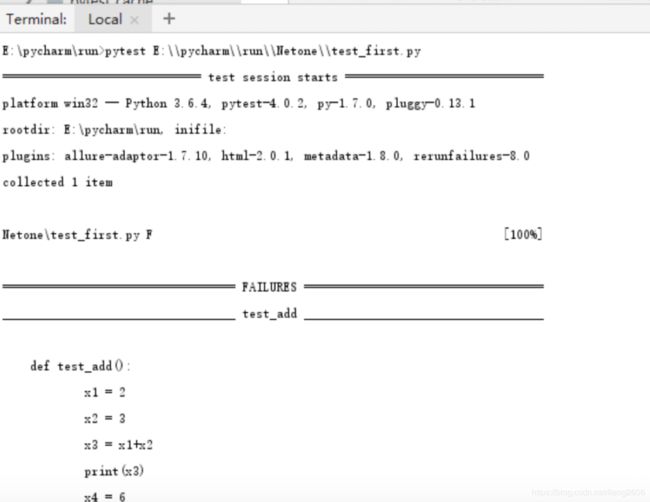
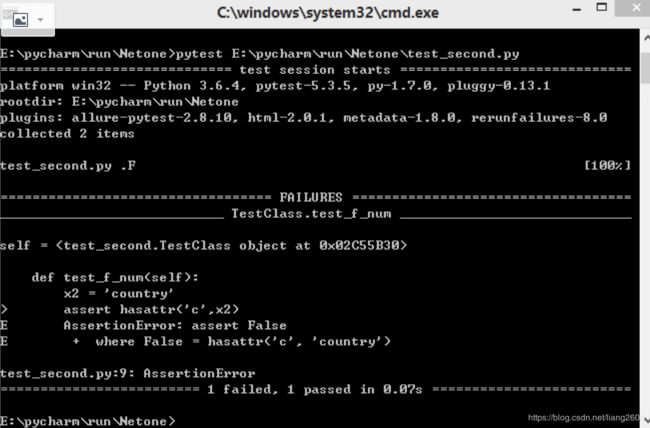
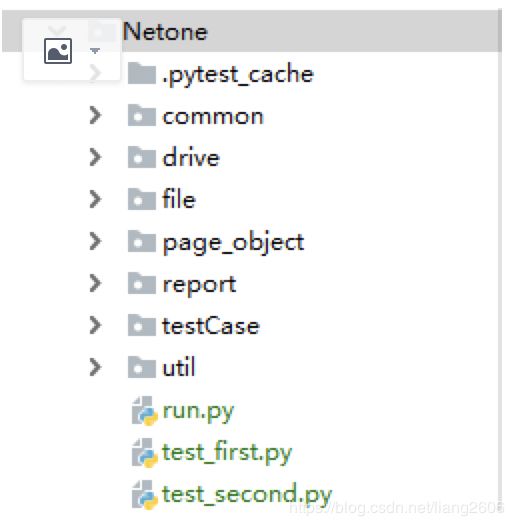
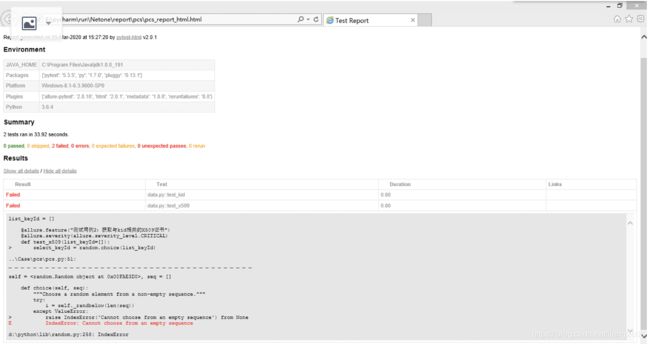
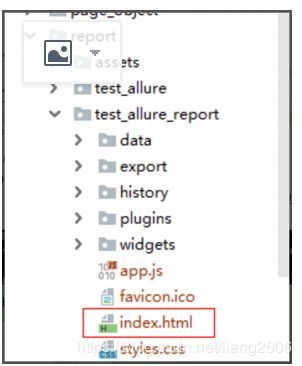
报错:pluggy.manager.PluginValidationError: unknown hook 'pytest_namespace' in plugin nvs\\pytest\\lib\\site-packages\\allure\\pytest_plugin.py'> 解决策略:https://www.cnblogs.com/lsdb/p/10430031.html 5、 如何执行pytest: (1) 在pycharm中:点击terminal,然后输入pytest 测试用例.py (注意:测试用例的文件名一定要带:test_*.py或者*_test.py) (2) 或者在dos命令行,cd到pytest安装目录,执行:pytest E:\pycharm\run\Netone\test_first.py 结果描述: test_second.py .F 表示:这个文件中一个方法成功(.),一个方法执行失败(F) (E)表示报错error 备注:上述方法是对于一个py类文件中的两个方法的测试,也可以对一个工程下的所有类进行测试,如: 一个Netone工程下,有两个py类文件,执行:pytest E:\\pycharm\\run\\Netone,根据pytest执行规则,会默认搜寻所有文件名为test_*.py或者*_test.py的文件。 6、 pytest执行规则https://blog.csdn.net/dawei_yang000000/article/details/93380552: pytest搜索测试文件和测试用例的过程称为测试搜索,只要遵循如下几条原则便能够被它搜索到: 测试文件应命名为test_(something).py或者(something)_test.py 测试函数、测试类方法应命名为test_(something) 测试类应命名为Test(something) 7、 各种断言的处理方式: https://blog.csdn.net/liuchunming033/article/details/46504187 8、如何生成测试用例报告: (1)pytest自带的插件 pycharm: https://blog.csdn.net/weixin_34362875/article/details/93794459 pytest.main(['-m smoke', '--result-log=report/test_first.log', '--junit-xml=report/test_first.xml', '--html=report/test_first.html']) 命令行: https://www.jianshu.com/p/8fa34a3c82bd 在dos命令行: E:\pycharm\run\Netone\Data>pytest data.py --html=E:\pycharm\run\Netone\report\pc s\pcs_report_html.html (2) allure a、安装步骤参考:http://www.51ste.com/share/det-862.html b、在pycharm中打开terminal,执行:pytest E:\\pycharm\\run\\Netone\\test_second.py --alluredir E:\pycharm\run\Netone\report\test_allure c、执行完毕后,会自动在路径下E:\pycharm\run\Netone\report\test_allure生成一个文件夹test_allure,文件夹中会有两个json文件(因为我的test_second.py中定义了两个方法且相互不调用, 因此测试test_second.py,就会生成两个json),这个json文件只是测试的结果而不是生成的报告。 d、dos命令行:cd到allure的安装目录bin目录 执行: allure generate E:\pycharm\run\Netone\report\test_allure -o E:\pycharm\run\Netone\report\test_allure_report –clean 将test_allure文件夹中的json文件转成test_allure_report中可以用浏览器打开的html文件 e、在pycharm中打开html:右击 ---- open in Brower即可。 或者:cmd中,cd到工作目录:执行:allure open -h 127.0.0.1 -p 8083 E:\pycharm\run\Netone\report\pcs\pcs_html_report 9、 执行报错:AttributeError: module 'allure' has no attribute 'severity_level' 解决策略: pip uninstall pytest-allure-adaptor pip install allure-pytest 10、pytest的8个强大的插件: https://www.sohu.com/a/239476958_100159565 11、如何获取到定位元素中的text文本内容: 直接通过:reponse = driver.find_elements_by_xpath(' //*[@id="iform"]/table/tbody/tr[2]/td/table/tbody/tr[67]/td/table/tbody/tr[2]/td[2]/div/text()') 是无法获取到text内容的 需要:先要获取到上一层数据,然后text获取: 步骤1:reponse = driver.find_elements_by_xpath(' //*[@id="iform"]/table/tbody/tr[2]/td/table/tbody/tr[67]/td/table/tbody/tr[2]/td[2]/div‘) 步骤2:text_element = reponse.text 12、 判断定位到的元素是否存在,不可用if来判断, 需要封装一个函数,来判断元素是否存在 # def isElementPresent(self, by, value): # """ # 用来判断元素标签是否存在, # """ # try: # element = self.driver.find_element(by=by, value="xpath") # # 原文是except NoSuchElementException, e: # except NoSuchElementException as e: # # 发生了NoSuchElementException异常,说明页面中未找到该元素,返回False # return False # else: # # 没有发生异常,表示在页面中找到了该元素,返回True # return True 13、 py文件存在跨目录的import,执行pytest报错: 解决策略: https://blog.csdn.net/fanzirong_/article/details/92577830 在执行文件中添加: import sys, os sys.path.append((os.path.abspath(os.path.join(os.path.dirname("E:\\pycharm\\run\\Netone\\page_object\\pcs"), '../')))) sys.path.append((os.path.abspath(os.path.join(os.path.dirname("E:\\pycharm\\run\\Netone\\common"), '../')))) # 路径最好写成绝对路径 14、执行过程中,报错: from Netone.testCase.test_pcs.test_pcs import test_open_Netone E ModuleNotFoundError: No module named 'Netone' 解决策略:在执行文件最前端加入代码: import sys, os sys.path.append((os.path.abspath(os.path.join(os.path.dirname("E:\\pycharm\\run\\Netone\\page_object\\pcs"), '../')))) sys.path.append((os.path.abspath(os.path.join(os.path.dirname("E:\\pycharm\\run\\Netone\\common"), '../')))) sys.path.append((os.path.abspath(os.path.join(os.path.dirname("E:\\pycharm\\run\\Netone\\testCase\\test_pcs"), '../')))) 详解:https://www.cnblogs.com/liuyanhang/p/11018407.html 15、数据分离: 方法1:函数传参的方式![]() 转存失败重新上传取消
转存失败重新上传取消


