Flutter的国际化方式
目录
- 引言
- 系统控件的多语言配置
- yaml文件的配置
- app增加多语言配置
- 对app的改写
- 自定义文本的多语言配置
引言
国际化(Localization)对于app来说是一个非常常见的需求。得益于flutter的StatefulWidge,实时切换app的语言环境是非常简单的。
flutter的Localization包含两个部分,预设控件的Localization配置以及自定义文本的Localization配置。
系统控件的多语言配置
flutter自带很多预设的控件,这些控件使用到的文本是可以根据app设定的语言环境来展示相应的语言文本的。默认的情况下,这些控件使用的是英文文案,即使你的手机系统是中文环境,flutter的控件仍然展示的是英文文案。
举个例子,我们使用flutter的DatePicker来演示一下:
import 'package:flutter/material.dart';
import 'widget/DemoWidget.dart';

void main() => runApp(MyApp());

class MyApp extends StatelessWidget {

  @override
  Widget build(BuildContext context) {
    return MaterialApp(
      // ignore: non_constant_identifier_names
      title: "test",
      theme: ThemeData(
        // This is the theme of your application.
        //
        // Try running your application with "flutter run". You'll see the
        // application has a blue toolbar. Then, without quitting the app, try
        // changing the primarySwatch below to Colors.green and then invoke
        // "hot reload" (press "r" in the console where you ran "flutter run",
        // or simply save your changes to "hot reload" in a Flutter IDE).
        // Notice that the counter didn't reset back to zero; the application
        // is not restarted.
        primarySwatch: Colors.blue,
      ),
      home: DemoWidget(),
    );
  }
}
main.dart
import 'package:flutter/material.dart';

class DemoWidget extends StatelessWidget {
  @override
  Widget build(BuildContext context) {
    return new Scaffold(
      appBar: AppBar(
        title: new Text('Demo页面'),
      ),
      body: Center(
        child: Column(
          mainAxisAlignment: MainAxisAlignment.center,
          children: [
            Text(Localizations.localeOf(context).toString()),
            MaterialButton(
              child: Text('选择时间'),
              color: Colors.grey,
              onPressed: () {
                showDatePicker(
                    context: context,
                    initialDate: DateTime.now(),
                    firstDate: DateTime(2018),
                    lastDate: DateTime(2030));
              },
            ),
          ],
        ),
      ),
    );
  }
}
demoWidget.dart
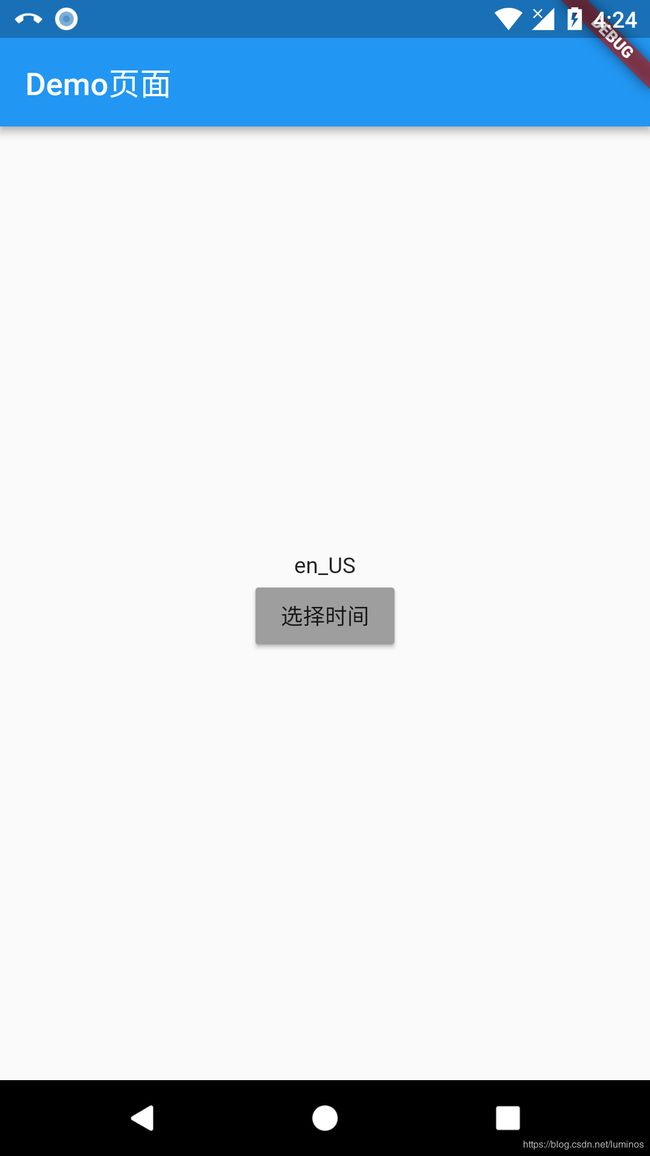
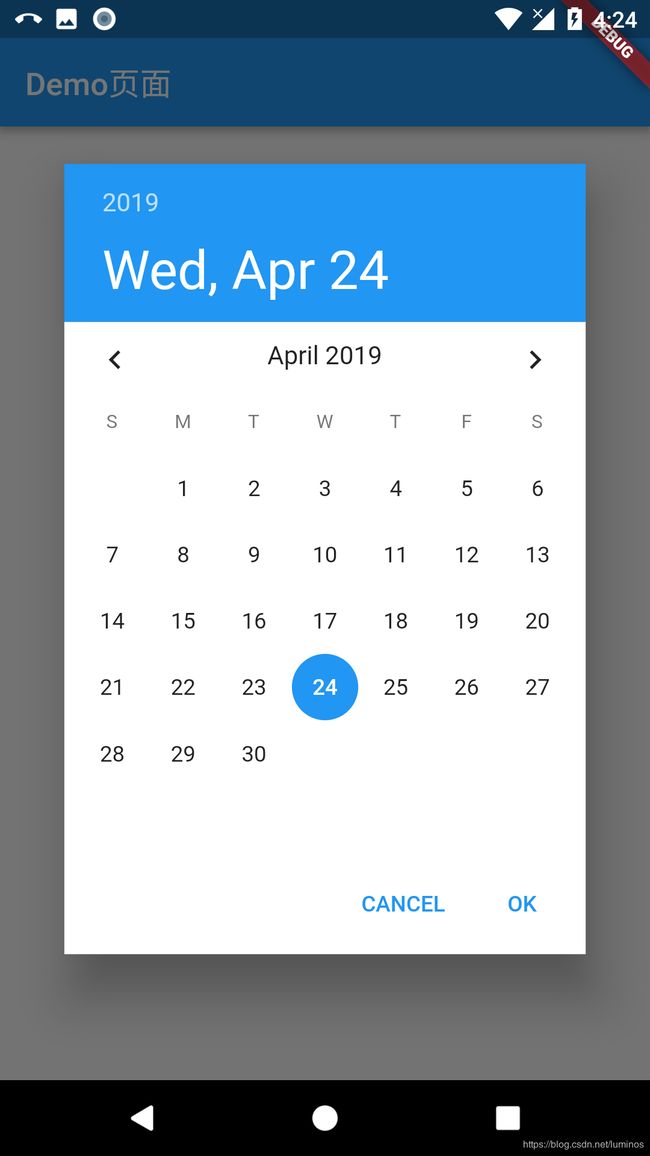
然后我们看一下运行结果:


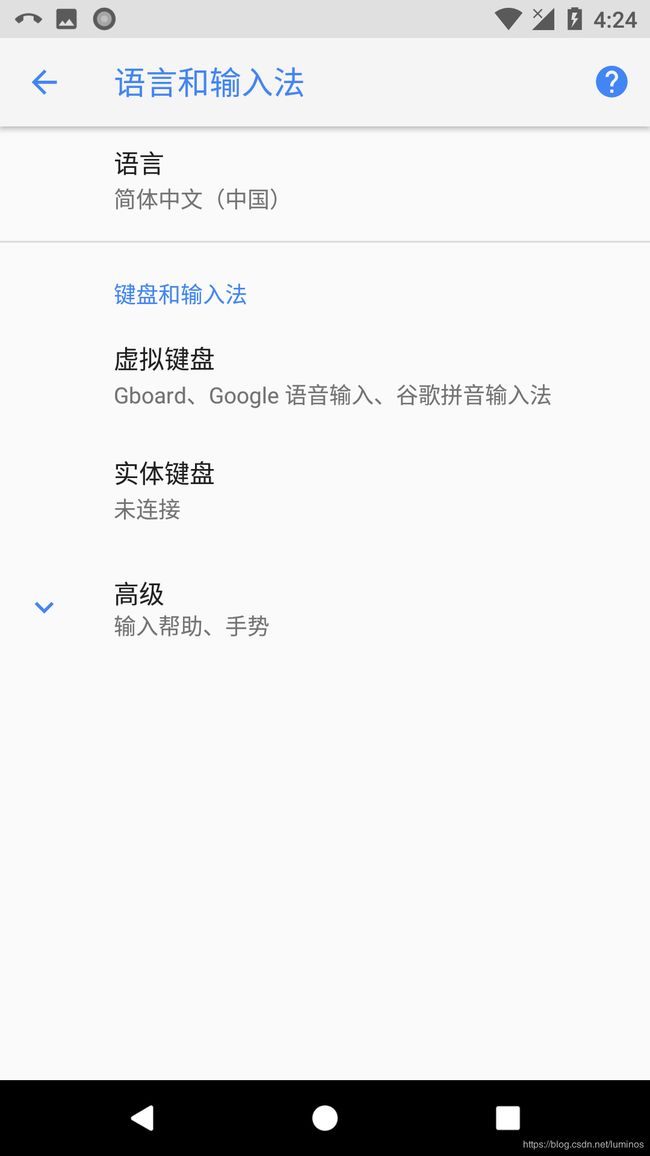
可以看见,即使系统的语言是中文的,由于没有在flutter app中配置多语言支持,预设控件使用的语言仍然默认为英文。
要使预设控件使用的语言与系统的语言保持一致,我们需要进行如下配置:
yaml文件的配置
首先我们需要在pubspec.yaml文件中的dependencies下,增加flutter_localizations的配置,修改之后在terminal执行一下flutter packages get,或者在android studio的yaml文件右上角直接点击Packages get按钮。
denpendencies:
	flutter:
		sdk: flutter
	# 以下是新增部分
	flutter_loclizations:
		sdk: flutter
app增加多语言配置
在main.dart中增加import项
import 'package:flutter_localizations/flutter_localizations.dart';
并且为MaterialApp的构造函数增加localizationsDelegates和supportedLocales参数的赋值。
import 'package:flutter/material.dart';
import 'package:flutter_localizations/flutter_localizations.dart';

import 'widget/demoWidget.dart';

void main() => runApp(MyApp());

class MyApp extends StatelessWidget {
  @override
  Widget build(BuildContext context) {
    return MaterialApp(
      // ignore: non_constant_identifier_names
      title: "test",
      theme: ThemeData(
        // This is the theme of your application.
        //
        // Try running your application with "flutter run". You'll see the
        // application has a blue toolbar. Then, without quitting the app, try
        // changing the primarySwatch below to Colors.green and then invoke
        // "hot reload" (press "r" in the console where you ran "flutter run",
        // or simply save your changes to "hot reload" in a Flutter IDE).
        // Notice that the counter didn't reset back to zero; the application
        // is not restarted.
        primarySwatch: Colors.blue,
      ),
      home: DemoWidget(),
      /*=====以下为新增部分========*/
      localizationsDelegates: [
        GlobalMaterialLocalizations.delegate,
        GlobalWidgetsLocalizations.delegate,
      ],
      supportedLocales: [Locale('zh', 'CH'), Locale('en', 'US')],
      /*=====以上为新增部分========*/
    );
  }
}
supportedLocales这个参数很好理解,我们看一下localizationsDelegates这个参数的注释:
  /// Internationalized apps that require translations for one of the locales
  /// listed in [GlobalMaterialLocalizations] should specify this paramter
  /// and list the [supportedLocales] that the application can handle.
意思是说国际化的(在GlobalMaterialLocalization支持的语言范围内的)的app需要指定这个参数,并且需要同时指定supportedLocales这个参数。
跟踪localizationsDelegates这个参数,发现它一路传递到了Localizations这个类里。
Localizations是一个StatefulWidget,我们可以在_LocalizationsState的void load(Locale locale)方法中看到这个类对Delegates的初始化和使用。
  @override
  void initState() {
    super.initState();
    load(widget.locale);
  }

  @override
  void didUpdateWidget(Localizations old) {
    super.didUpdateWidget(old);
    if (widget.locale != old.locale
        || (widget.delegates == null && old.delegates != null)
        || (widget.delegates != null && old.delegates == null)
        || (widget.delegates != null && _anyDelegatesShouldReload(old)))
      load(widget.locale);
  }

  void load(Locale locale) {
    final Iterable<LocalizationsDelegate<dynamic>> delegates = widget.delegates;
    if (delegates == null || delegates.isEmpty) {
      _locale = locale;
      return;
    }

    Map<Type, dynamic> typeToResources;
    final Future<Map<Type, dynamic>> typeToResourcesFuture = _loadAll(locale, delegates)
      .then<Map<Type, dynamic>>((Map<Type, dynamic> value) {
        return typeToResources = value;
      });

    if (typeToResources != null) {
      // All of the delegates' resources loaded synchronously.
      _typeToResources = typeToResources;
      _locale = locale;
    } else {
      // - Don't rebuild the dependent widgets until the resources for the new locale
      // have finished loading. Until then the old locale will continue to be used.
      // - If we're running at app startup time then defer reporting the first
      // "useful" frame until after the async load has completed.
      WidgetsBinding.instance.deferFirstFrameReport();
      typeToResourcesFuture.then<void>((Map<Type, dynamic> value) {
        WidgetsBinding.instance.allowFirstFrameReport();
        if (!mounted)
          return;
        setState(() {
          _typeToResources = value;
          _locale = locale;
        });
      });
    }
  }
结合我们对StatefulWidget生命周期的理解,至此我们已经知道flutter是如何去初始化Delegates和更新他的locale的了。具体如何去绑定资源的我们不再深入去看。
GlobalMaterialLocalizations这个类点进去看,可以知道它是提供了一些预设控件的多语言文案,而GlobalWidgetsLocalizations点进去看,则可以看到它是对文本排列是从左到右还是从右到左作了支持。由于文本排列从右到左的语言只有阿拉伯语、希伯来语、波斯语、普图什语和乌尔都语,如果你的app不支持这些语言的话,这个参数可以不添加也没关系。
对app的改写
由于我们需要对app的语言环境进行切换,也就意味着app是要保存当前选择的语言状态的,所以我们的app应该使用StatefulWidget来保存以及更新它的状态。
在main.dart中找到你的app类,将你的app类改为继承自StatefulWidget,并且创建它的State类:
import 'package:flutter/material.dart';
import 'package:flutter_localizations/flutter_localizations.dart';

import 'widget/demoWidget.dart';

void main() => runApp(MyApp());

class MyApp extends StatefulWidget {
  @override
  State<StatefulWidget> createState() {
    return AppState();
  }
}

class AppState extends State<MyApp> {
  Locale _locale;
  List<Locale> supportedLocales = [Locale('zh', 'CH'), Locale('en', 'US')];

  void changeLocale(Locale locale) {
    if (supportedLocales
        .map((locale) {
          return locale.languageCode;
        })
        .toSet()
        .contains(locale?.languageCode)) {
      setState(() {
        _locale = locale;
      });
    }
  }

  @override
  Widget build(BuildContext context) {
    return MaterialApp(
      // ignore: non_constant_identifier_names
      title: "myApp",
      locale: _locale,
      theme: ThemeData(
        // This is the theme of your application.
        //
        // Try running your application with "flutter run". You'll see the
        // application has a blue toolbar. Then, without quitting the app, try
        // changing the primarySwatch below to Colors.green and then invoke
        // "hot reload" (press "r" in the console where you ran "flutter run",
        // or simply save your changes to "hot reload" in a Flutter IDE).
        // Notice that the counter didn't reset back to zero; the application
        // is not restarted.
        primarySwatch: Colors.blue,
      ),
      home: DemoWidget(),
      localizationsDelegates: [
        GlobalMaterialLocalizations.delegate,
        GlobalWidgetsLocalizations.delegate,
      ],
      supportedLocales: supportedLocales,
    );
  }
}
这样一来,每当我们调用app的changeLocale方法,更新MaterialApp的locale属性,app就会将其语言更新为新的语言并且更新整个widget树。
自定义文本的多语言配置
通过上面的步骤我们可以知道,每当我们通过setState方法改变MaterialApp的locale,会触发Widget的更新。因此我们可以写一个我们自己的LocalizationsDelegate,将其赋值到MaterialApp的localizationsDelegates参数中即可。下面我们来按照GlobalWidgetsLocalizations仿写一下。
class GlobalWidgetsLocalizations implements WidgetsLocalizations {
  /// Creates an object that provides localized resource values for the
  /// lowest levels of the Flutter framework.
  ///
  /// This method is typically used to create a [LocalizationsDelegate].
  /// The [WidgetsApp] does so by default.
  static Future<WidgetsLocalizations> load(Locale locale) {
    return SynchronousFuture<WidgetsLocalizations>(GlobalWidgetsLocalizations(locale));
  }
  ......
  static const LocalizationsDelegate<WidgetsLocalizations> delegate = _WidgetsLocalizationsDelegate();
}
class _WidgetsLocalizationsDelegate extends LocalizationsDelegate<WidgetsLocalizations> {
  const _WidgetsLocalizationsDelegate();

  @override
  bool isSupported(Locale locale) => true;

  @override
  Future<WidgetsLocalizations> load(Locale locale) => GlobalWidgetsLocalizations.load(locale);

  @override
  bool shouldReload(_WidgetsLocalizationsDelegate old) => false;

  @override
  String toString() => 'GlobalWidgetsLocalizations.delegate(all locales)';
}
参照GlobalWidgetsLocalizations,我们新建一个Translations.dart,在内声明Translations类和_TranslationsDelegate类,
import 'dart:async';

import 'package:flutter/foundation.dart';
import 'package:flutter/material.dart';
import 'package:flutter/widgets.dart';

class Translations {
  Locale _locale;
  // 多语言文本资源,为了演示上的方便,将文本资源放到这个map里。
  // 实际工程中可以将资源放到本地的文件中,通过rootBundle去加载。
  // 也可以将资源放到服务器上,通过网络请求加载。
  Map<String, Map<String, String>> _resourceMap = {
    'zh': {
      'btnTextZh': '中文文案',
      'pageTitle': '演示页面',
      'btnTextEn': '英文文案'},
    'en': {
      'btnTextZh': 'lang:zh',
      'pageTitle': 'demo page',
      'btnTextEn': 'lang:en'
    },
  };

  Translations(this._locale);

  String text(textKey) {
    return _resourceMap[_locale.languageCode][textKey];
  }

  static Translations of(BuildContext context) {
    return Localizations.of<Translations>(context, Translations);
  }

  // 加载资源的方式。
  // 可以看到这个方法返回的类型是一个Future
  // 因为我们可以将多语言文本资源放到服务端或者本地文件里,
  // 因此加载多文本资源可能是耗时的,所以这里返回的类型是Future
  // 这里为了演示上的方便,将文本资源直接硬编码到代码里了。
  static Future<Translations> load(Locale locale) async {
    return SynchronousFuture<Translations>(Translations(locale));
  }

  static const _TranslationDelegate delegate = _TranslationDelegate();
}

class _TranslationDelegate extends LocalizationsDelegate<Translations> {
  const _TranslationDelegate();

  @override
  bool isSupported(Locale locale) => ['en', 'zh'].contains(locale.languageCode);

  @override
  Future<Translations> load(Locale locale) => Translations.load(locale);

  @override
  bool shouldReload(LocalizationsDelegate<Translations> old) => false;
}
在使用的地方,我们可以通过Translations类的of方法获取Translations类的实例。为了方便我们修改AppState的Locale,我们在AppState中设置一个static的变量供我们使用。当然,这只是为了演示上的方便,实际工程中我们可以使用单例,或者使用flutter-redux来保存app的状态。
import 'package:flutter/material.dart';
import 'package:flutter_localizations/flutter_localizations.dart';

import 'localization/translations.dart';
import 'widget/demoWidget.dart';

void main() => runApp(MyApp());

class MyApp extends StatefulWidget {
  @override
  State<StatefulWidget> createState() {
    return AppState();
  }
}

class AppState extends State<MyApp> {
  // 供外部使用的_AppSetting实例,用于修改app的状态
  static _AppSetting setting = _AppSetting();

  @override
  void initState() {
    super.initState();
    setting.changeLocale = (Locale locale) {
      if (setting.supportedLocales
          .map((locale) {
            return locale.languageCode;
          })
          .toSet()
          .contains(locale?.languageCode)) {
        setState(() {
          setting._locale = locale;
        });
      }
    };
  }

  @override
  Widget build(BuildContext context) {
    return MaterialApp(
      // ignore: non_constant_identifier_names
      title: "myApp",
      locale: setting._locale,
      theme: ThemeData(
        // This is the theme of your application.
        //
        // Try running your application with "flutter run". You'll see the
        // application has a blue toolbar. Then, without quitting the app, try
        // changing the primarySwatch below to Colors.green and then invoke
        // "hot reload" (press "r" in the console where you ran "flutter run",
        // or simply save your changes to "hot reload" in a Flutter IDE).
        // Notice that the counter didn't reset back to zero; the application
        // is not restarted.
        primarySwatch: Colors.blue,
      ),
      home: DemoWidget(),
      localizationsDelegates: [
        // 不要忘了将Translates.delegate添加到localizationsDelegates的列表中
        Translations.delegate,
        GlobalMaterialLocalizations.delegate,
        GlobalWidgetsLocalizations.delegate,
      ],
      supportedLocales: setting._supportedLocales,
    );
  }
}

class _AppSetting {
  _AppSetting();

  Null Function(Locale locale) changeLocale;
  Locale _locale;
  List<Locale> _supportedLocales = [Locale('zh', 'CH'), Locale('en', 'US')];
}
此外我们再新建一个演示页面来演示app内的语言环境切换:
import 'package:demoApp/localization/translations.dart';
import 'package:demoApp/main.dart';
import 'package:flutter/material.dart';

class DemoWidget extends StatelessWidget {
  @override
  Widget build(BuildContext context) {
    return new Scaffold(
      appBar: AppBar(
        title: Text(Translations.of(context).text("pageTitle")),
      ),
      body: Center(
        child: Column(
          mainAxisAlignment: MainAxisAlignment.center,
          children: [
            MaterialButton(
                child: Text(Translations.of(context).text('btnTextZh')),
                color: Colors.grey,
                onPressed: () {
                  AppState.setting.changeLocale(Locale('zh'));
                }),
            MaterialButton(
                child: Text(Translations.of(context).text('btnTextEn')),
                color: Colors.grey,
                onPressed: () {
                  AppState.setting.changeLocale(Locale('en'));
                })
          ],
        ),
      ),
    );
  }
}

