springboot搭建集成mongoDB——MongoRepository简单查询,MongoTemplate复杂查询,和分布式搭建
我的开发环境是eclipse,首先安装好springboot的插件,我参考的是这篇博客Eclipse安装STS(Spring Tool Suite (STS) for Eclipse)插件,插件的下载地址是http://spring.io/tools3/sts/all。
其次将mongodb安装好,解压版下载地址是http://dl.mongodb.org/dl/win32/x86_64
安装我参考的是这两篇博客
windows安装MongoDB3.4.7解压版本和mongoDB(1):windows下安装mongoDB(解压缩版)
如果你想要有mongodb的可视化工具,可以从这个博客Navicat Premium 12破解方法知道。
开始正餐
项目结构是
pom.xml
	4.0.0


	com.forezp
	springboot-mongodb
	0.0.1-SNAPSHOT
	jar

	springboot-mongodb
	Demo project for Spring Boot


		org.springframework.boot
		spring-boot-starter-parent
		1.5.2.RELEASE


		UTF-8
		UTF-8
		1.8


			org.springframework.boot
			spring-boot-starter-web


			org.springframework.boot
			spring-boot-starter-data-mongodb


			org.springframework.boot
			spring-boot-starter-test
			test


				org.springframework.boot
				spring-boot-maven-plugin
CustomerRepository.java
public interface CustomerRepository extends MongoRepository {


}
Customer.java
package com.forezp.entity;

import org.springframework.data.annotation.Id;

/**
 * @author ligz
 */
public class Customer {

    @Id
    public String id;

    public String firstName;
    public String lastName;

    public Customer() {}

    public Customer(String firstName, String lastName) {
        this.firstName = firstName;
        this.lastName = lastName;
    }

    @Override
    public String toString() {
        return String.format(
                "Customer[id=%s, firstName='%s', lastName='%s']",
                id, firstName, lastName);
    }

}
CustomerController.java
package com.forezp.web;

import java.util.List;

import org.springframework.beans.factory.annotation.Autowired;
import org.springframework.web.bind.annotation.RequestBody;
import org.springframework.web.bind.annotation.RequestMapping;
import org.springframework.web.bind.annotation.RequestMethod;
import org.springframework.web.bind.annotation.RestController;

import com.forezp.dao.CustomerRepository;
import com.forezp.entity.Customer;

/**
 * @author ligz
 */
@RestController
@RequestMapping("/customer")
public class CustomerController {
	@Autowired
	private CustomerRepository repository;

	@RequestMapping(value = "/create", method = RequestMethod.POST)
    public boolean CreateCustomer(@RequestBody Customer customer) {
        repository.save(customer);
        return true;
    }

	@RequestMapping(value = "/list", method = RequestMethod.GET)
	public List List() {
		List list = repository.findAll();
		return list;
	}
}
application.properties
spring.data.mongodb.uri=mongodb://localhost:27017/mongoDB启动主程序
package com.forezp;

import org.springframework.boot.SpringApplication;
import org.springframework.boot.autoconfigure.SpringBootApplication;

@SpringBootApplication
public class SpringbootMongodbApplication{


	public static void main(String[] args) {
		SpringApplication.run(SpringbootMongodbApplication.class, args);
	}


}
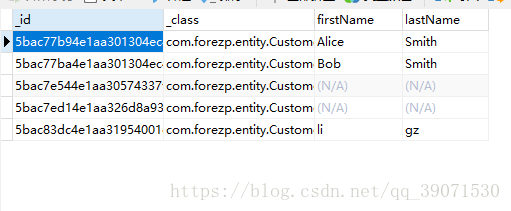
用postman测试save方法可以插入数据
直接访问http://localhost:8080/customer/list可以看到数据库中的数据
如果想要简单的查询,在CustomerRepository中直接添加方法
public List findByid(String id); 可以直接通过id查询,具体springboot是如何实现的,后面要去好好的看一下。
更复杂的查询通过注解MongoTemplate实现
@Autowired
private MongoTemplate mongoTemplate;
这里的实例是实际项目中的一个例子,mongodb时间段查询。
/**
	 * 查询某一俩车一段时间内的基础信息
	 * @param terminalphonenumber
	 * @param startTime
	 * @param endTime
	 * @return
	 */
	@RequestMapping(value = "/gListByTime", method = RequestMethod.POST)
	@ResponseBody
	public List gListByTime(String terminalphonenumber, String startTime, String endTime){
		Query query = new Query();
		query.addCriteria(Criteria.where("terminalphonenumber").is(terminalphonenumber));
		query.addCriteria(Criteria.where("timestamp").lt(endTime).gt(startTime));
		List glist = mongoTemplate.find(query, GeneralInfo.class);
		return glist;
	}
如果想要集成分布式的mongodb,首先要搭建分布式的集群,推荐使用Linux搭建。
可以参考我的另外一篇搭建mongodb分片shard集群
搭建成功后使用下面的
spring.data.mongodb.uri=mongodb://172.16.2.245:20000,172.16.2.161:20000,172.16.7.52:20000/allinfo
根据自己的ip和端口还有数据库名称修改即可成功连接和使用
亲测有效


