【Nachos】山东大学操作系统实验六 系统调用
完整源码见本人博客下载资源
文章目录
- 一、完成情况一览
- 二、Nachos用户进程和内存管理机制解读
- 1、用户进程相关
- 2、内存管理机制
- 三、多道程序和Exec()实现步骤
- 1、添加AddrSpace::Print()函数
- 2、用BitMap管理主存
- 3、初始化用户空间AddrSpace::AddrSpace(OpenFile *executable)函数的修改
- 4、完成Exec()系统调用
- 四、结果展示
一、完成情况一览
- 完成class AddrSpace中的print函数
- 扩展现有的class AddrSpace的实现,使得Nachos可以实现多用户程序
- 实现Nachos 系统调用:Exec()
- 熟悉了解了Nachos运行用户进程,内存管理机制
二、Nachos用户进程和内存管理机制解读
1、用户进程相关
- 通过StartProcess函数(progtest.cc),内核线程转化成用户进程,线程控制块拥有了addr的信息,成为描述用户进程的进程控制块,最关键的信息就是AddrSpace对象,它存了属于该进程的页表TranslationEntry *pageTable
- 关于用户进程的执行,由machine类负责,machine模拟了硬件部分,有cpu(靠mipssim.cc中OneInstruction函数的一长串switch语句解释命令),用户寄存器组(数组),主存(char数组)。machine类还实现了一套关键函数,最重要的是Run(运行进程,被StartProcess函数首次调用),和OneInstruction(执行一条指令)。值得一提的是,每OneInstruction一次,就会调一次OneTicks函数,推动时钟前进,此时,用户态时钟才是准确的。
- 操作系统是靠中断驱动的,靠系统调用服务用户进程的。Nachos也不例外。machine.h中定义了所有异常类型,syscall.h中定义了所有系统调用接口。machine类里有void RaiseException(ExceptionType which, int badVAddr);函数,抛出异常后交由exception.cc中的void ExceptionHandler(ExceptionType which);处理,在这个异常处理函数中,根据异常种类which,调用interrupt类中的处理函数完成中断或系统调用的处理。题目中要求的Exec()系统调用也是这个流程。这中间需要注意,参数,返回值等是存在预先设定好的某寄存器中的。
2、内存管理机制
-
Nachos是采用页式内存分配方式管理用户内存空间的,最主要的两部分,一是AddrSpace类中存了属于该进程的页表TranslationEntry pageTable,并完成了页表初始化,内存空间分配;二是machine类中,ExceptionType Translate(int virtAddr, int physAddr, int size,bool writing);函数模拟了mmu的工作,每次读写内存时,通过页表找到物理地址。
-
原始的Nachos,物理地址等于虚拟地址,内存只能为一个用户进程服务,必须将用户进程所需空间全部分配内存。
三、多道程序和Exec()实现步骤
1、添加AddrSpace::Print()函数
在nachos/userprog/addrspace.cc文件末尾添加如下代码
void
AddrSpace::Print()
{
	printf("spaceID: %d\n",spaceID);
	printf("page table dump: %d pages in total\n", numPages);
	printf("============================================\n");
	printf("\tVirtPage, \tPhysPage,\tvalid,\tdirty,\tuse\n");
	for (int i=0; i < numPages; i++) {
	printf("\t%d,\t%d,\t%d,\t%d,\t%d\n", pageTable[i].virtualPage,pageTable[i].physicalPage,pageTable[i].valid,pageTable[i].dirty,pageTable[i].use);
	}
	printf("============================================\n\n");
}
2、用BitMap管理主存
要实现多道程序,就需要有一个全局管理,来组织空闲主存,分配主存。之前在fileSystem中用过的BitMap很适合。
-
在system.cc中做适当声明和初始化。
其中bool ProgMap[NumPhysPages]数组,是为了分配给每个用户进程唯一标识的spacID(后面会提到)。
#ifdef USER_PROGRAM	// requires either FILESYS or FILESYS_STUB
Machine *machine;	// user program memory and registers
//**********************
BitMap *freeMM_map;
bool ProgMap[NumPhysPages];       //to set pid
#endif
#ifdef USER_PROGRAM
    machine = new Machine(debugUserProg);	// this must come first
//*******************************************************************************
    freeMM_map = new BitMap(NumPhysPages);

    bzero(ProgMap,NumPhysPages);    //0
#endif
3、初始化用户空间AddrSpace::AddrSpace(OpenFile *executable)函数的修改
-
给类AddrSpace增加int spaceID;属性
初始化时,分配SpacID,如下
AddrSpace::AddrSpace(OpenFile *executable)
{
    bool flag = false;
    for(int i = 0; i < NumPhysPages; i++)
    {
        if(!ProgMap[i]){
            ProgMap[i] = 1;
            flag = true;
            spaceID=i;
            break;
        }
    }
    ASSERT(flag);
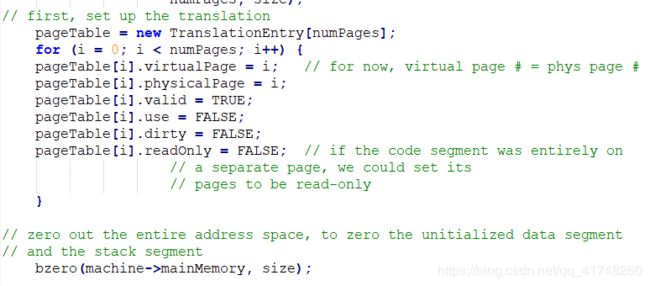
- 由BitMap分配物理块,修改如下:
// first, set up the translation
    pageTable = new TranslationEntry[numPages];
    for (i = 0; i < numPages; i++) {
	pageTable[i].virtualPage = i;	// for now, virtual page # = phys page #
//*************************************************
	pageTable[i].physicalPage = freeMM_map->Find();
	pageTable[i].valid = TRUE;
	pageTable[i].use = FALSE;
	pageTable[i].dirty = FALSE;
	pageTable[i].readOnly = FALSE;  // if the code segment was entirely on
					// a separate page, we could set its
					// pages to be read-only
    }

// zero out the entire address space, to zero the unitialized data segment
// and the stack segment
    //bzero(machine->mainMemory, size);
-
将code和initData载入内存的部分也要修改,(原先是直接用虚拟地址访问内存)
并在AddrSpace(OpenFile *executable)的末尾调用Print()
/ then, copy in the code and data segments into memory
     if (noffH.code.size > 0) {
        DEBUG('a', "Initializing code segment, at 0x%x, size %d\n",
            noffH.code.virtualAddr, noffH.code.size);

    //code start from this page
    int code_page = noffH.code.virtualAddr/PageSize;
    //calculate physical address using page and offset (0);
    int code_phy_addr = pageTable[code_page].physicalPage *PageSize;
    //read memory
        executable->ReadAt(&(machine->mainMemory[code_phy_addr]),
            noffH.code.size, noffH.code.inFileAddr);
    }
    if (noffH.initData.size > 0) {
        DEBUG('a', "Initializing data segment, at 0x%x, size %d\n",
            noffH.initData.virtualAddr, noffH.initData.size);
    //data start from this page
    int data_page = noffH.initData.virtualAddr/PageSize;
    //first data's offset of this page
    int data_offset = noffH.initData.virtualAddr%PageSize;
    //calculate physical address using page and offset ;
    int data_phy_addr = pageTable[data_page].physicalPage *PageSize + data_offset;
    //read memory
        executable->ReadAt(&(machine->mainMemory[data_phy_addr]),
            noffH.initData.size, noffH.initData.inFileAddr);
    }


    Print();
至此,nachos已经可以支持多道程序
4、完成Exec()系统调用
按照二、中的原理分析,Exec的系统调用接口已经定义好,我们主要工作是在exception.cc中完成对SC_exec的系统调用的处理工作。
- syscall.cc中对Exec用户接口的定义,系统调用类型以及返回值通过寄存器$2传递,参数是通过寄存器$4,$5,$6,$7传递,最多四个参数。
SpaceId Exec(char *name);
-
exception.cc修改
mipssim.cc的Machine::OneInstruction(Instruction *instr)对系统调用的软中断,处理后是return,所以系统调用处理完后需要完成“pc+1”的工作,否则用户程序无法继续执行。
AdvancePC()完成“PC+1”
ExceptionHandler(ExceptionType which)中增加SC_Exec的选项,并将中断处理交给interrupt类。
//**********************************pc+1
void AdvancePC() {

	machine->WriteRegister(PrevPCReg, machine->ReadRegister(PCReg));
	machine->WriteRegister(PCReg, machine->ReadRegister(NextPCReg));
	machine->WriteRegister(NextPCReg, machine->ReadRegister(NextPCReg) + 4);
}
//****************************************

void
ExceptionHandler(ExceptionType which)
{
    int type = machine->ReadRegister(2);

    if (which == SyscallException) {
	switch(type){
	    case SC_Halt:
		DEBUG('a', "Shutdown, initiated by user program.\n");
   		interrupt->Halt();
		return;
	    case SC_Exec:

		interrupt->Exec();
		AdvancePC();
		return;

	}
    } else {
	printf("Unexpected user mode exception %d %d\n", which, type);
	ASSERT(FALSE);
    }
}
-
Interrupt增加void Interrupt::Exec()函数
工作和StartProcess()一样,还需要将当前线程送入就绪队列,而且不能直接fork(StartProcess,1),因为Exec需要返回SpaceID,所以new AddrSpace的工作必须在Exec()中完成,如果用了fork,StartProcess()中会再new一次,这样会有两个SpacID,不唯一,所以不行。
void
Interrupt::Exec()
{
    printf("Execute system call of Exec()\n");
    //read argument
    char filename[50];
    int addr=machine->ReadRegister(4);
    int i=0;
    do{
       machine->ReadMem(addr+i,1,(int *)&filename[i]);//read filename from mainMemory
    }while(filename[i++]!='\0');

    printf("Exec(%s):\n",filename);

//yunxing
    OpenFile *executable = fileSystem->Open(filename);
    AddrSpace *space;

    if (executable == NULL) {
	printf("Unable to open file %s\n", filename);
	return;
    }
    space = new AddrSpace(executable);
    Thread *thread = new Thread("forked thread");
//把当前线程送入就绪队列
    IntStatus oldLevel = interrupt->SetLevel(IntOff);
    scheduler->ReadyToRun(currentThread);	// ReadyToRun assumes that interrupts
					// are disabled!
    (void) interrupt->SetLevel(oldLevel);

    currentThread=thread;

    thread->space = space;

    delete executable;			// close file

    space->InitRegisters();		// set the initial register values
    space->RestoreState();		// load page table register

    //return spaceID
    machine->WriteRegister(2,space->getSpaceID());

    machine->Run();			// jump to the user progam
    ASSERT(FALSE);			// machine->Run never returns;
					// the address space exits
					// by doing the syscall "exit"

}
四、结果展示
写一个exec.c用于测试
#include "syscall.h"

int
main()
{
int pid;
pid = Exec("../test/halt.noff");

Halt();
}


