Centos6.5 keepalive+nginx实现高可用负载均衡详解
1、准备环境
| IP | hostname | 主master | 副backup |
|---|---|---|---|
| 192.168.0.192 | node4.kg.cn | √ | |
| 192.168.0.193 | node5.kg.cn | √ |
主nginx负载均衡器:192.168.0.192
副nginx负载均衡器:192.168.0.193
主keepalived:192.168.0.192
副keepalived:192.168.0.193
设定虚拟IP:192.168.0.195
2、什么是keepalived
Keepalived软件起初是专为LVS负载均衡软件设计的,用来管理并监控LVS集群系统中各个服务节点的状态,后来又加入了可以实现高可用的VRRP (Virtual Router Redundancy Protocol ,虚拟路由器冗余协议)功能。因此,Keepalived除了能够管理LVS软件外,还可以作为其他服务(例如:Nginx、Haproxy、MySQL等)的高可用解决方案软件
3、如何实现故障转移
Keepalived高可用服务对之间的故障切换转移,是通过 VRRP 来实现的。在 Keepalived服务正常工作时,主 Master节点会不断地向备节点发送(多播的方式)心跳消息,用以告诉备Backup节点自己还活着,当主 Master节点发生故障时,就无法发送心跳消息,备节点也就因此无法继续检测到来自主 Master节点的心跳了,于是调用自身的接管程序,接管主Master节点的 IP资源及服务。而当主 Master节点恢复时,备Backup节点又会释放主节点故障时自身接管的IP资源及服务,恢复到原来的备用角色。
4、安装keepalived
分别在两台机器执行一下指令:
yum install -y keepalived
#设置开机启动
chkconfig keepalived on
#启动keepalive服务
/etc/init.d/keepalived start
4.1 keepalive设置
备份keepalived.conf文件
cp /etc/keepalived/keepalived.conf /etc/keepalived/keepalived.conf_bak
设定node4.kg.cn 为 MASTER
vim /etc/keepalived/keepalived.conf
! Configuration File for keepalived
global_defs {
   notification_email {
     [email protected]
     [email protected]
     [email protected]
   }
   notification_email_from [email protected]
   smtp_server 192.168.200.1
   smtp_connect_timeout 30
   router_id LVS_DEVEL
}

vrrp_script Monitor_Nginx {
	 script "/opt/module/monitor_nginx.sh"
	 interval 2
	 weight 2
}
vrrp_instance VI_1 {
	state MASTER    #(主机为MASTER,备用机为BACKUP)
	interface eth0  #(HA监测网络接口)

	virtual_router_id 61 #(主、备机的virtual_router_id必须相同)
	#mcast_src_ip 192.168.0.99 #(多播的源IP,设置为本机外网IP,与VIP同一网卡)此项可不设置
	priority 90 #(主、备机取不同的优先级,主机值较大,备份机值较小,值越大优先级越高)
	advert_int 1 #(VRRP Multicast广播周期秒数)
	authentication {
		auth_type PASS #(VRRP认证方式)
		auth_pass 1234 #(密码)
	}

	track_script {
		Monitor_Nginx #(调用nginx进程检测脚本)
	}
	virtual_ipaddress {
            192.168.0.195 #(VRRP HA虚拟地址)
	}
}
设定node5.kg.cn 为 BACKUP
BACKUP方面只需要修改state为BACKUP , priority比MASTER稍低即可
4.2 监控nginx进程的脚本
monitor_nginx.sh 内容如下:
vim /opt/module/monitor_nginx.sh
当检测到nginx进程不存在的时候,就干掉所有的keepalived,这时候,请求将会由keepalived的backup接管!
#!/bin/bash
if [ "$(ps -ef | grep "nginx: master process"| grep -v grep )" == "" ]
 then
 killall keepalived
fi
chmod +x /opt/module/monitor_nginx.sh
node4.kg.cn node5.kg.cn都重新启动keepalived:
service keepalived restart

![]()
这里请注意,当keepalived启动后,我们可以用命令:
ip add show eth0 来看我们的eth0网卡确实被添加了虚拟IP,如下图:


5、安装nginx
分别在两台机器安装nginx


参考安装链接 https://blog.csdn.net/u012637358/article/details/90173977
5.1 配置主副nginx负载均衡器
node4.kg.cn 以及 node5.kg.cn的关键nginx配置如下:
cd /usr/local/nginx/conf
vim nginx.conf

#################
....

upstream IP{
        least_conn;
        server node5.kg.cn:8087;
        server node4.kg.cn:8087;
 }

server
{
listen  80;
server_name 192.168.0.195; #keepalive设置的虚拟IP

location / {
            proxy_pass http://IP;
            proxy_set_header Host $host;
            proxy_set_header X-Real-IP $remote_addr;
            proxy_set_header X-Forwarded-For $proxy_add_x_forwarded_for;
            root   html;
            index  index.html index.htm;
        }

#access_log  /var/log/nginx/xxx.log;
}

##########################
重新启动nginx
sbin/nginx -s reload
※说明
node5.kg.cn:8087 、node4.kg.cn:8087 一份web工程分别部署到这两个服务器上面


分别对应不同的显示界面,便于区分nginx负载均衡是否生效。
6、验证nginx负载均衡是否生效
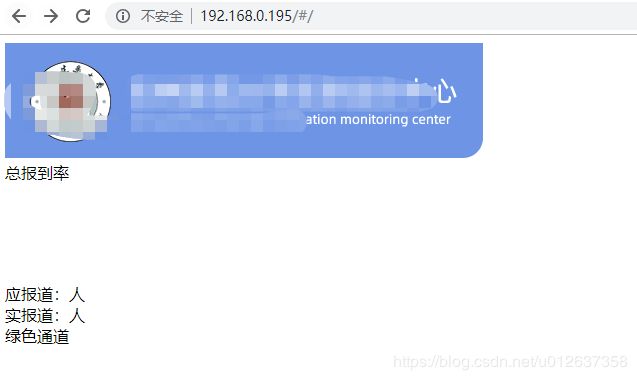
由nginx server_name 设置的为我们虚拟IP192.168.0.195
所有在浏览器情况http://192.168.0.195路径测试即可,实验效果如下所示:
7、验证nginx高可用是否生效
node4、node5 nginx都正常运行


收到停止node4服务器上nginx服务
[root@node4 sbin]# ./nginx -s stop
[root@node4 sbin]# ps -ef|grep nginx

node4服务器keepalive已dead
![]()
再次查看node5虚拟IP地址
ip add show eth0

发现node5已附有192.168.0.195地址。
继续请求http://192.168.0.195完全ok,到此恭喜您 nginx+keepalived配置完成~!
鸣谢参考
https://blog.csdn.net/l1028386804/article/details/52577875


