写一篇LNMP搭建个WordPress和知乎网,实实在在干货
前言:
之前咱的博客用分布式搭建过Discuz,https://mp.csdn.net/console/editor/html/105031305 是源码包安装的,今天使用rpm方式安装LNMP,然后网站源码包搭建个博客网站和知乎网站。
安装nginx:
所用到的环境:
一台Centos7.4做LNMP, ip:192.168.10.4
一台Centos7.4做测试机,ip:192.168.10.6
1>//使用官方提供的yum包安装
[root@lnmp~]# cat /etc/yum.repos.d/nginx.repo
[nginx-stable]
name=nginx stable repo
baseurl=http://nginx.org/packages/centos/7/$basearch/
gpgcheck=0
enabled=1
[root@localhost ~]#
2>//yum安装nginx
[root@lnmp~]# yum -y install nginx
[root@lnmp~]# systemctl start nginx
[root@lnmp~]# systemctl enable nginx
3>//测试nginx是否可以访问
[root@localhost ~]# curl http://192.168.10.4
<!DOCTYPE html>
<html>
<head>
<title>Welcome to nginx!</title>
<style>
    body {
        width: 35em;
        margin: 0 auto;
        font-family: Tahoma, Verdana, Arial, sans-serif;
    }
</style>
</head>
<body>
<h1>Welcome to nginx!</h1>
<p>If you see this page, the nginx web server is successfully installed and
working. Further configuration is required.</p>

<p>For online documentation and support please refer to
<a href="http://nginx.org/">nginx.org</a>.<br/>
Commercial support is available at
<a href="http://nginx.com/">nginx.com</a>.</p>

<p><em>Thank you for using nginx.</em></p>
</body>
</html>
安装mysql(mariadb):
1>//下载官⽅方扩展源, 扩展源集成mysql5.6、5.7、8.0。
[root@lnmp ~]# rpm -ivh http://repo.mysql.com/yum/mysql-5.6-community/el/7/x86_64/mysql-community-release-el7-5.noarch.rpm
[root@lnmp ~]# yum install mysql-community-server -y
[root@lnmp ~]# systemctl start mysqld
[root@lnmp ~]# systemctl enable mysqld
2>//监听3306端口,确认一下是否开启成功
[root@lnmp ~]# netstat -anpt | grep 3306
tcp6       0      0 :::3306                 :::*                    LISTEN      3634/mysqld
[root@localhost ~]#
3>//如果mysql登陆需要密码,请查看该文件,默认没有密码。
[root@lnmp~]# grep 'temporary password' /var/log/mysqld.log
4>//给MySQL设置密码
[root@lnmp ~]# mysql_secure_installation #根据提示修改密码为123.com
[root@lnmp ~]# mysql -uroot -p'123.com'  #登录mysql
使用第三方扩展epel源安装PHP7.2:
1>// 安装扩展源
[root@lnmp ~]# rpm -Uvh https://dl.fedoraproject.org/pub/epel/epel-release-latest-7.noarch.rpm
[root@lnmp ~]# rpm -Uvh https://mirror.webtatic.com/yum/el7/webtatic-release.rpm
2>// 安装 php7.2 版本
[root@lnmp ~]# yum -y install php72w php72w-cli php72w-common php72w-devel php72w-embedded php72w-gd php72w-mbstring php72w-pdo php72w-xml php72w-fpm php72w-mysqlnd php72w-opcache
3>//启动php
[root@lnmp ~]# systemctl start php-fpm

[root@lnmp ~]# systemctl enable php-fpm
4>//确认php-fpm是否开启
[root@lnmp ~]# netstat -anpt | grep php-fpm
tcp        0      0 127.0.0.1:9000          0.0.0.0:*               LISTEN      3948/php-fpm: maste
[root@localhost ~]#
ok,环境我们已经准备好,下一步,下载网站源码包,嘻嘻,我有准备啊,把提前准备的网站源码包拷贝到Centos里
知乎网源码包
链接:https://pan.baidu.com/s/1LhMOYO5Q3cubchZI9zY1Rw
提取码:8831
博客网站源码包
链接:https://pan.baidu.com/s/18FgcZX0TwUJUxanGTGAShQ
提取码:8zoh
2>//复制wordpress(博客的)安装包,到虚拟机/,解压并赋权
[root@lnmp ~]# unzip wordpress-4.9.4-zh_CN.zip
[root@lnmp ~]# chmod -R 777 /wordpress #为了方便起见,直接 777了,生产环境你在决定给什么权限
3>//创建虚拟主机配置文件
[root@lnmp ~]# vim /etc/nginx/conf.d/blog.conf
添加:
	server {
        listen 80; #监听端口
        server_name blog.benet.com; #网站域名
        root /wordpress;#网站根目录
        index index.php index.html; #支持的文本类型

        location ~ \.php$ {
                root /wordpress;
                fastcgi_pass 127.0.0.1:9000; #nginx收到的请求转发的地址,这里本机,如果分布式安装的,指定好ip
                fastcgi_index index.php; #默认索引页
                fastcgi_param SCRIPT_FILENAME $document_root$fastcgi_script_name;  #定义变量或参数,这里是脚本文件在哪里,其中,fastcgi_params就是个存放变量的目录,在/etc/nginx目录下。
                include fastcgi_params; #引用这个目录
        }
	}
	保存退出
	systemctl reload nginx
4>//创建blog数据库和管理用户
mysql> create database blog;
Query OK, 1 row affected (0.00 sec)

mysql> grant all on blog.* to lizijin@localhost identified by '123.com';
Query OK, 0 rows affected (0.00 sec)

mysql> Ctrl-C -- exit!
5>//客户端通过域名访问blog,安装并配置
[root@localhost ~]# cat /etc/hosts

127.0.0.1   localhost localhost.localdomain localhost4 localhost4.localdomain4
::1         localhost localhost.localdomain localhost6 localhost6.localdomain6
192.168.10.4 blog.benet.com
192.168.10.4 zh.benet.com
根据要求完成安装过程,安装完进入博客

应用2:搭建知乎wecenter,同上
1>//复制wecenter安装包,到虚拟机/zh目录下,赋权
[root@lnmp ~]# cd /zh
[root@lnmp ~]# unzip wecenter_3-3-4.zip
[root@lnmp ~]# chmod -R 777 /zh
2>//创建虚拟主机配置文件
[root@lnmp ~]# vim /etc/nginx/conf.d/zh.conf
	添加:
	server {
        listen 80;
        server_name zh.benet.com;
        root /zh;
        index index.php index.html;

        location ~ \.php$ {
                root /zh;
                fastcgi_pass 127.0.0.1:9000;
                fastcgi_index index.php;
                fastcgi_param SCRIPT_FILENAME $document_root$fastcgi_script_name;
                include fastcgi_params;
        }
	}
	保存退出
	systemctl reload nginx
3>//创建blog数据库和管理用户
mysql> create database zh;
Query OK, 1 row affected (0.00 sec)

mysql> grant all on zh.* to lhh@localhost identified by '123.com';
Query OK, 0 rows affected (0.00 sec)

mysql> Ctrl-C -- exit!
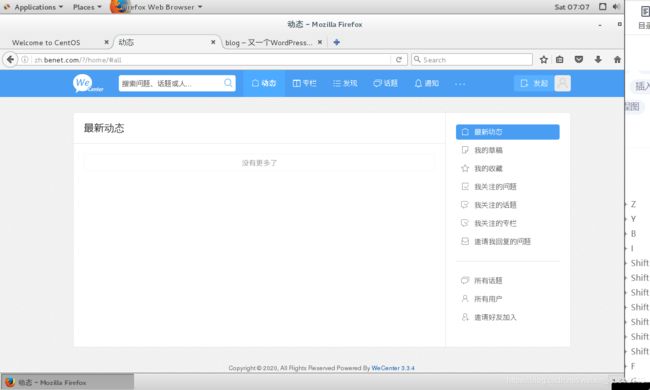
4>//客户端通过域名访问zh,安装并配置
hosts文件已经改过,安装过程填写好管理用户和密码,其他自己看着来
安装完效果
非常感谢你耐心的看完,
如果你有学到的话,
麻烦你点点赞呗!
谢谢。